How to you give a handmade card to a stamper extraordinaire?

Standard

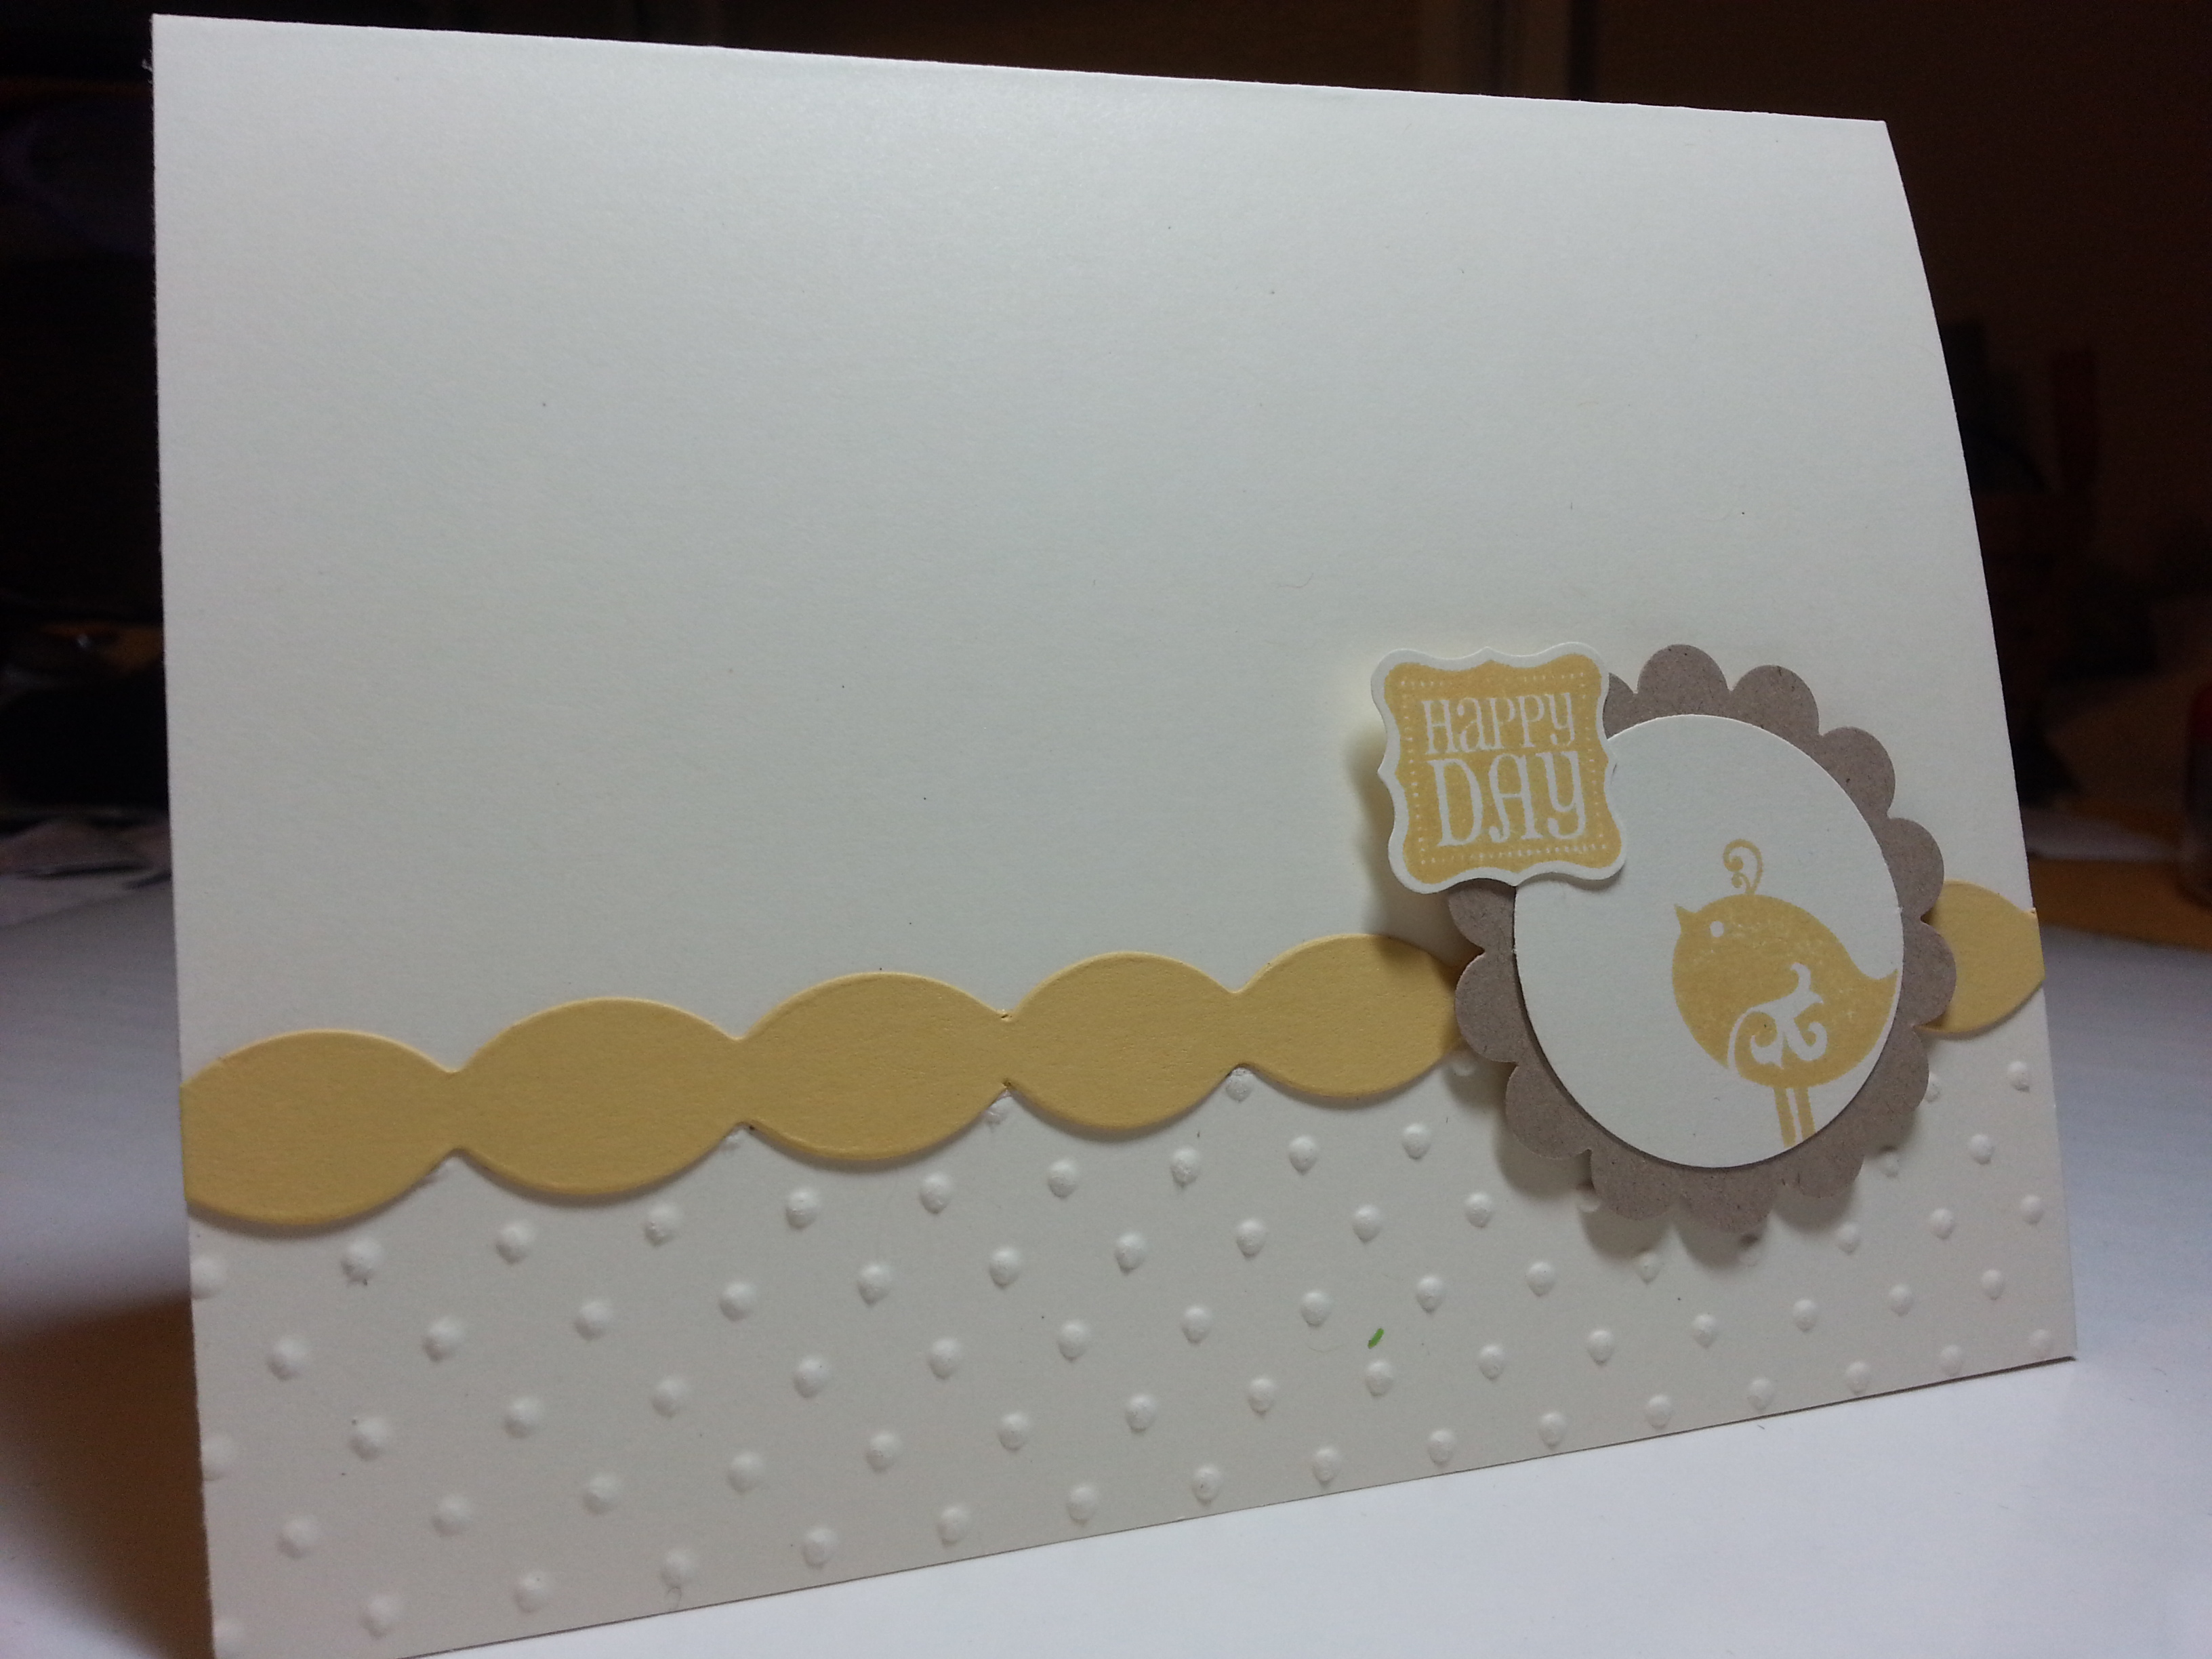
It’s a daunting task…. I tell ya… my friend, themauistamper, had a birthday. And so… I needed a card. But. Not just any card. Had to be a good one. Couldn’t just be out of the ol’ card box. And I’m not saying that she wouldn’t appreciate whatever I sent… she’s not like that. But as a friend and fellow stamper… I needed something nice.  Now… my sister asked me once… that why to my family I often send store bought cards (gasp….I know) but then she answered her own question… “oh, cause store bought cards tells me I really matter… cause you didn’t just get it out of your box… you had to put effort into getting it.”  Yeah. We go with that. And now I’m paranoid that everyone thinks that when I send them a card.  But oh well…And, for my family,  I’m usually looking for something really funny…which I’ve not mastered. Anyway. Store-bought wouldn’t work for mauistamper… CAUSE SHE IS A STAMPER. I really procrastinated on this cause I didn’t know what to do…. but, pinterest saved the day again… and this is what I came up with…

image

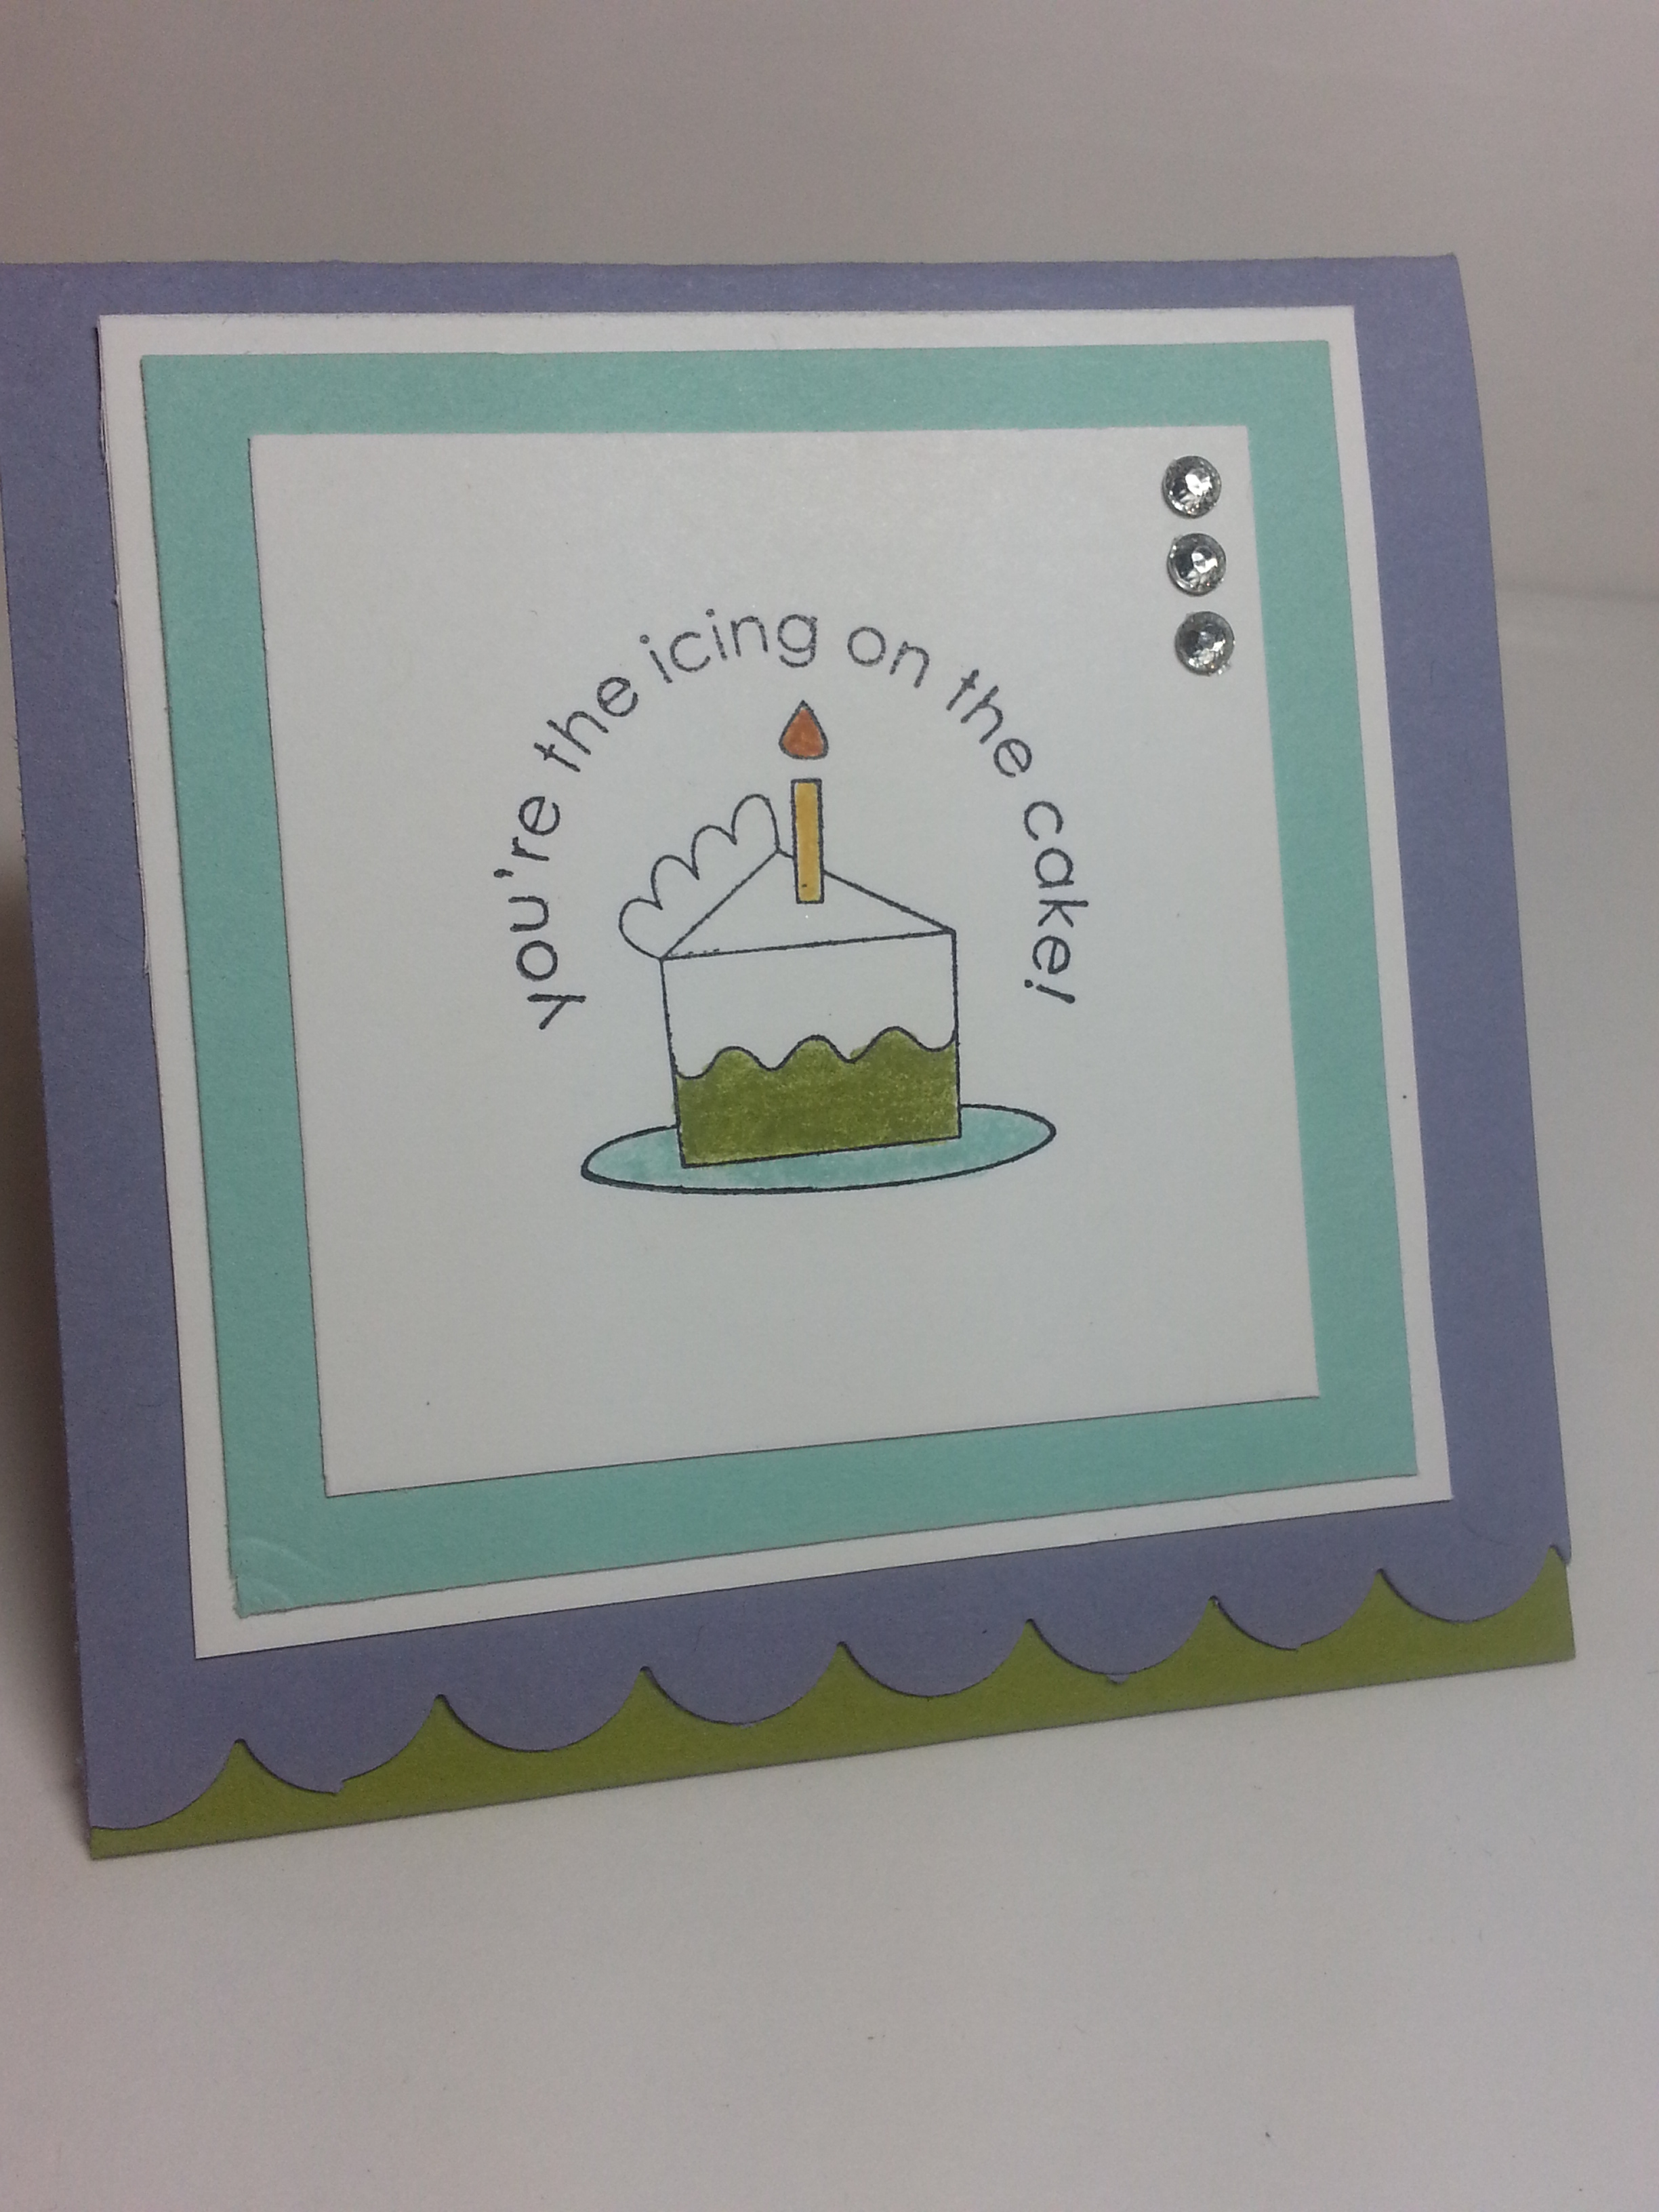
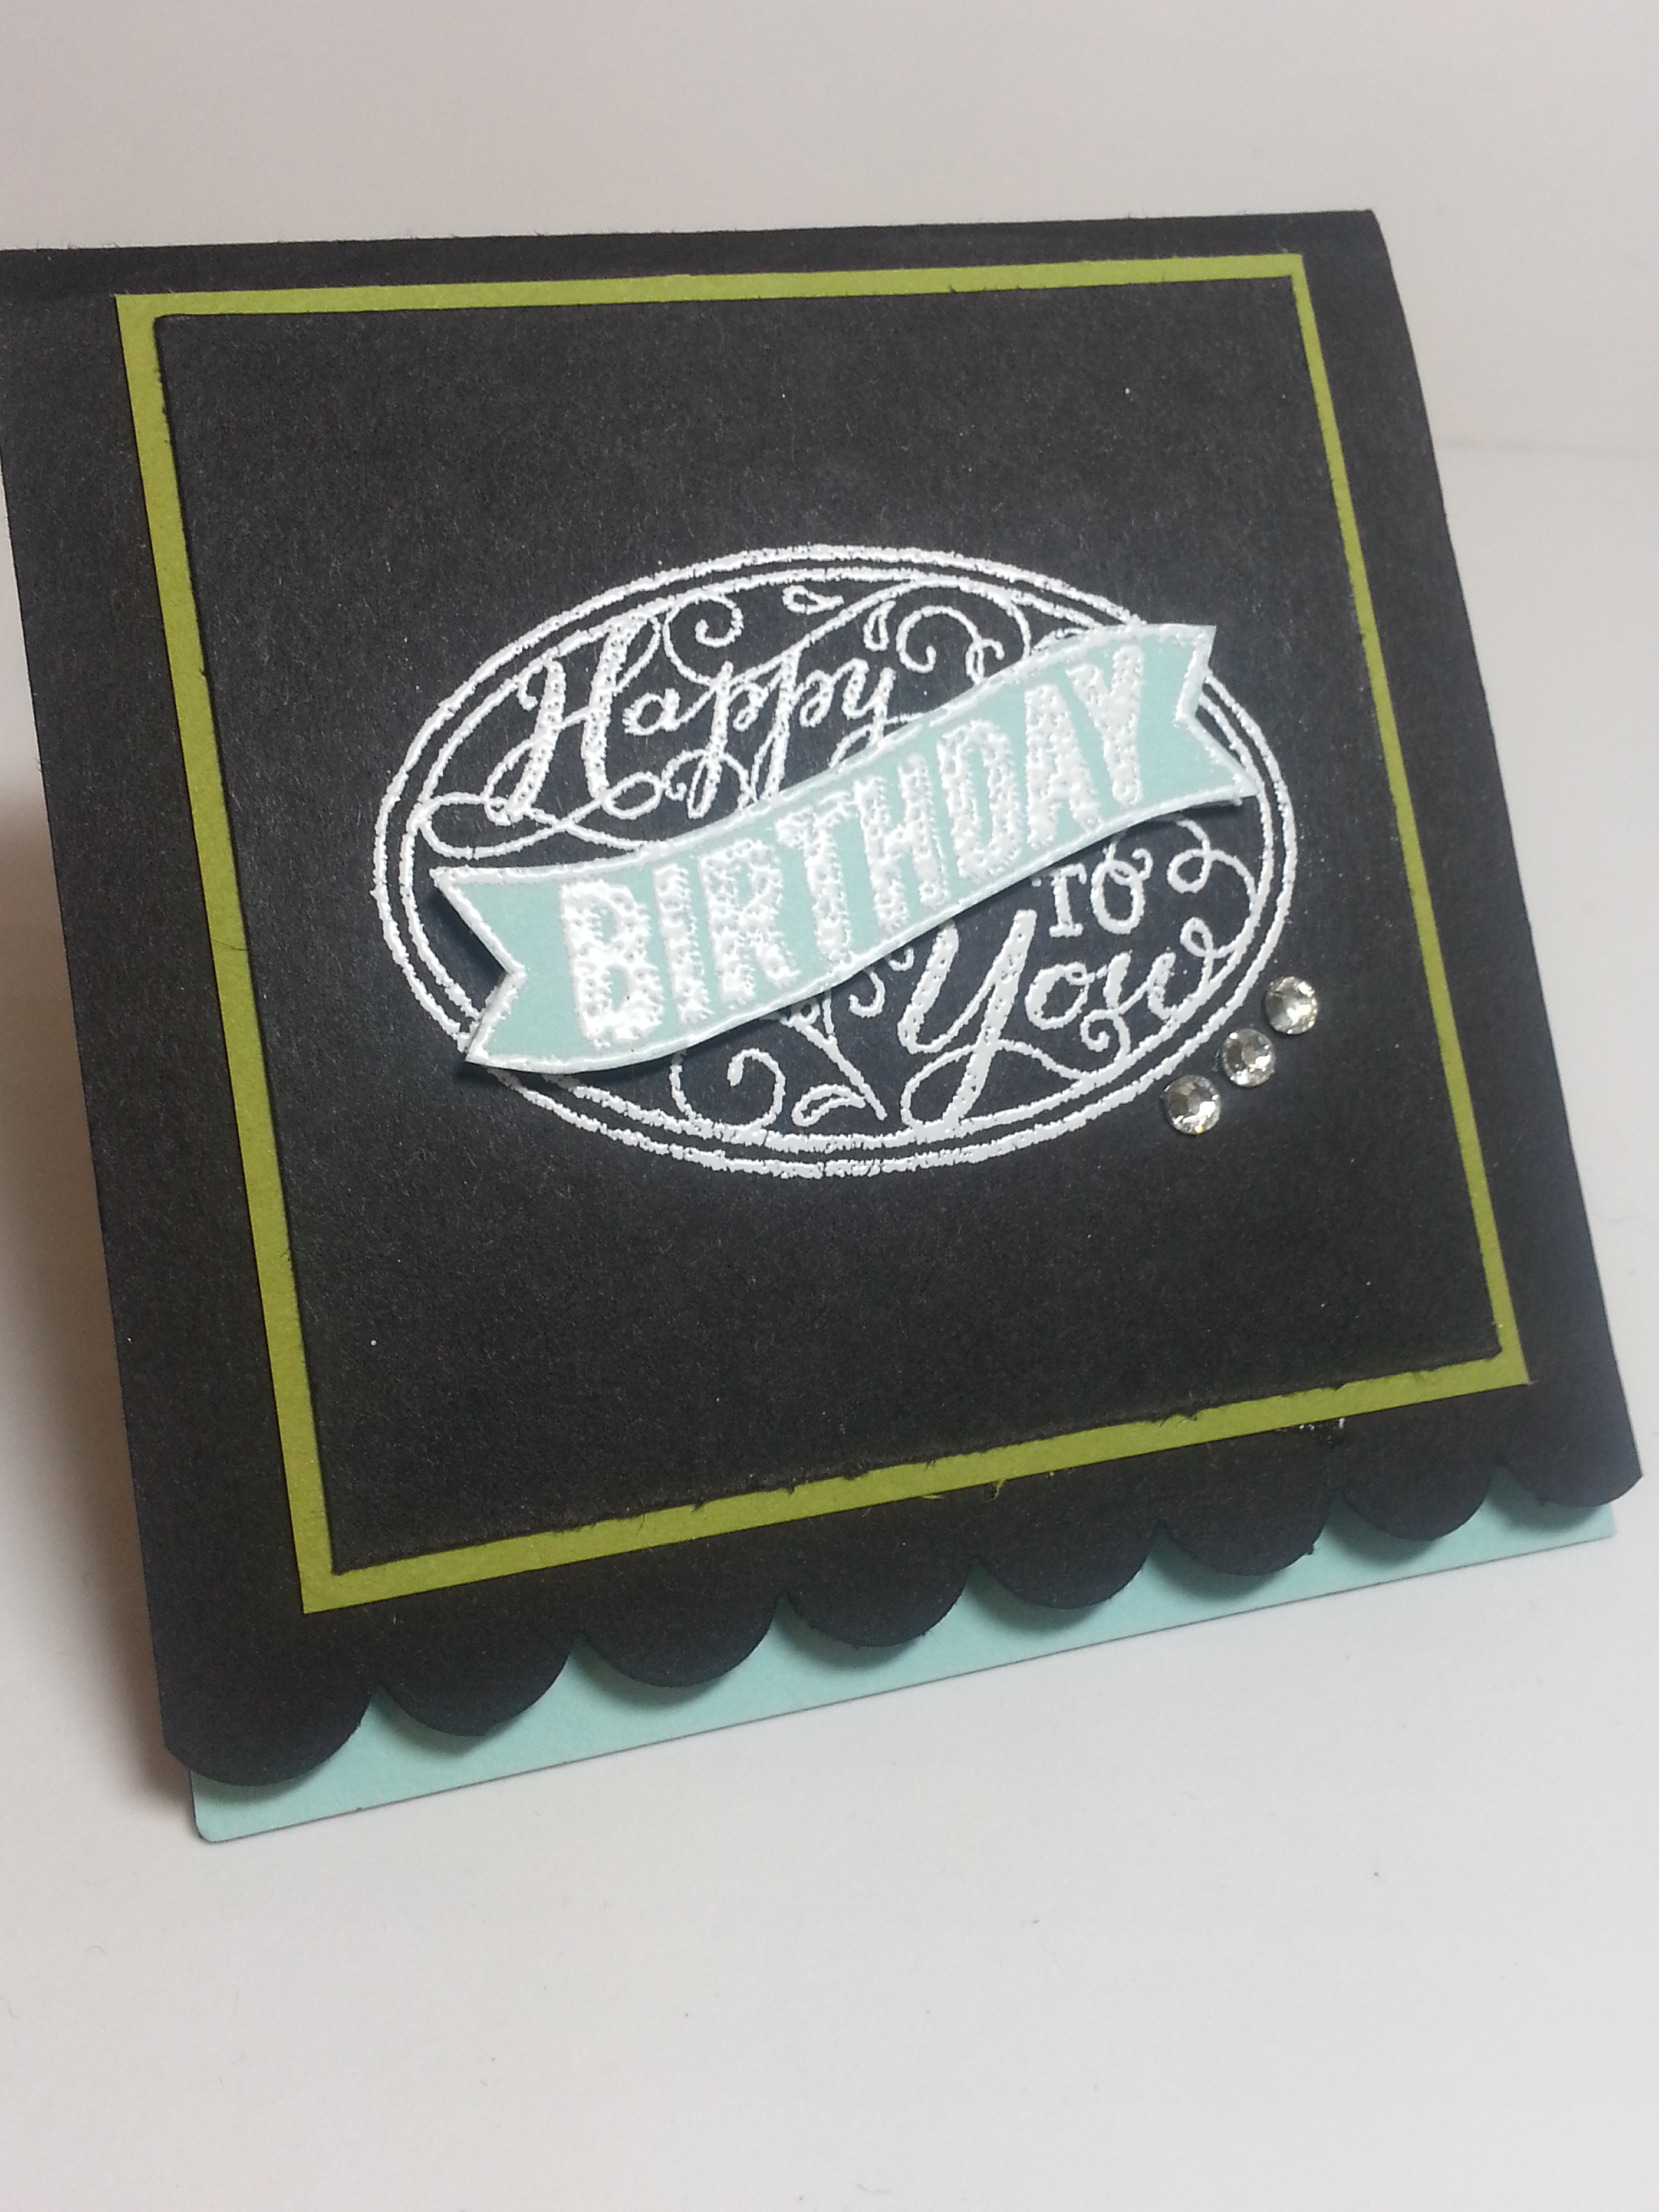
The original idea was the normal card size (4.25×5.5) but I wanted to be different. So I did square.  I like it when the card stands out in the mail. And, of course…. I wanted to make the envelope so it’d be really special. I’m sure the USPS isn’t  all that excited about my special cards (square cards require extra postage…and you should use a white label on dark dsp so the address could be clearly read)… but some times special people call for special circumstances. And with all thanks to the USPS for humoring me… (and it is still the best purchasing value…. if I wanted…I could send a card to my family…which is about 5000 miles… for only 48¢. I sure can’t get there for that…)  anyway…  here is another view…

image

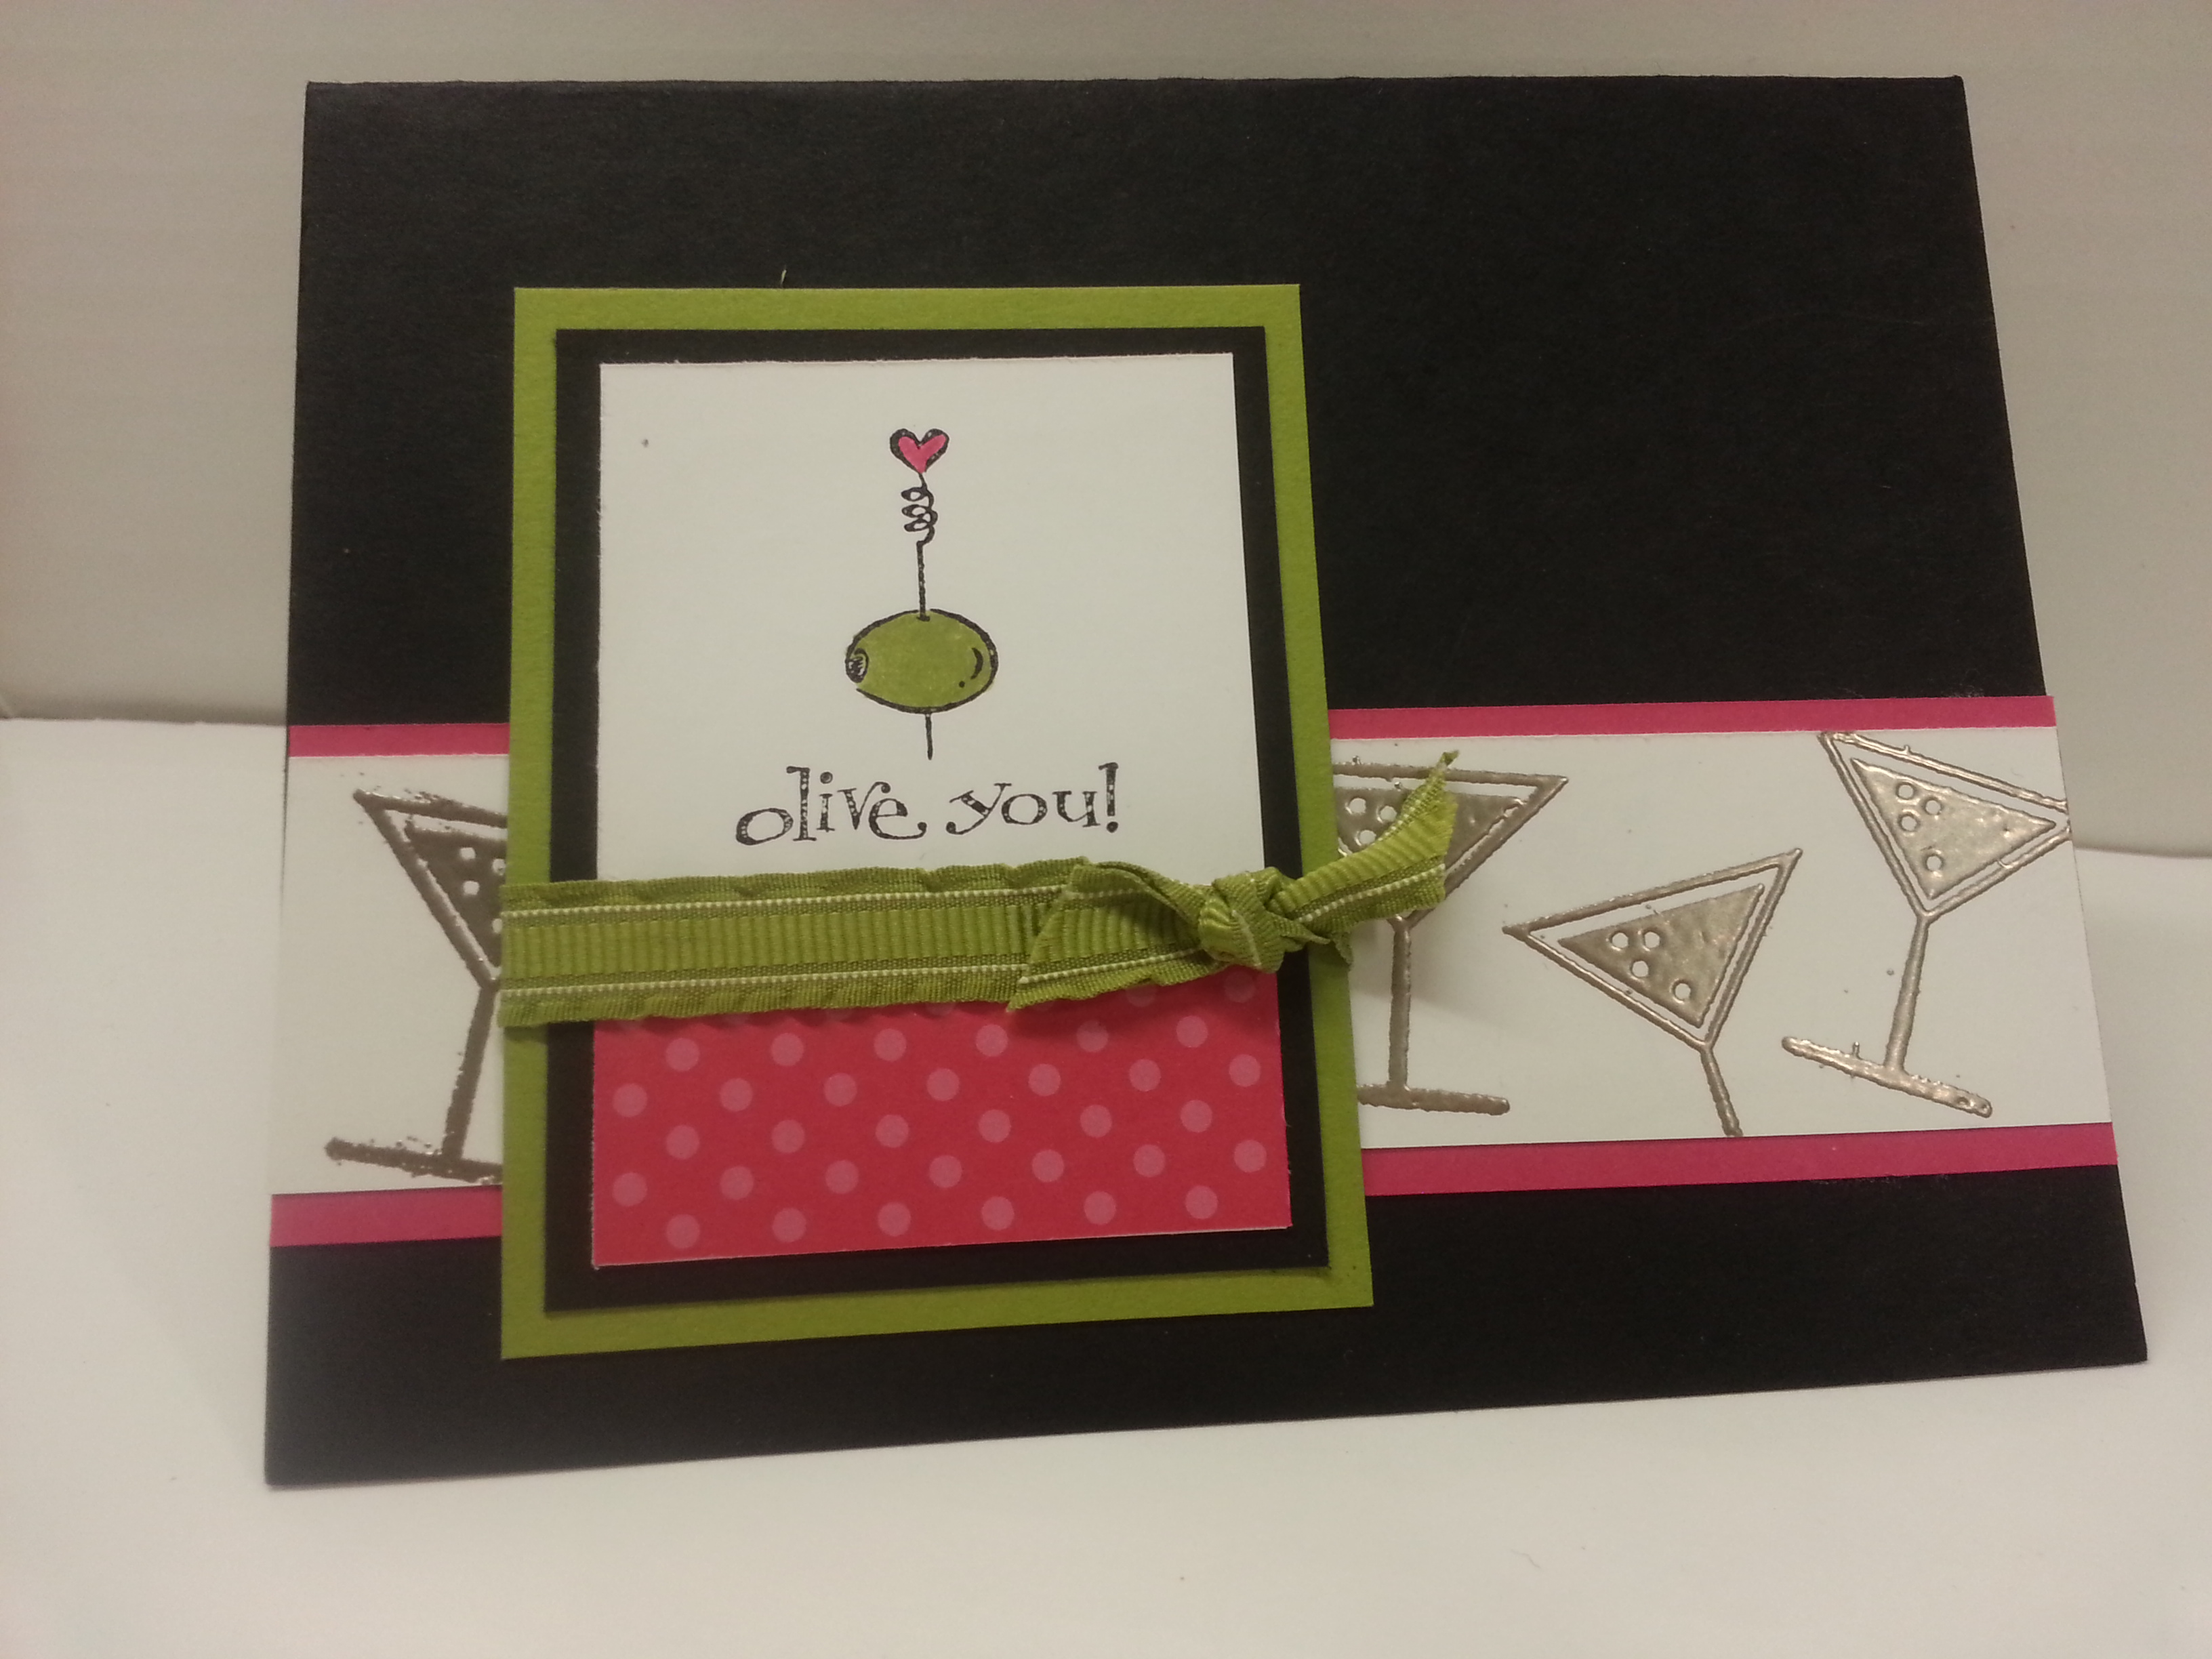
And for a super special person… I decided to go crazy with rhinestones… who doesn’t like diamonds??  I used summer starfruit and raspberry ripple for the colors…and my favorite, the tasteful trim die to make the scallop border…

image

So… that’s it. Thats what I got for mauistamper extraordinaire.

Bunny, Bunny, Who’s got the bunny??

Standard

Easter’s a-comin’…

Better get crackin…

Here is a SUPER easy little Easter Goodie Bag…  It uses that super easy Pop-up Posies Designer Kit.  Again.  Did I mention I LOVE that kit??


20130315_193723


I just scored and folded the tag that came in the kit in half to use it as a topper on a cello bag!!  Added a few Easter Eggs (those whopper robin eggs…my favorite)…  And some of that crinkle grass.  I STOCK up on that stuff during this season cause it comes in handy all year… I like the clearish one cause it matches everything…

For this flower, I used one of the vanilla fabric covered brads and just scruntched up the petals some.  The “Happy Easter” stamp is from the Teen Tiny Wishes stamp set.  Stamped in Crumb Cake on Vanilla, punched out with the Word Window punch and layered on a Summer Star-fruit modern label punch.  Took NO TIME to put together.  Perfect for office mates or your child’s school party…


Best of LOVE

Standard

Welcome BACK!!  This is the Stampin’ UP’s 25th Anniversary “Best of ” Blog Tour.  This month, we are featuring the ‘Best of LOVE’ stamp set.  Though it is aimed at being a valentine stamp set, I think there are many other ways you can use it.  It’s got perfect images for weddings and other just ‘thinking’ of you kind of cards…  so… here we go!!

20130315_193953

“OLIVE YOU!!  Get it???  (snort, snort…)  I paired this olive stamp the from the Best of Love stamp with the Martini glass from Happy Hour stamp set.  I love the pewter embossing powder.  It melts SO smoothly.

Here is a little closer picture…

20130315_194010

This is Lucky Limeade paper and ribbon…  I’ve used the Melon Mambo prints paper pack for that polka-dot paper.  And, of course, basic black…

The next sample is a little more elegant… Perfect for a wedding, bridal shower… or just a heart-felt thinking of you card.

20130315_193859

I’m using the basic gray paper and I used the paper doilies from the Spring Occasions catalog…  I cut the lattice die out of gray paper too and layered over.  The silver glimmer and rich razzleberry flags give a little bit of color punch over the layers.  And of course, I stamped and embossed the big heart image with clear embossing powder just to give it the tone-on-tone elegant look.

20130315_193918

The vintage faceted button with a tidge of white baker’s twine tied in the holes finishes off the card.  I left it plain, but a sentiment from Teeny Tiny Wishes could be stamped on a white flag and added to the ensemble…

FUN STAMP SET!!  Even though February is OVER, these will still be available until March 2014.  Go ahead and get yours!!  And, you’ll get a little decal and collector’s card.  If you collect 6 decals between now and March 2014, you can trade it in for a free stamp set valued at $14.95 or less…

Well… Thanks for stopping by!! Off to the next project…  click the button below…

blogtour-25years-next (1)

Or, if that doesn’t work, here is a list:

nancy Amato – http://stampinallnight.blogspot.com/
Linda bartolucci – www.inkstampandscrap.com
Ingrid Blackburn http://createwithingrid.wordpress.com/
Melissa Bolinger – 
www.stampinup.net/blog/2089191
Jackie Bottomley – http://jackiebottomley.blogspot.com
Lee Bradford – http://inkartfromtheheart.blogspot.com/
Susan Carlson – http://stampinmomoffour.blogspot.com 
Connie Deibler – www.conniestamps.com
Tamra Davis  –Www.theCardLadies.com
Sherri Eddleblute – Www.sweetestdesigns.blogspot.com
Lynn Embrey- www.PossibilitieStamperStudio.com
Becky Evans www.alwayshappystampin.com
Kathy Hamrick – www.countryroads.typepad.com 
Crystal Kondo  www.http://card-ed.com/
Debra Lehigh- www.thestampinhut.typepad.com

Debbie Lever – www.debbiescreativespot.blogspot.com

Lynn Marshall Http://raganscrazycreations.blogspot.com
Anne Matasci – www.MauiStamper.wordpress.com

Need a Tag?

Standard

So…  I finally opened the box of the ‘Pop Up Posies Designer Kit’ (item #131395, $12.95).  I have no IDEA why I waited so long to play with these.

I needed some tags for a couple of gift bags of tea I was making, so I thought these tags would be a good, springy tag to put on…

20130311_211420

They come with pool party, calypso coral and very vanilla paper flowers and 9 brads, some twine, and the crumb cake pre-embossed, diecut tag.  AND, it comes with that just for you stamp (It’s worth it just to get the stamp).  For these tags, I used the antique brads instead of what came with the kit, cause my club members are making a version of this this weekend!!  (sorry to spoil the surprise…) The kit says it makes 9, but you could make MANY more than that (with the paper flowers anyway)… by supplying different brads.  I also added the ribbon pieces to the back of the flowers, just to give it a little extra..

20130311_211430

You can curl the petals with your bone folder…

20130311_211438

Here it is, all packaged UP!!

20130311_212700

I just LOVE how stuff looks in cellophane!!  It makes it look finished… and the recipients of these gifts are gonna be so much more excited because it LOOKS exciting…

Here is the kit131395S

There are so many ideas of things you can do with this kit!!  I will try to get some more samples.   One GOOD idea is to get the kit, and make up all the tags… just to have a stash of tags when you need to get a quick gift together.  They’re so cheerful they will put a smile on ANYONE’s face.

Stop back by on Sunday!!  We will have our next installment of the “BEST OF…” Blog tour… Featuring the “BEST OF LOVE” stamp set!!

blogtour-25years-march (2)

Wedding Favors

Standard

Tis the season for weddings. I was asked by a co-worker to design a box for a friend of hers who is coming to Maui to get married.  She is gonna have mochi as her favors.  A brief aside for our non-local readers.  Mochi is a Japanese dessert made with mochi flour.  Which is made from a sweet rice.  A taste, which,  no offense to my local friends,  I have not been able to aquire.  Just not sweet enough.  I have a sweet tooth that will rival Willy Wonka’s.  Anyway… That isn’t to discount the favors.  The mochi used is famous on this island.  And maybe… The longer I live here… I will aquire it.  That has happened with many other delicacies.

I digress.  The box.  Here it is…

image

I made the box on the simply scored.  Super easy.  I embossed it with the elegant lines embossing folder and spritzed it with sparkle juice (the concoction made with alcohol and champagne shimmer paint).  The bow is made with 3/4inch wide strips of paper glued into the paper chain loop and then gluedotted together in the center.  Different lengths of paper give you the different sizes in thr bow.   I covered the center with the vintage facated button and a rhinestone!!  

Here’s a side view:

image

I used the scalop boarder punch do put some detailing on the top of the box so it would show up against the bottom of the box.  

image

Whatcha think? I think…. Why limit this to favors!! Since you can make boxes of all sizes on our simply scored… Its perfect for packages for jewelry…. Money…. Gift cards…. Bath and body hand sanatizers…   Anything.   I love it when one thing has many uses….

Don’t. Know if the bride will choose it,  but I sure had fun making it…

Ciao, BABY!!

Standard

Welcome Back to the “Stamp of the Month” Blog tour.  March’s installment uses Ciao, Baby from the Spring Occasions catalog.  I ordered this set as soon as I saw it.  Wanna know why…  It fits the petite curly label punch available in SAB… and the tiny scallop circle in the Occasions catalog.  And, I’m a sucker for little tags.  You can use them on everything.  Now, this set would make gorgeous cards in it’s own right…3×3 cards, tags, etc… but, when we get to March, I know the Stampin’ Up catalog is in it’s, hum, shall we say, last few moments (don’t get alarmed, you still got a couple of months…) But, as a demonstrator, with the new catalog coming in June, I have to start looking at the stamps I have and seeing what have I used, what has gotten ‘hidden’ behind something else on the shelf…  and I did… and found Baby Boutique.  It kinda got stuck back behind some other stamps, and I realized this WHOLE year has passed and I’ve not really made anything with it.  SO….  I’m paring Ciao, Baby with Baby Botique.

I wanted to do a few quick and simple cards, cause these images really are nice and bold…  for both sets…

Here is what I did:

20130308_203749

Simple colors, easy lines, fun and fast to make.


20130308_203925

Though it doesn’t specifically say it, This one would make a perfect Easter card.  I love the little detailing in the bird.  And, the Happy Day stamp from Ciao Baby looks like the bird chirped it.  I used the border from the Tasteful Trim die (I use that for EVERYTHING….not just on this blog post).  I used so saffron paper and the polkadot textured impressions embossing folder to add just a little detail…  Oh, I used crumb cake for the scallop punch and very vanilla for the card…


20130308_204029

This one makes a great card for someone who you need to give a note of encouragement or thanks!  Island Indigo ink makes a very cheerful greeting.


20130308_204055 (2)

And, the baby pajamas.  That’s what made me want to by the Baby Boutique stamp set in the first place.  This one uses pool party, but it could easily be made in any color for either gender baby… and, you can take the ‘Thank you’ stamp from the Pretty Petites (another SAB freebie) and make a set of thank you cards for the new-to-be mom.  Thank you cards… that’s what I started giving as gifts to baby and wedding showers….  a set of cards, pretty pen, stamps, and return address labels…  A perfect, hand-made gift…

Anyway, thanks for stopping by!!  Off to your next stop!  See what Deb Leigh has for you…

blogtour-stampmonth-next


And if that link doesn’t work, here is the full list of people in the tour:


Best of… BIRTHDAYS!!!

Standard

Aren’t Birthdays fun times??  I’m happy now because my birthday always falls on our school’s FALL BREAK.  So, I always have the day off! It’s great!!

Anyway, thanks for joining us again on another Blog Tour!  This tour is the BEST OF 25 YEARS TOUR.  Every month of 2013, SU!  is bringing back some of the most popular images and adding a new image and releasing them in a brand new set!  AND… each set comes with a special decal proof of purchase sticker.  If you save 6 of these, you can trade them in for a FREE STAMP SET!!  (valued at 14.95).

For this set, I decided to make a cute set of 3×3 birthday cards… perfect for attaching to a gift.  SO…  with out further adieu, here is the BEST OF BIRTHDAYS!!  (132929, $14.95, clear)

20130216_081759

For this set, I looked on Pinterest (my favorite place for wasting time) to find a color challenge.  This is a good way to jump start a creative process.  I chose one that was Wisteria Wonder, Whisper White, Basic Black, Lucky Limeade and Pool Party.  These cards are basically made all the same way… 3×3…  I used the scallop border punch to punch the bottom… and in doing so, I put a different color to be the inside of the card just so it would show up under the scallop border.

20130216_081344

This set has mostly outlined images, so I pulled out the Many Marvelous Markers (and they are MARVELOUS) to do some ole’ fashioned coloring.  I love to color.

20130216_081149


The rhinestones just added a touch of bling that made gave the little birthday tag a little sparkle.  I also toyed with using dazzling details glitter, but didn’t want to go over the top…

20130216_081201

I like this one the best.  And, the black on the inside is only a 1/2″ piece, so that the giver could still write on it with a regular pen…

20130216_081211

The moment I saw the oval stamp, it screamed to me white emboss on black card stock.  So, that’s what I did.  I also embossed on Pool Party so I could trim out that banner image in the center.

20130216_081324

Well.  Maybe I like this one the best.  I like cupcakes.  DELICIOUS.

The supplies for these little cards are pretty simple.  In addition to the cardstock colors I listed above, I used black staz-on ink, the markers, and the scallop border punch.  You could sit down in an evening and knock a bunch of these out so you’d be set for birthdays for the whole year.  They’re cute and FAST and are sure to make the receiver smile.

Thanks for joining us!!  Off to the next stop… click the button below…

blogtour-25years-next (1)

In case the link doesn’t work, or SOMEONE else’s link doesn’t work, here is a list of the blog tour participants in alphabetical order:

nancy Amato – http://stampinallnight.blogspot.com/
Linda bartolucci – www.inkstampandscrap.com
Ingrid Blackburn http://createwithingrid.wordpress.com/
Melissa Bolinger – 
www.stampinup.net/blog/2089191
Jackie Bottomley – http://jackiebottomley.blogspot.com
Lee Bradford – http://inkartfromtheheart.blogspot.com/
Susan Carlson – http://stampinmomoffour.blogspot.com 
Connie Deibler – www.conniestamps.com
Tamra Davis  –Www.theCardLadies.com
Sherri Eddleblute – Www.sweetestdesigns.blogspot.com
Lynn Embrey- www.PossibilitieStamperStudio.com
Becky Evans www.alwayshappystampin.com
Kathy Hamrick – www.countryroads.typepad.com 
Crystal Kondo  www.http://card-ed.com/
Debra Lehigh- www.thestampinhut.typepad.com

Debbie Lever – www.debbiescreativespot.blogspot.com

Lynn Marshall Http://raganscrazycreations.blogspot.com
Anne Matasci – www.MauiStamper.wordpress.com

With a dig…dig…diggy… VALENTINE!!

Standard

OOH Today is Valentine’s Day!!

Now, the day hasn’t really made THAT big of an impression on me… but it’s fun when I have a good idea.  And, I like my idea for this year.  If I do say so myself.  Thought of it myself.  Well… most of it.

So, when Isaac was born, people would tell me “He’s ALL boy”.  And, I never really understood exactly what that meant.  Especially I grew up in a FAMILY of girls.  Three sisters.  My husband has TWO sisters.  Then Isaac comes, and as a baby, people are telling me he is a boy.  Duh.  But, as he has been growing…  it’s hitting me like a slap on the forehead.  And on his head (he just got 5 stitches on his eyebrow after a very boyish crash involving a chair, exercise ball… and apparently a mommy who needs to be more careful when she is sweeping… So the BOY says.

ANYWAY… This is what Isaac’s Valentines’ are gonna be:

20130213_215648


It’s a CUP of DIRT AND WORMS!!  Nah, just a cup of crushed graham crackers and gummy worms.  And, I made these tags:

20130213_215457


This comes from the I DIG YOU stamp set.  I markered them, stamped, and cut out.  Used the tiny brads to put on the wheels and then put them on the large tag from the two tags die.  This was cut from the early espresso core’dinations paper, embossed and sanded (sorry… paper isn’t available anymore.  email SU… to tell them they need to re-release it.)  I found these tiny shovels on amazon to add to the tag.  (Isaac LOVES shovels).

20130213_222025


This is the finished product.  Put lids on the dirt cups and tied in a bag.  I LOVE the new Natural Trim ribbon (Spring Occasions Catalog).  It has the look and weave of burlap but is a lot softer and easy to use.

Here is the mess of them:

20130213_222058


This is what inspired the diggy valentine…

20130126_115243

The stamp set is a MUST have for all proud BOY families.

And, being we have family all over the country, I had to make a valentine to send away.  This is what the family on the mainland got:  (I created it in My Digital Studio).  It doesn’t have a diggy theme, but was too cute to pass up…

valentine-001


and back:

valentine-002


Well….  Hope you have a wonderful VALENTINE’s DAY!!  And, I can’t help but thinking about the biggest, best valentine of all…

For GOD so LOVED the world that HE GAVE his only son that whoever believes in him should not perish but have everlasting life.   John 3:16.


And, check back on SUNDAY for the Stampin’ UP 25th Anniversary Stamp Set Blog tour!!

blogtour-25years

Special Valentine Delivery

Standard

So… a while back a friend of mine asked me to make a “Baby’s First Year” scrapbook album for her daughter who is due sometime this month.  They made it as a gift for her at the shower.  For baby’s first year, I usually do a Valentine themed page for the month of February, but since this conflicted with the actual ARRIVAL of the baby, I decided to try to meld the two ideas together.  So, this is what I got…  (idea was cased from a card I saw on pinterest… but I cannot remember who)


20130103_172158 (1)


I apologize for the junky picture, (and the surrounding mess) but it is what it is.  And, I don’t have the album anymore to take another…  But, I LOVE it…  (oh… so humble I am….  snort).  For this, I used every heart framelit and punch I owned.  And, since it was a baby boy, I wanted to keep the red and pink, and girly to a minimum.  Hence the pool party, island indigo and suede…

So…  enjoy…

AND!!  I’m part of ANOTHER blog tour.  2 A MONTH now!!  (WOW).  The next one is coming up THIS Sunday.  And, it is the “Anniversary Blog” tour.  It will feature all of the stamp sets that SU is releasing every month in honor of their 25th anniversary.  They are the most popular images from different sets they’ve had over the years, plus a NEW image.  AND…  if you order the set, you get a special little card and decal… you collect 6 of these over the course of the next year, and you will get a free stamp set valued at $14.95!!  HOW FUN IS THAT!!!

So…  see you soon!

blogtour-25years

Favorite Favors

Standard

So…  I bet you are gonna PASS OUT from shock to see that I’ve posted TWICE so close together.  I am actually trying to be better about this… so…

I wanted to show you some favors I made for a friend’s daughter’s non-bridal bridal shower.  There’s a whole story behind that, but whatever.  I’m not sure I understand… except that it was a day before the wedding and she hadn’t had opportunity to have a shower, but they didn’t want a shower so they had brunch.  So, call it brunch.  That is what it was.

But, said friend is a fellow stamper, THE MAUI STAMPER, as a matter of fact and you can check out her blog here for more pics from the wedding and other beautiful decorations she made (and favors and LOTS of just beautiful scenery).  Her name is Anne.  You’ve probably heard me mention her before.

Anyway, she gave me a bucket of chocolate macadamia nuts and said do whatever I like to make favors for the BRUNCH.  YAY.  That’s my favorite.  DO WHAT I LIKE.  Does this woman really know what she is saying…???!!!???

So, this is what I liked:

20130201_064458


It’s just a simple belly band that covers more than just the belly.  The bride chose the “Blushing Bride” and “Pear Pizzazz” paper (both retired–sorry) and Very Vanilla.  I used the antique brads in the center of the flower.  Which was made by several layers of the blossom punch and then sliced the petals with scissors.  I LOVE LOVE LOVE the two-tone satin ribbon…  this went around the middle.  I stamped the blushing bride paper with the Flowering Flourishes stamp set.  This is my replacement for the retired Baroque Motifs (I was SO sad to lose this one).  And I used the polka-dot embossing folder on the pear.

Here is the hidden chocolate.  Who can resist CHOCOLATE MAC NUTS??

20130201_064537


Then, I found this SUPER cute basket and cloth napkin at Pier 1 that made for PERFECT presentation of the whole mess of bellies of hidden chocolate.  DELICIOUS.

Oh… The paper I made the flowers with.  Was from (mumble mumble…I forgot….)  (not Stampin’ Up….  eek….I know… just had it lying around and needed to use it up).


20130201_064735


Anyway, ENJOY!!