Tag Archives: Valentines Day

True Beauty

Standard

Well— January just flew by— I feel like it was just a blink ago that we were welcoming the new year!

As we look forward to the month of love— just wanted to have you take a peek at this stamp set: True Beauty.

Old olive and polished pink give it the valentine vibes, but using florals helps keep it more ‘all occasion’. I personally love these types of stamp sets. The solid images allow for #simplesstampin’ and you can change up the color scheme to completely change the feel of the images. It’s a perfect, all around just solid floral to have in your collection.

I actually have a small handful of these calendars still available! They’re on sale half off! If you’re interested, contact me and we can arrange local pick up or shipping. This could be a fun little gift for your ‘galentine’!

Our friend, Cheryl will be taking a break this month, but go check out the project Anne has for you!

Advertisement

Monster Love

Standard
Monster Love

February is always a fun month for me… a return to a normal routine after the holidays and the anticipation of the summer (as a school teacher, February always is an encouragement…that I may actually survive until the end of the school year).  And, I’ve always enjoyed Valentines from a crafting standpoint.  There’s no pressure around the holiday like Christmas brings, and it’s opportunity to do something cute, simple and fun!

This February is no exception.  The 2017 Occasions catalog had this stamp set, Yummy in my Tummy and the minute I saw it I KNEW this lovable beast needed to be in my calendar.  (Sorry, the set is now retired… I know, so sad)

Such a super simple, easy image.  And you can color, or no need…  And, he’s just a little friendly smile to see as you change the months on the calendar.

Hope you enjoy your February!  Head on over to see what Anne and Cheryl have for you today!

A Nice Cuppa

Standard

Hello!!

Here’s a little treat bag for your crafting pleasure.  I made this last month in my Stamp Clubs.  Wanted something to celebrate the Valentine holiday, but not too ‘in your face’.  I wanted it to be able to be used any time.

image

I love the little kraft treat bags from Stampin’ Up!  You can get a pack of 10 for $3.50!  It’s a steal!  And, I made up a handful to have on hand…just so they were available when I needed to give a little gift … or treat…

image

The ‘A Nice Cuppa’ stamp set was a lot of fun to play with.  I love tea cups.  I wish I enjoyed hot tea more.  Well, I do enjoy it.  When it is cold out.  Its just that I am rarely cold enough to feel the need to drink hot tea…  anyway…

image

The framelits make cutting the cup and the tag and the steam out VERY easy.  And, a little glimmer paper for the heart…  I used Wink of Stella to add the accent to the  cup and to the steam.  (HAVE YOU TRIED STELLA YET????  You NEED TO.)

Anwyay, super fun, super fast.  EASY!!

A Little V-Day Decor

Standard
A Little V-Day Decor

I realized Valentine’s Day has come and gone, but I want to share a little of the decor I made for the house.  Actually, I made 13 of these…  sent to family on the mainland for Valentine’s!!  What a wonderful piece of HAPPY mail!

image

Even though I made it pink and hearts, I really tried to keep it from being TOO Valentine-y just cause I wanted people to be able to leave it up past the holiday.  Just cause it is very cheery…

image

Love the Blushing Bride Glimmer paper.  It’s fabulous.  I actually thought it would be too pink for my liking, but when it came, I was wonderfully surprised.  It seems to go well with everything.

image

I cut the banners out on the big shot… cut out the dsp and photos alike.  The big shot makes the easiest banners… (and many other things.)

image

Our little heart punch lines up very well with the Hearts TIEF… The glimmer cut outs glued in real well..  (oops, looks like one of my hearts is a little crooked…)

I had a very hard time getting pictures without glare…

image

One of my favorite card sites (for making digital cards) is Pear Tree Greetings.  I saw the idea of sending a Valentine’s Banner on their site.  But, it was about $3 EACH.  To order!  And, I figure, with this banner, I spent less than a dollar!  And, it came together in minutes!  You could modify for any occasion!

image

Ok.  Homework:  Go make some spring banners.  And send me some pics!!  I wanna see.  They are so much fun!!

Beeeeee mine

Standard
Beeeeee mine


I love this little bee!!  It has such a cheery smile… so it was a MUST for this February Post.

image

The stamps are from the Honeycomb Hello stamp set.  The little polka dot  hexagon background adds the perfect amount of texture and color to the page…  And, of course, you cannot forget the bling in the heart punch-out…

image

Go see what Anne and Cheryl have for you!  And, happy Valentine’s Day to  you!

Happy Valentine’s Decorating!

Standard

Hello!!

Today’s post is very special… I was invited to be part of a ‘Creative Blog Hop’.  The rules are, post and then link to 2 people who post a week later….  And use Stampin UP! products.  Then, after the bulk of my post, you will find my answers to questions about my ‘creative process’.  I was invited my my friend and downline, Anne Matasci.  You can go see what she posted HERE.

So..

Here is my first project….  This pillow with the heart garland.  I happened to see his pillow on etsy and though, “HUH.  I could make that.”  So, I did.  I bought the fabric from a local fabric store.  I like it cause it is burlap like, but not as rough and smelly as burlap.  I LOVE decorating with burlap.  But, hate the feel and smell…  So… This is a close second.  It’s way softer and not at all stinky…  When I saw the pillow on etsy, I immediately wondered if the framelits could cut felt.  WELL.  They can!!  (fyi:  This is not a manufacturer suggested use for framelits).  However, I had no problem cutting mine.  And, the magnet platform for the big shot made it a breeze.  I used the silver baker’s twine to make the hanging string…  Was going to use black, but then thought the little thread of silver would be a nice pop…  (and, if I had it to do over, I’d probably  just buy a premade pillow case instead of making one…just cause the fabric was super stretchy which made it WAY hard to work with)

image

Here is a close up….

image

The next project I made was this Valentine’s Banner.  I decided to use the “Love Never Fails” phrase from I Cor. 13… Just cause I thought it would be something different to hang up, but still Valentiney…  I used the chalk board banner kit…WHICH I LOVE.  Everything is pre-made and ready to go…  I had the stencils left over from the canvas banner kit so I used those to make the letters….And, I made the letters with the white chalk marker rather than chalk.  That way, it was more vibrant.

image

You can see, I cut LOTS of hearts out of felt.  And, I used the banner framelits to make the embellishments on the sides and between the words.  The magnet die makes it SUPER easy to cut the heart out of the center of the banner.  For the heart garland, I used TONS of felt hearts and got out the trusty glue gun and went to gluing… Here, I used the linen trim (retired), but any flat ribbon would work.  The flat ribbon was great cause it was wide enough to keep the hearts from twisting all over the place.  I originally wanted a silver button in the center of the hearts, but that made them fall forward.

image

Full Confession:  I decided to do a little Valentine’s decor…becasue I never really got Christmas decorations up.  AND, at this moment, I have a spring banner over the entry way mirror, a days of gratitude banner (thanksgiving) up on the back wall, and a ‘JOY’ marquee sign that never got taken down from Christmas, ALL gracing my living room.  We like to celebrate all the holidays.  At the same time.  Or something.

And, I didn’t want to just leave you with Valentine’s decorations… so here are a couple paper crafts…

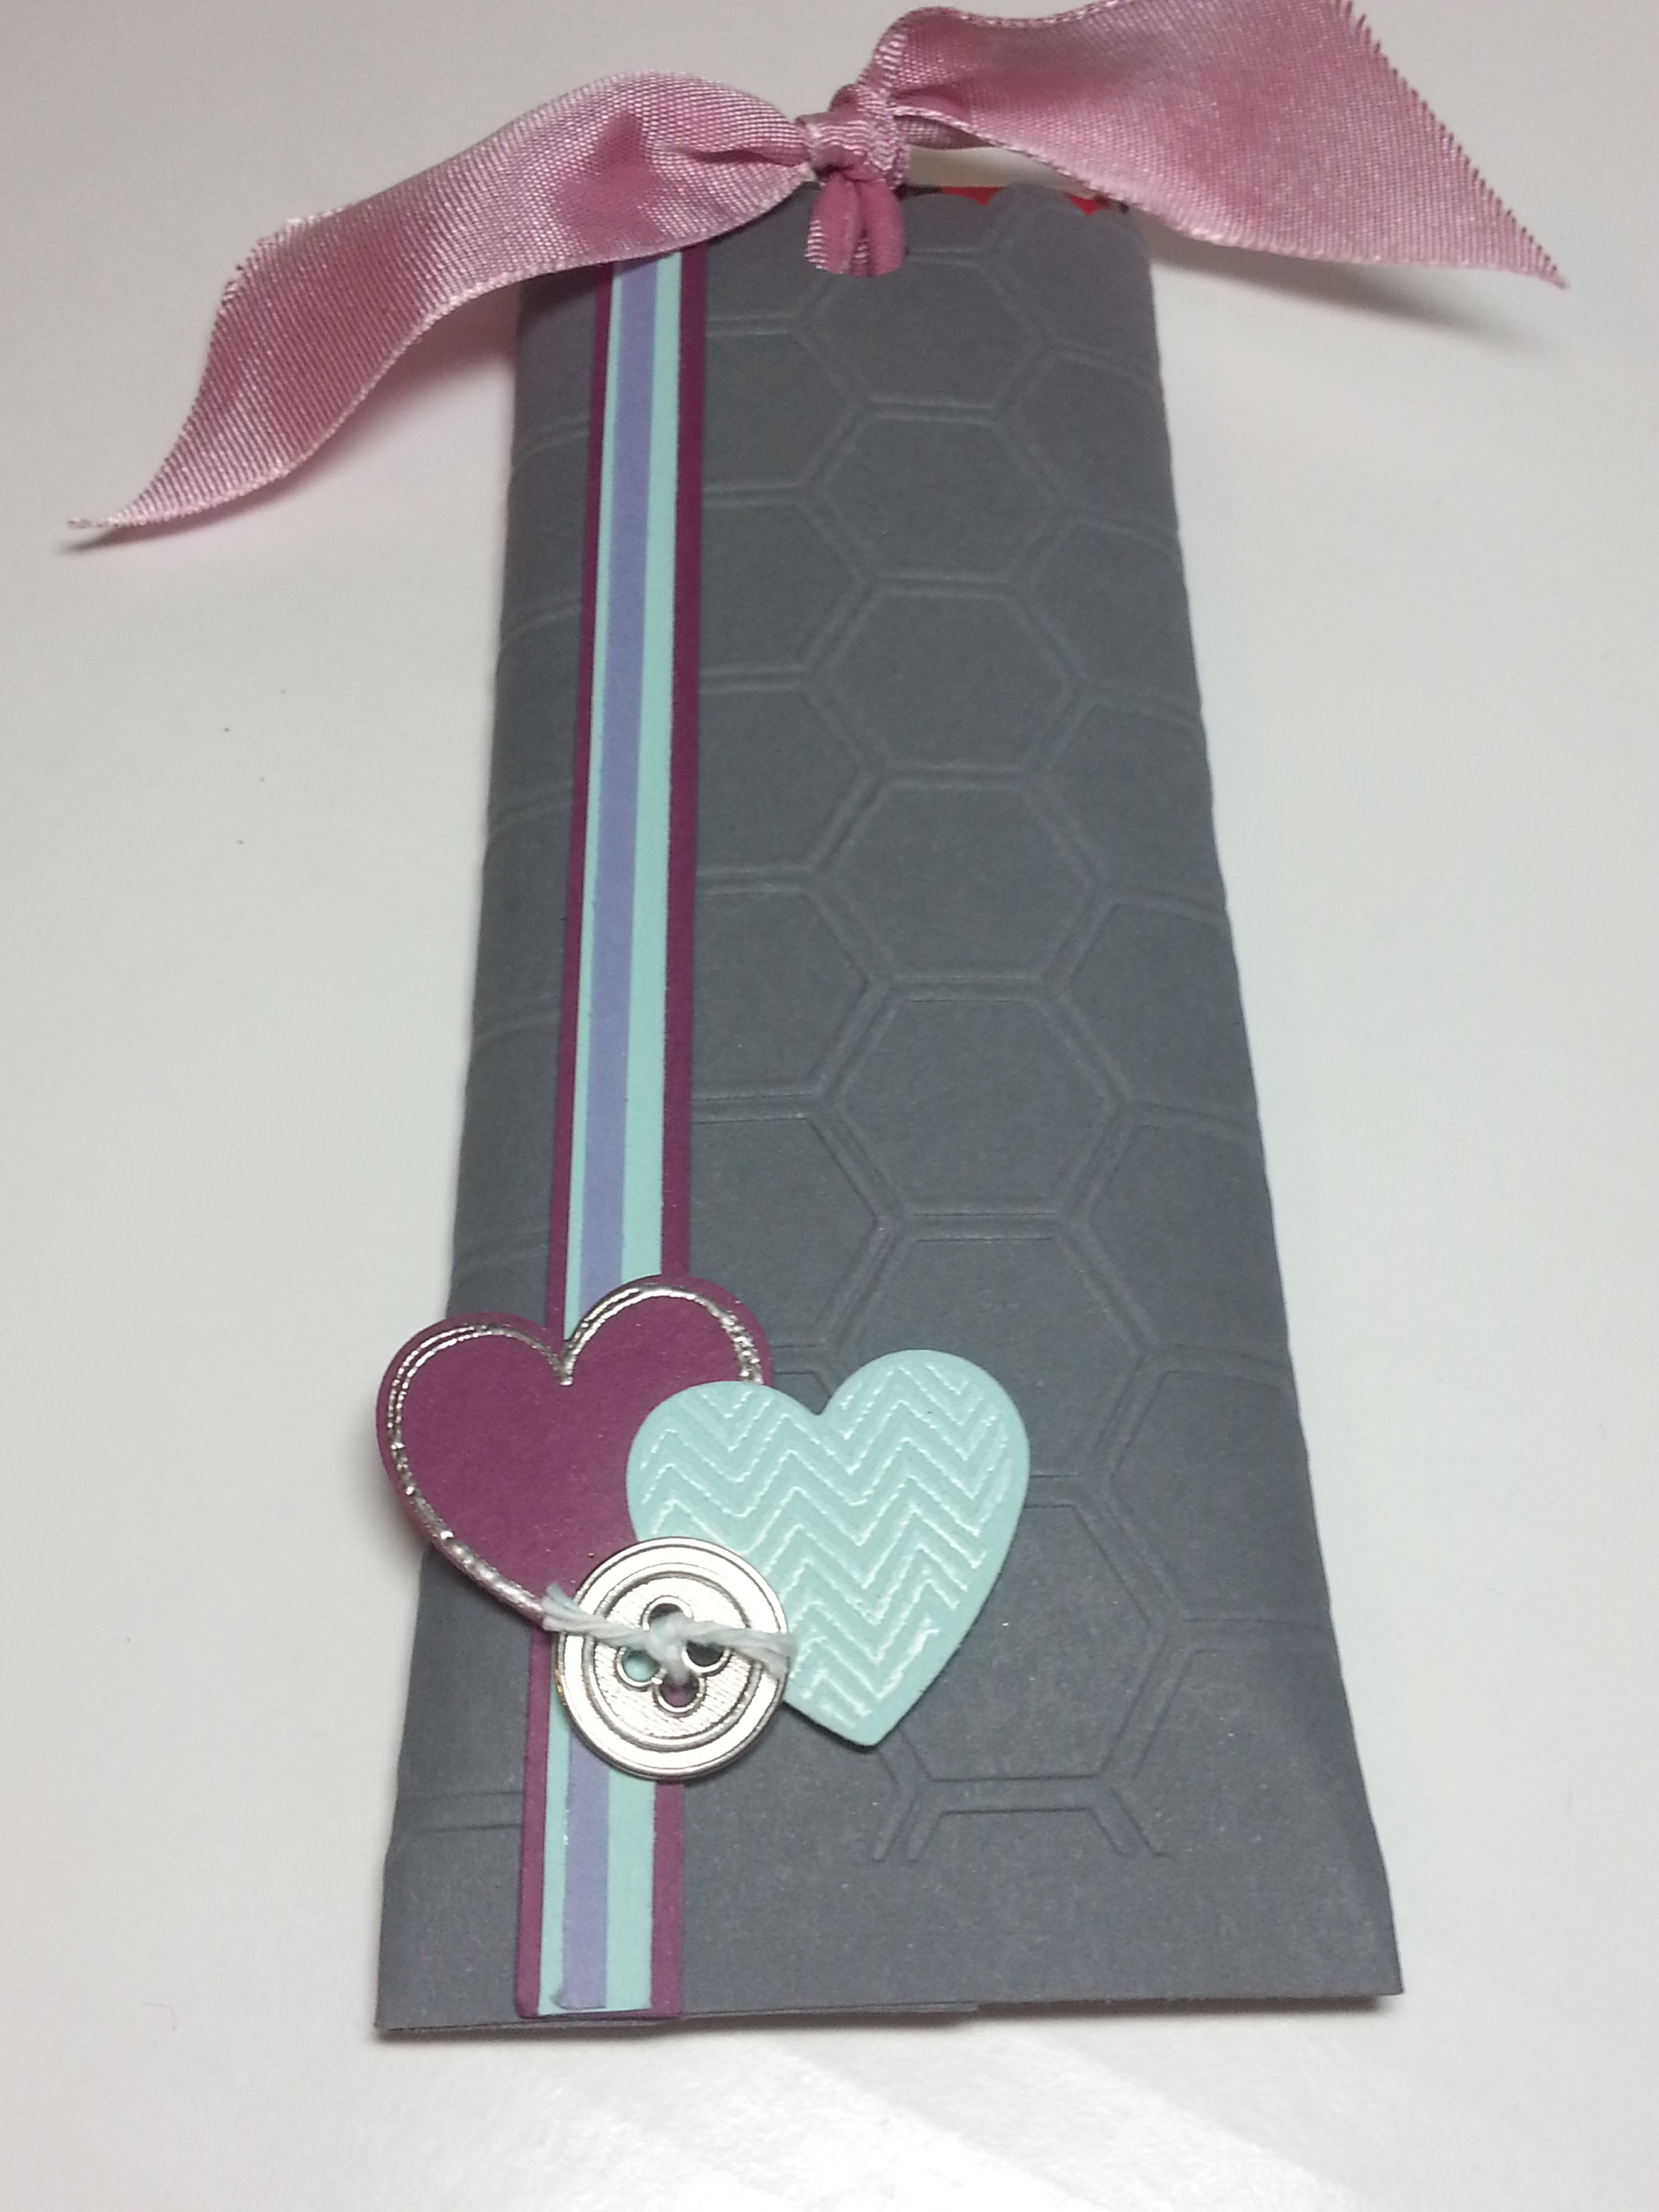
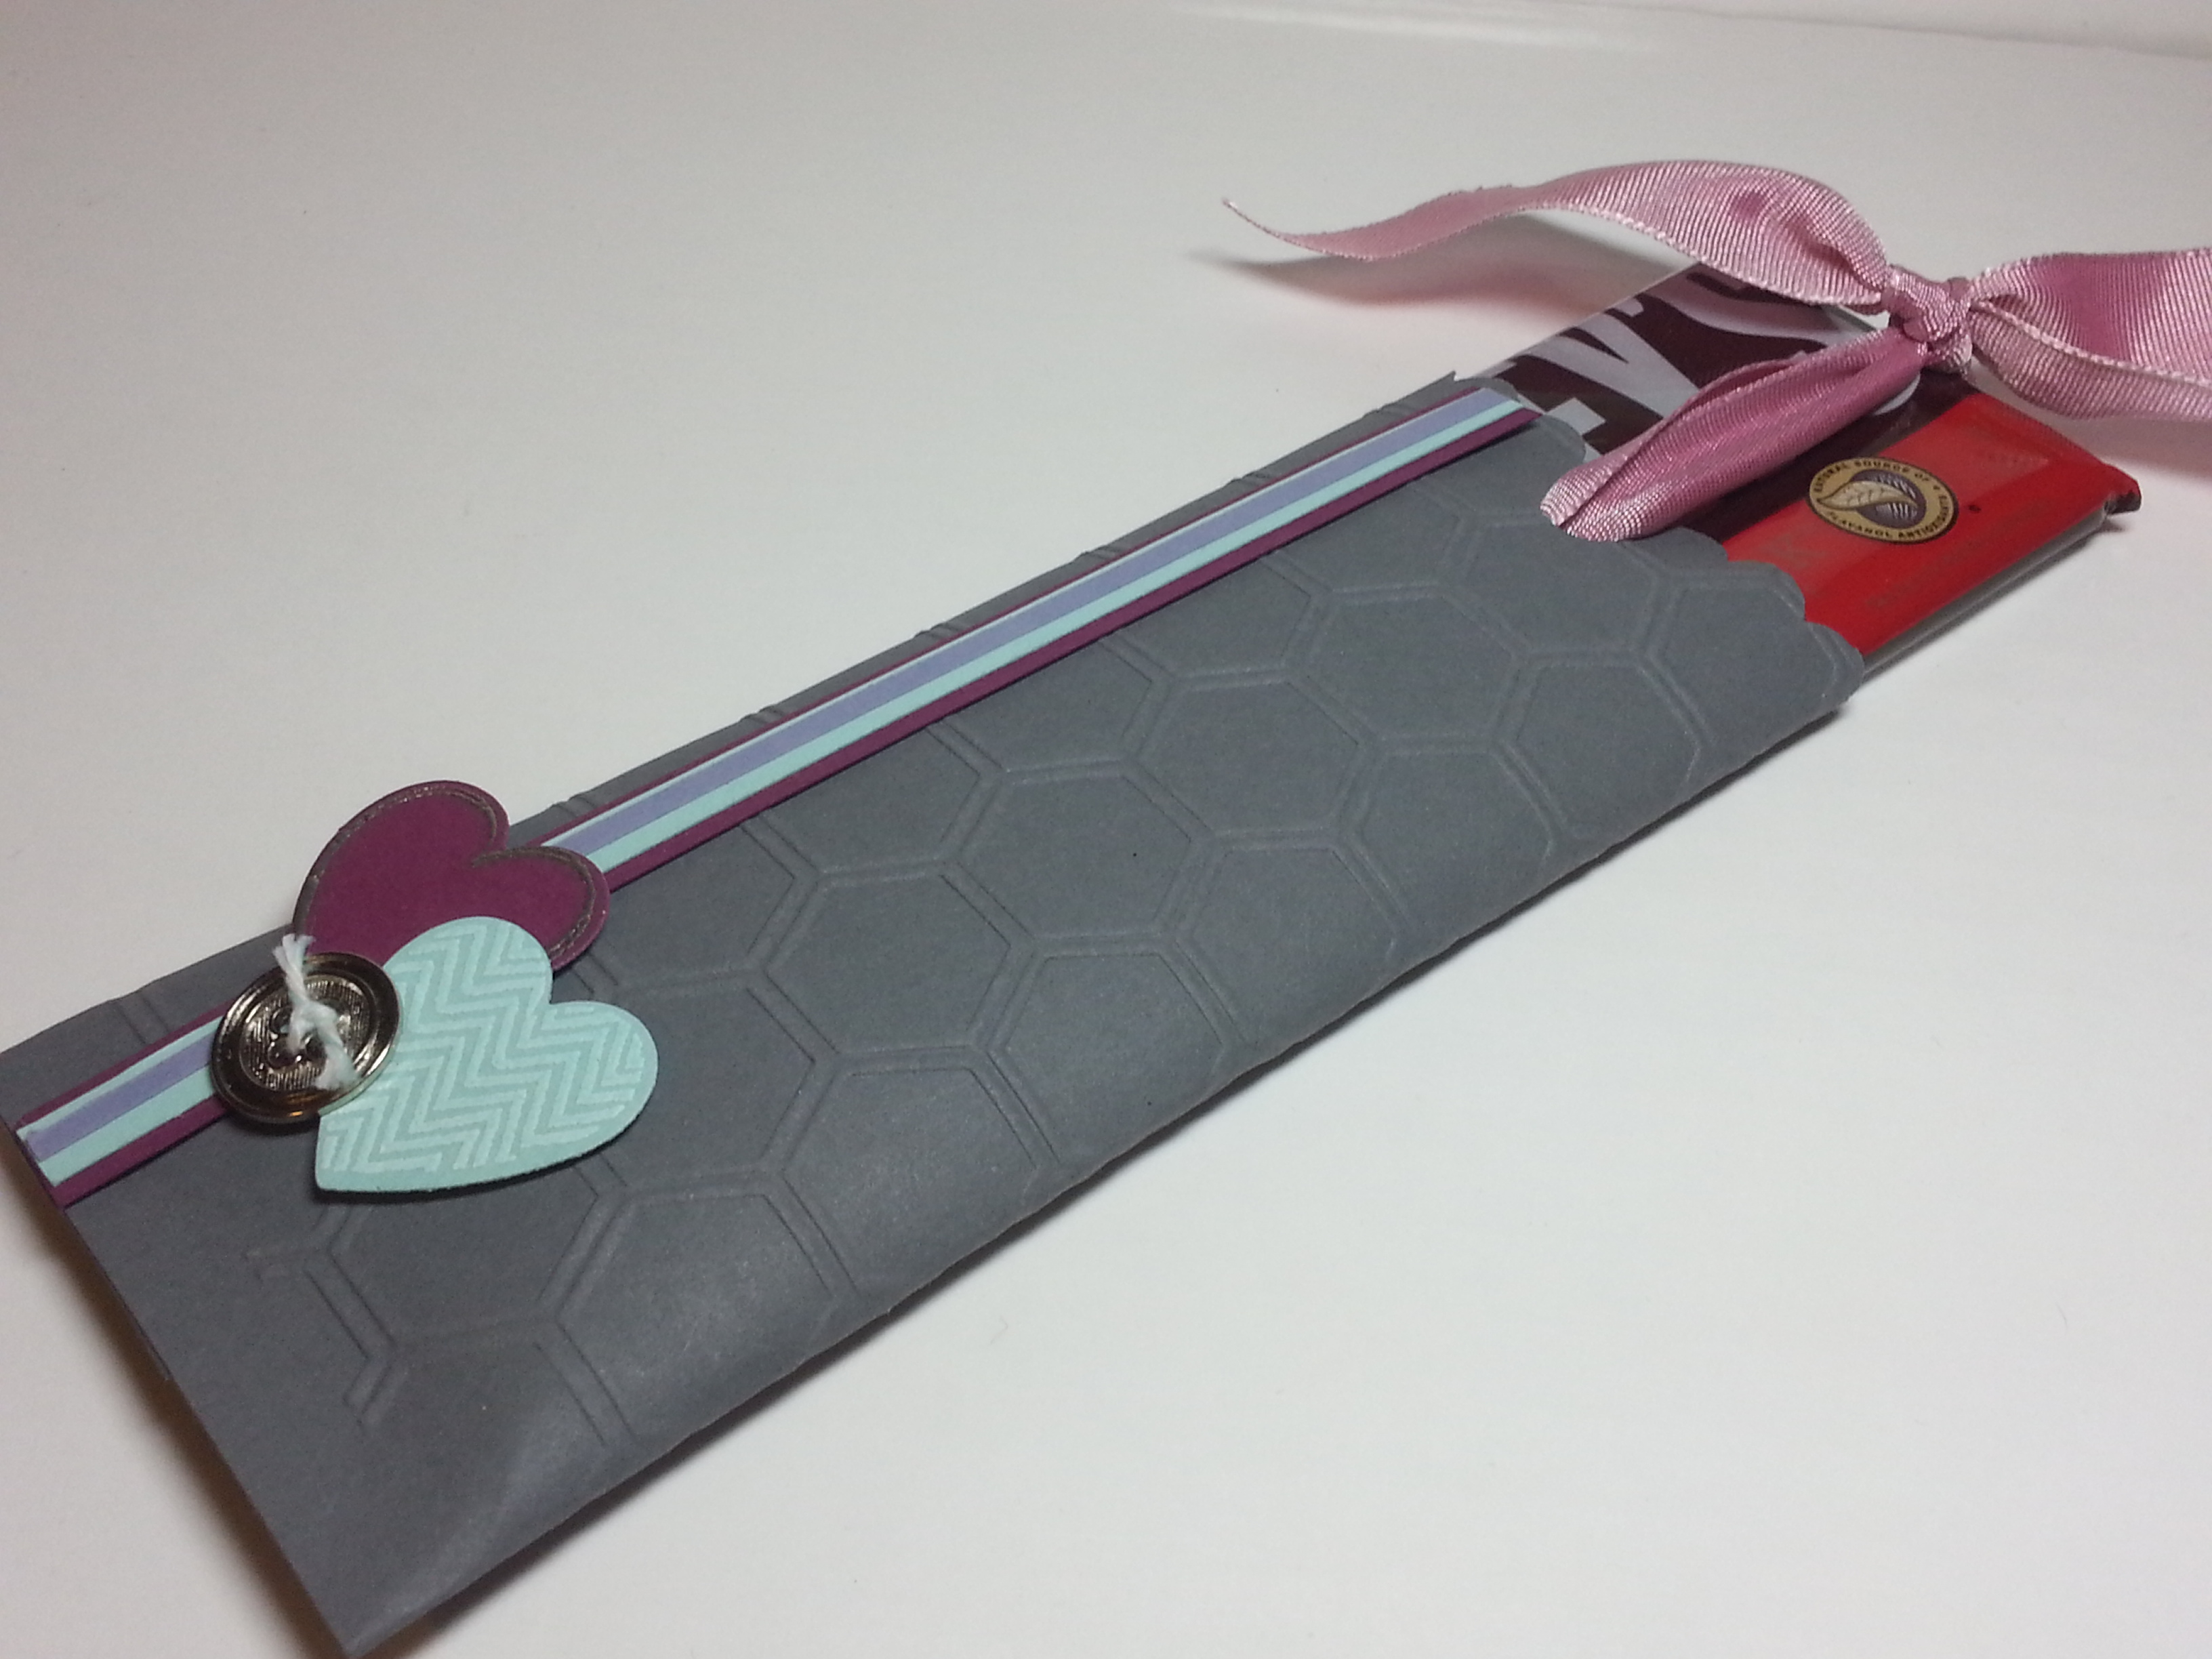
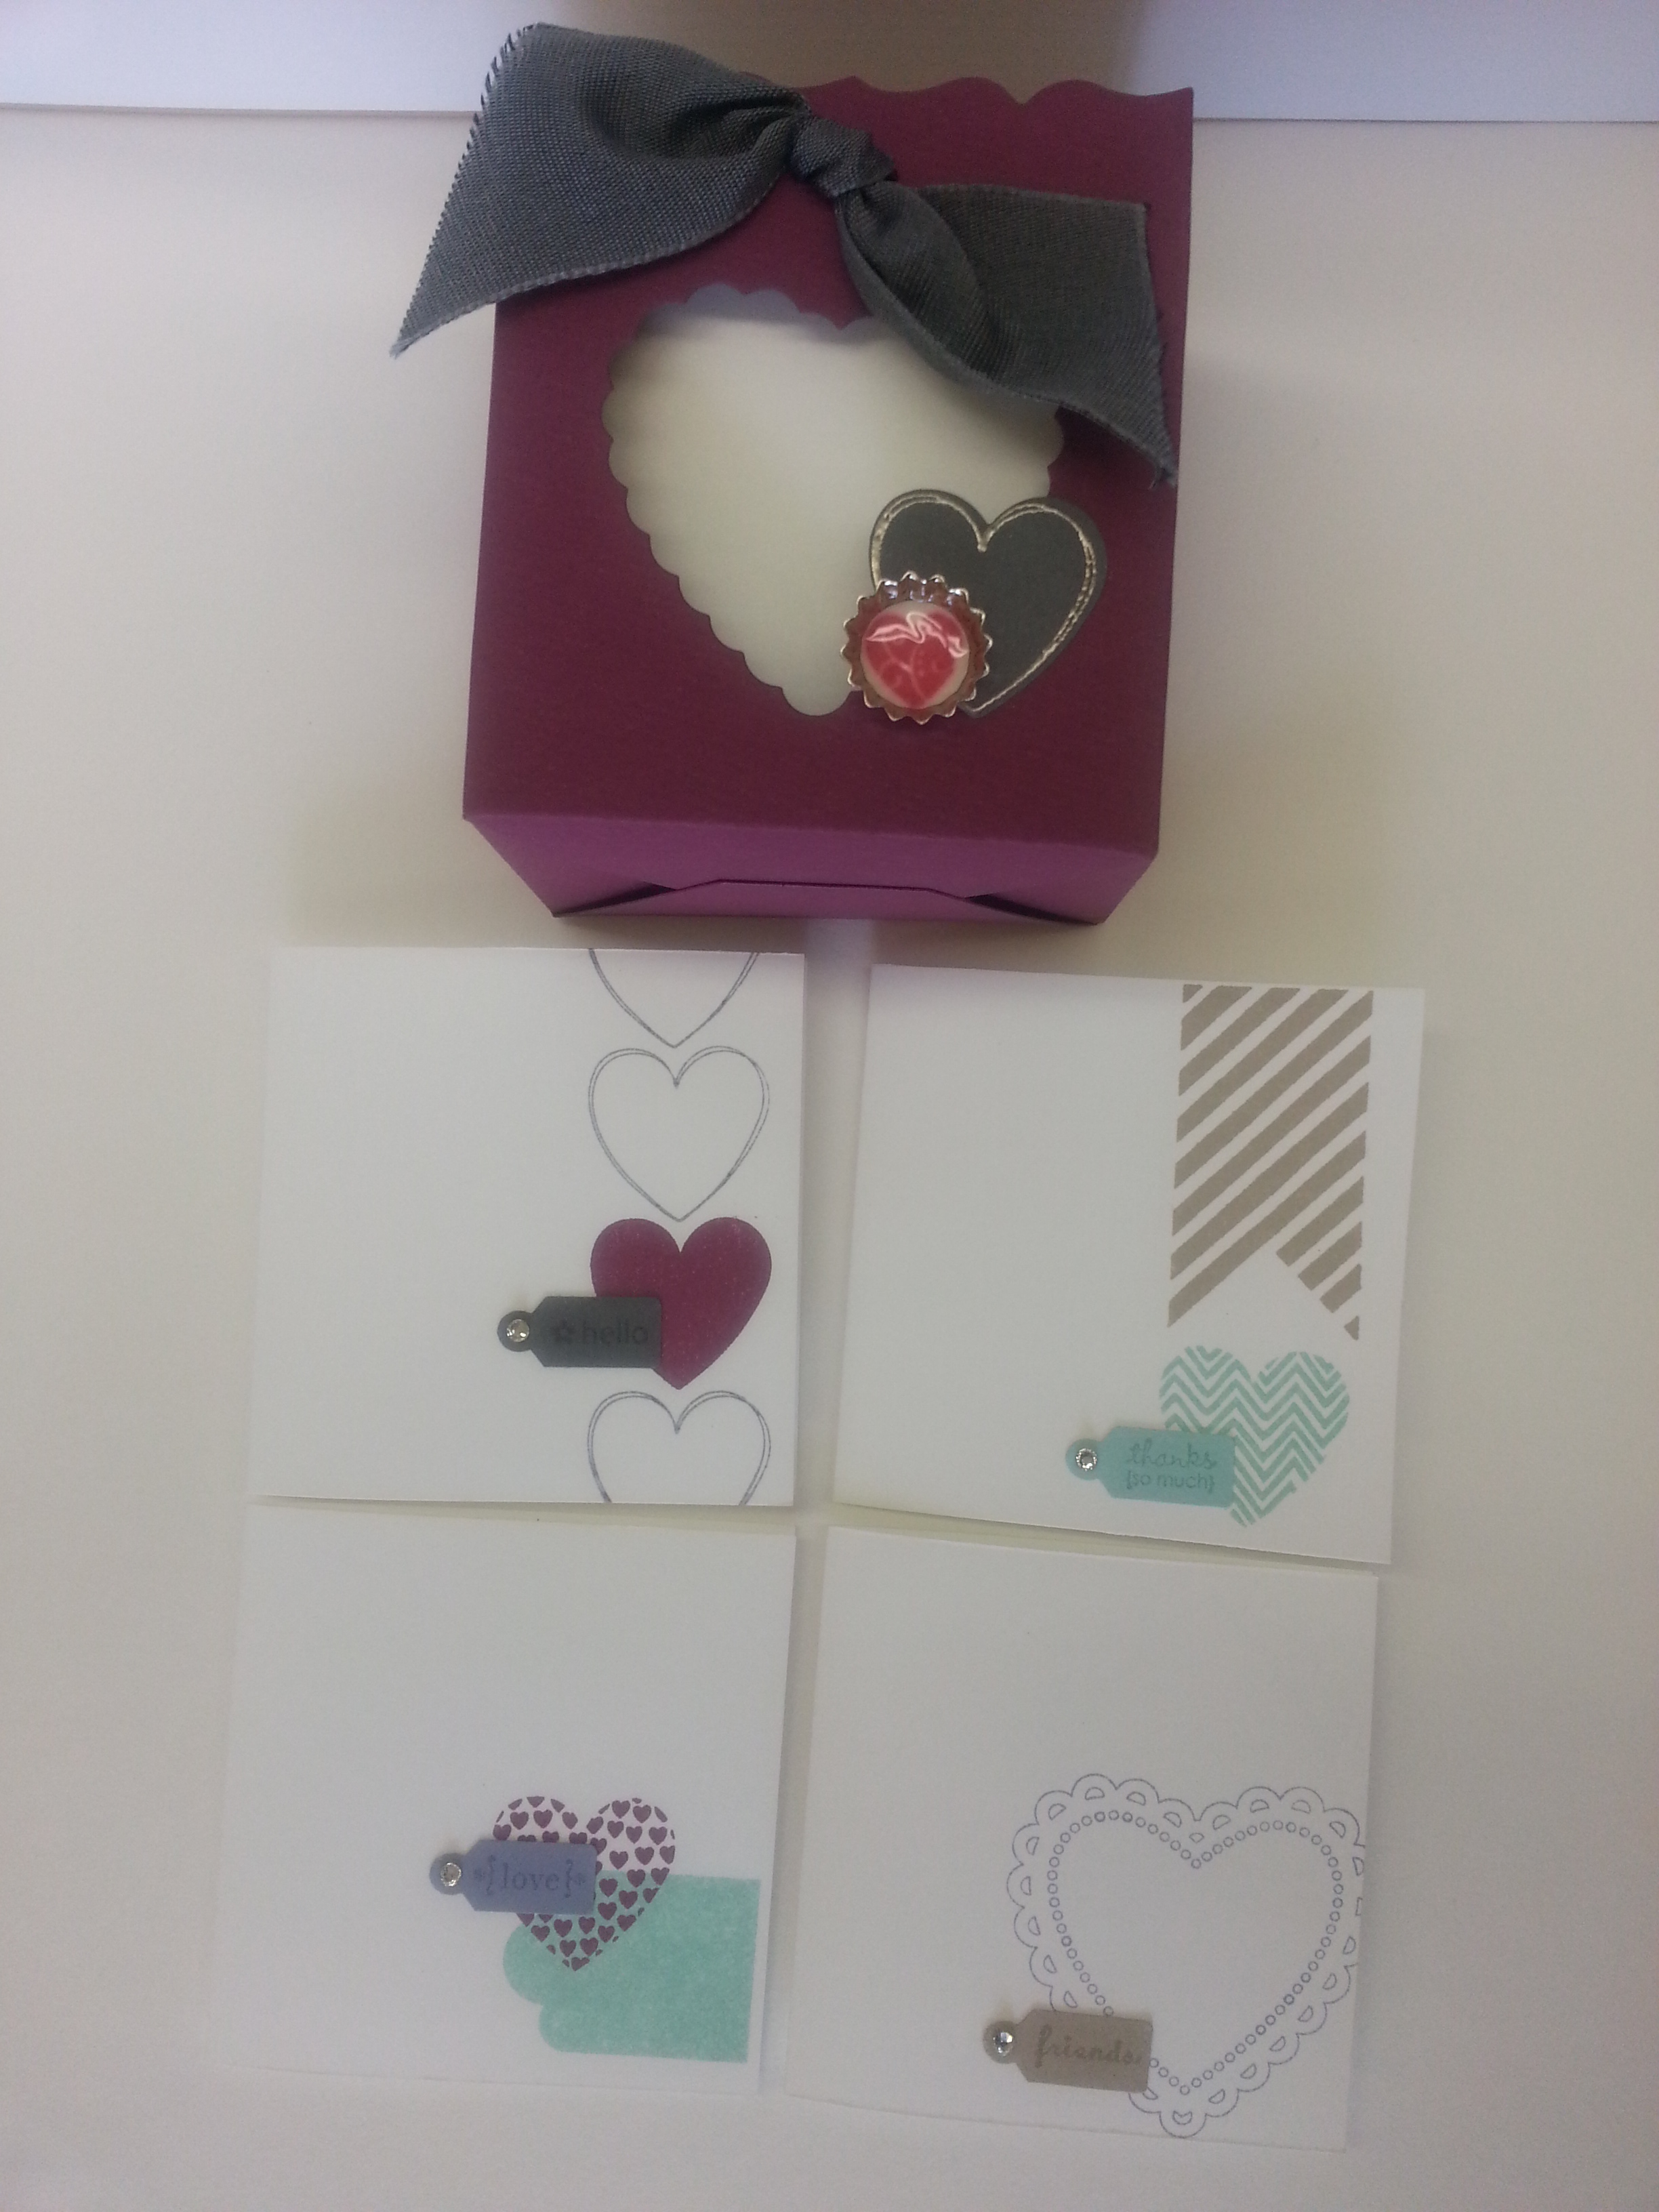
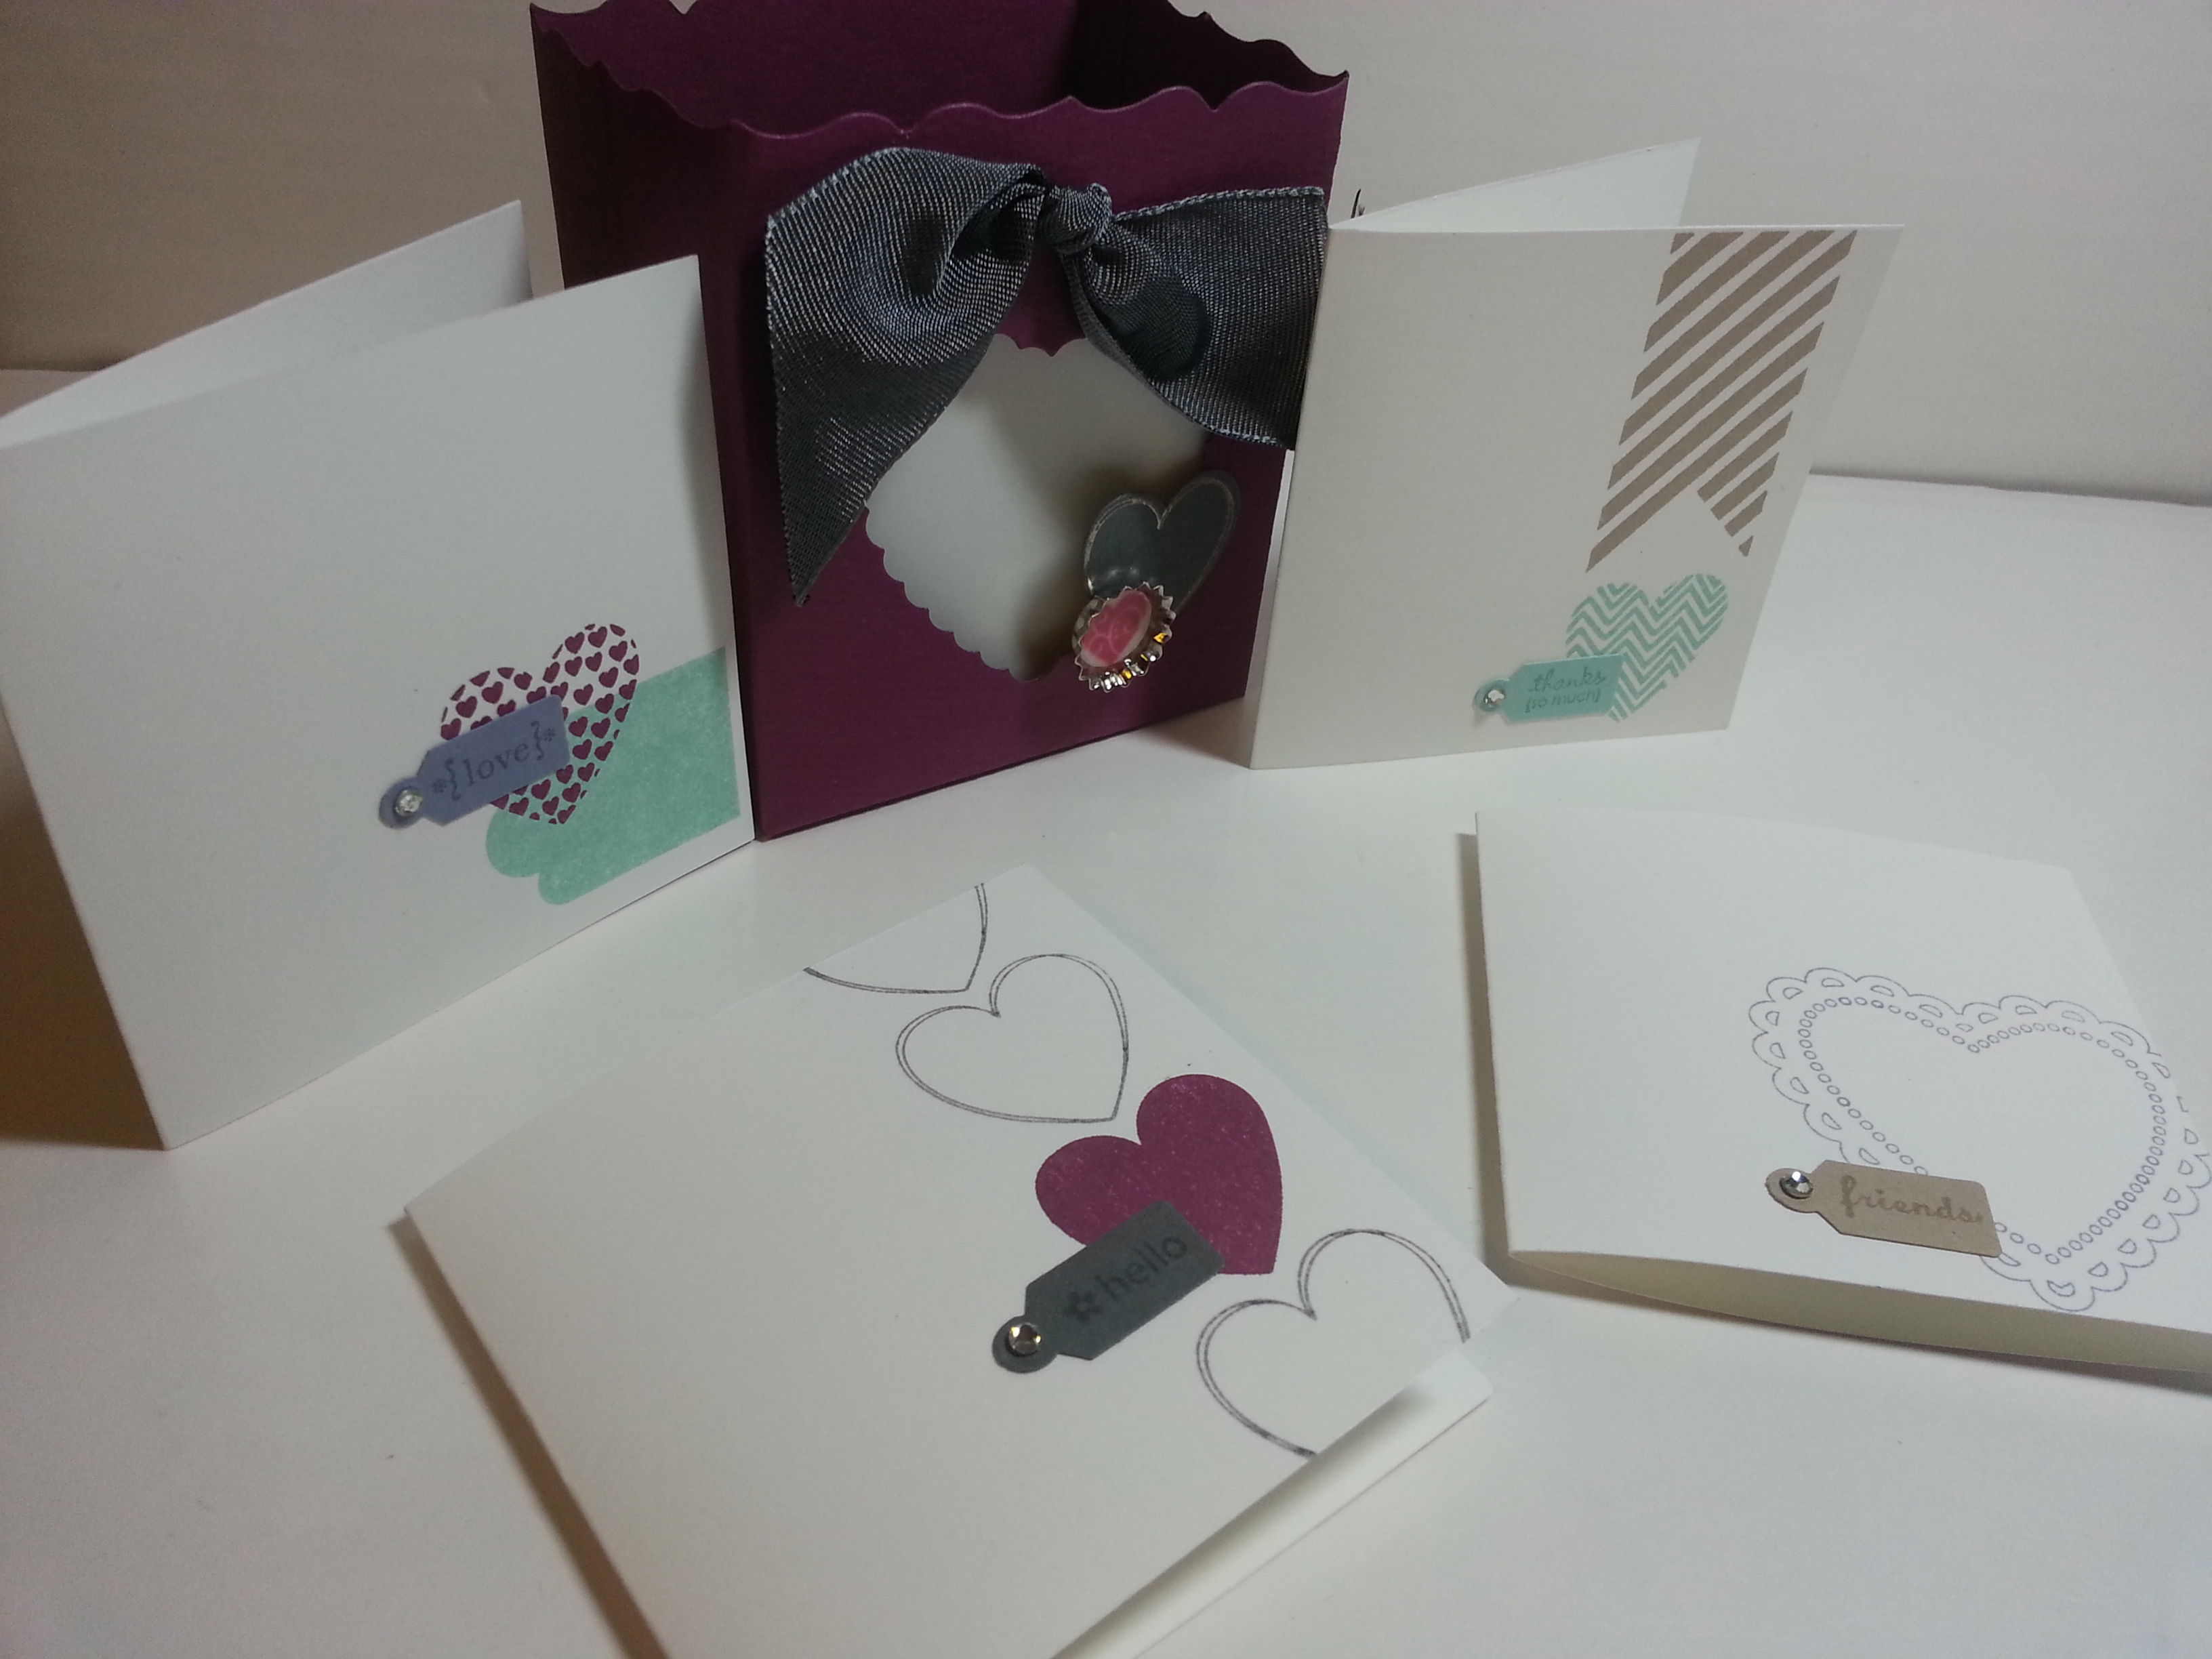
This one is a little treat holder I made with the gift card enclosures.  Super fun…  SUPER fast!!  You can make up a pile of these in no time and pass out to friends and co-workers for Valentine’s!!

image

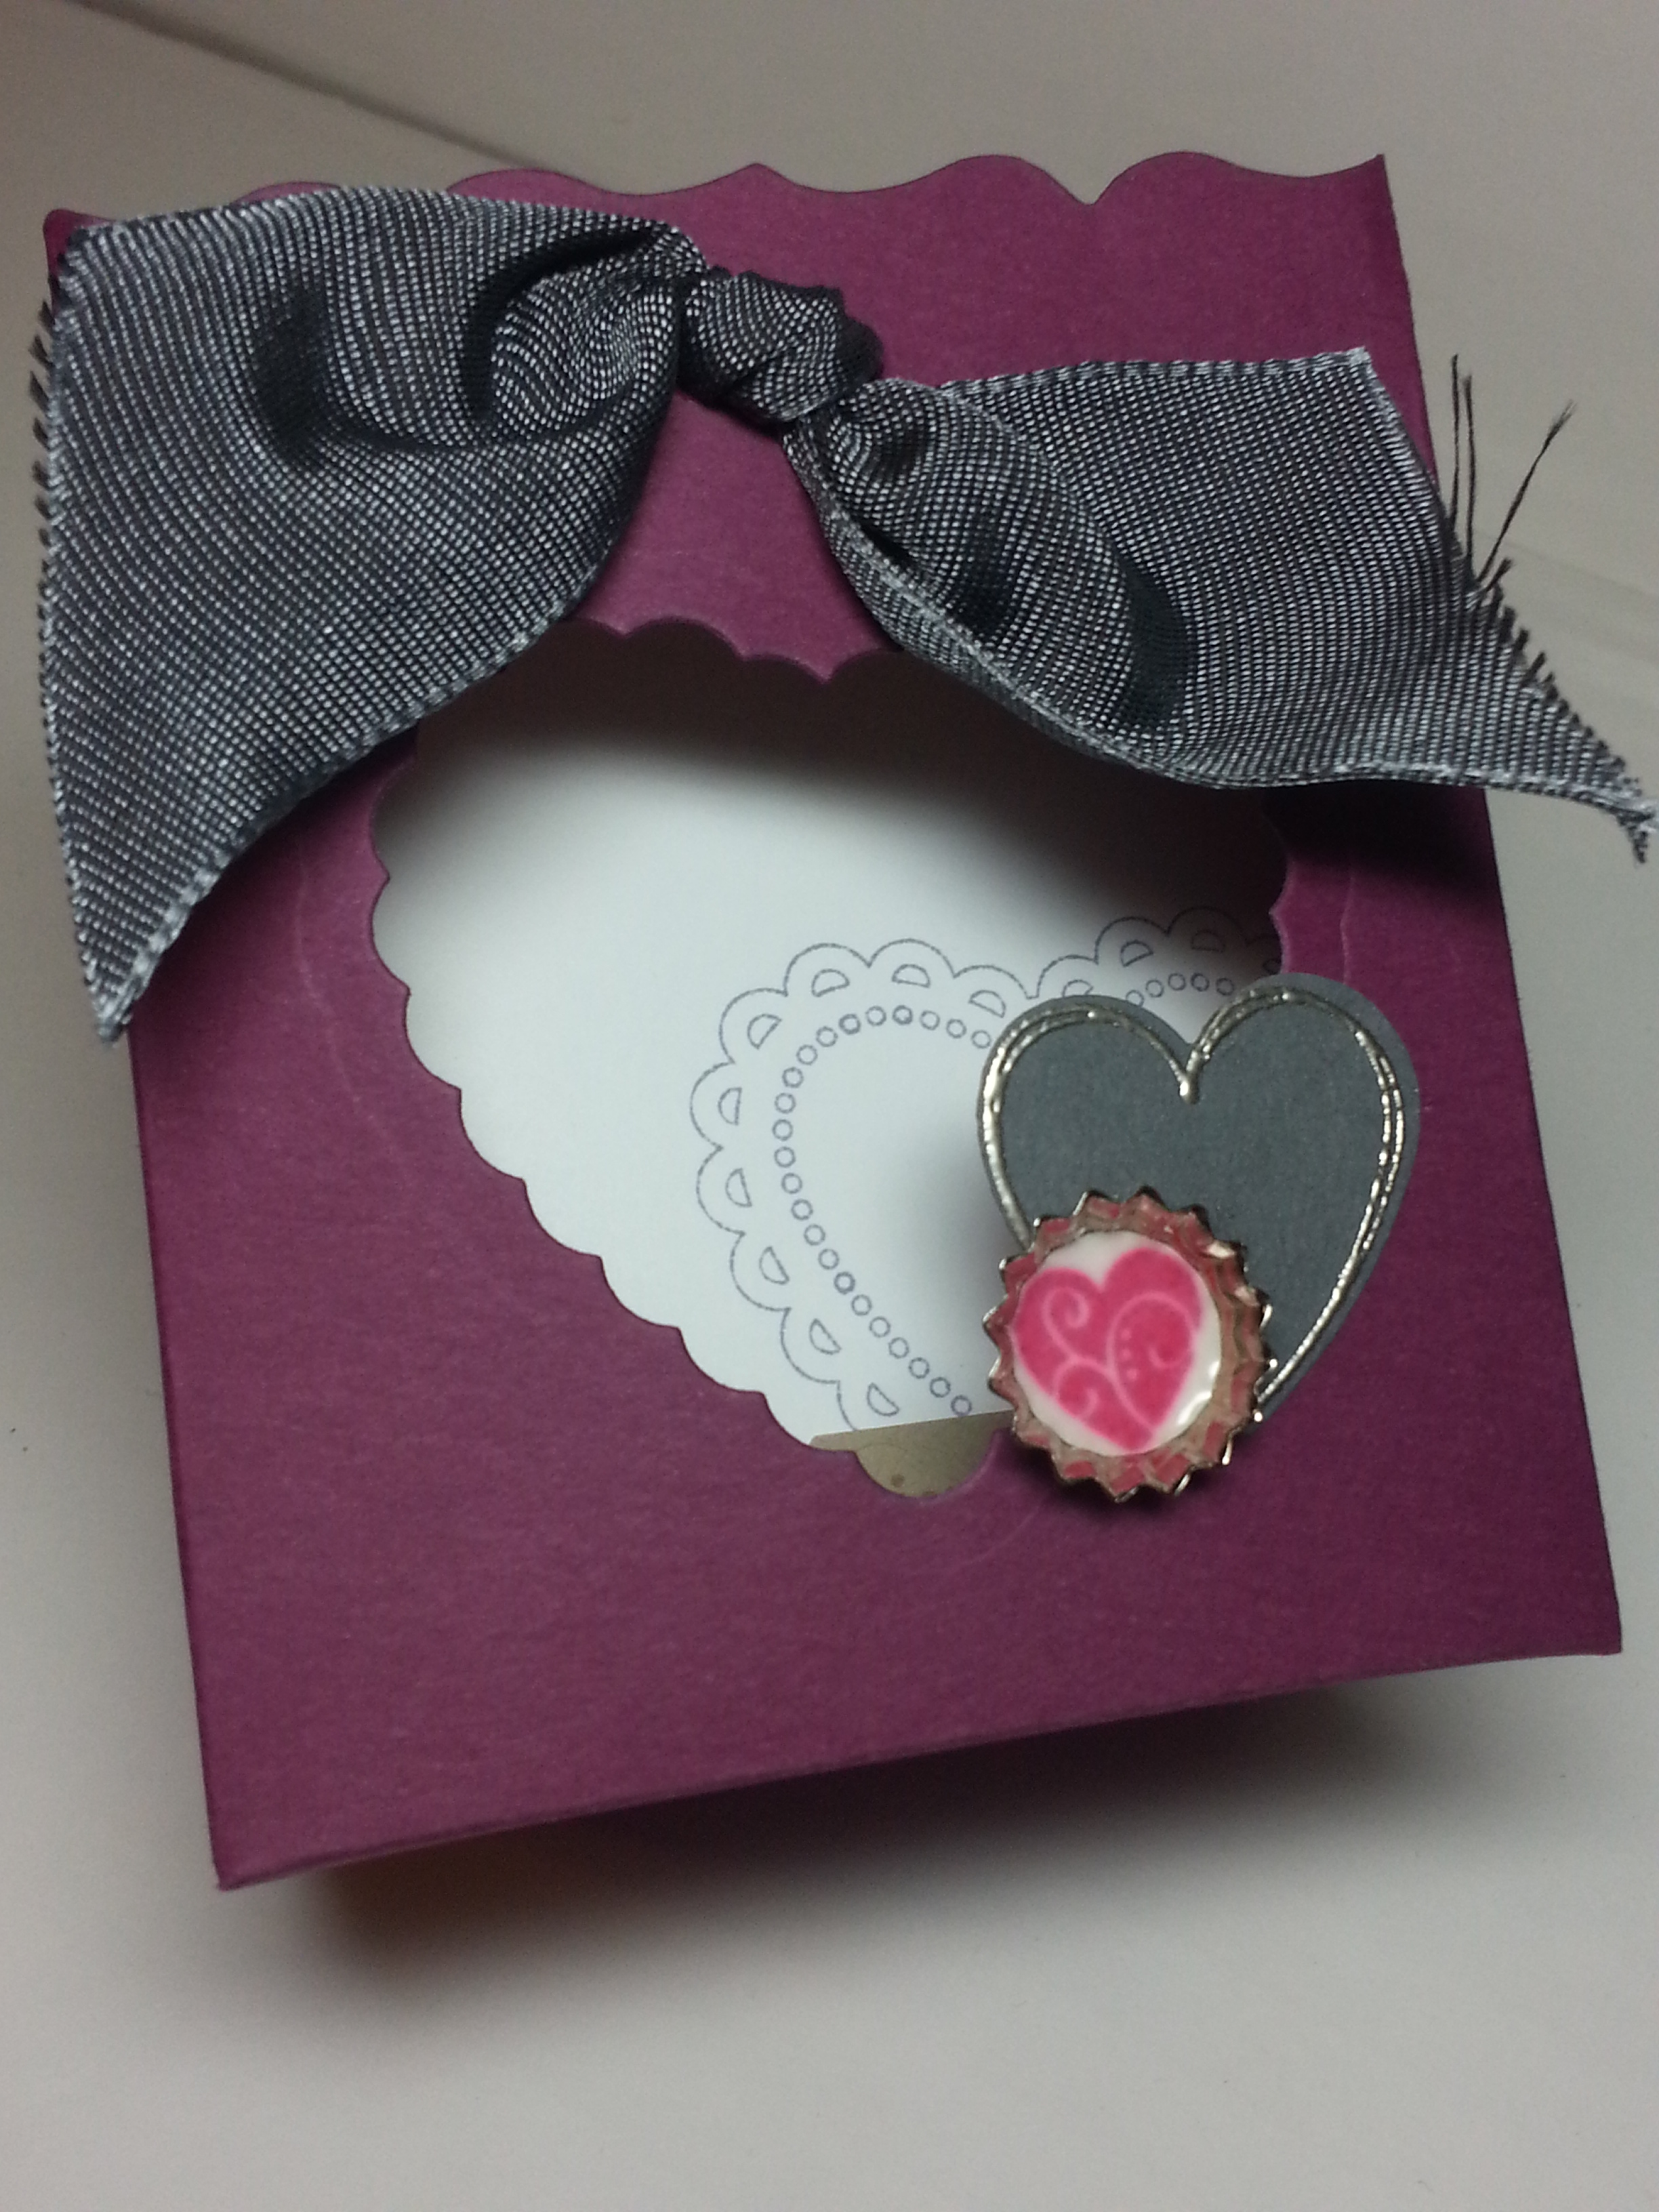
And, here is a card.  Notice the heart.  Again.  I think that poor little framelit got quite the work out….

wpid-20150124_191735.jpg

This is from the ‘Hello LIfe’ stamp set in the Occasions catalog…  and that paper, is the DSP called ‘Typset”.  It’s thinner than the usual DSP and makes crafting fun.  It has a different feel but is gorgeous.

Now, on to the questions…

1.  What are you working on?

Huh…  well, I have a pile of mason jar drink cosies that need to be finished.  But, the projects for this post consumed my weekend.  I don’t feel like I ever have enough time for all my projects… the littles take up LOTS of it (The Littles:  Zeke and Hannah, my 9 month old twins).  I have a LIST of things I want to do…which include the Baby’s first year album for said littles, and a project life album.  OH.  Christmas Thank Yous.  I need to get out the Christmas Thank you cards.  Which may be combined into Valentine’s Cards.  Valenmas Cards.  There.

2.  How does your work differ from other’s in your genre?

I like clean and simple.  Honestly, I think I don’t do as much of it as I would like, just because I think it is TOO simple for most of my stamp customers.  And, I’m constantly trying to explore how to use the tools I have in new ways (like the framelits for cutting felt to make some decor items…)  I am currently in LOVE with layering white on top of white (talk about clean and simple)  and deep mats on the layers (getting away from the traditional 1/4″ size difference between layers on cards and doing maybe a .5″ or .75″ mat…I know, pushing the boundaries, but still…)

3.  Why do you create what you do?

The simple answer to this is that I have a need to have it… for example, I made the above items intentionally for this blog hop.  It worked out well, cause I wanted some Valentine’s items to decorate with and that worked out perfectly. But, being honest again, it probably wouldn’t have been made if it weren’t for the deadline of this particular blog hop.  It would have ended up like the Christmas garland I started.  Which is still in a bag in the craft closet, half finished….  So, deadlines seem to necessitate my creations.  I LOVE working with people to make invitations or announcements.  It’s a puzzle, to figure out what someone wants, and to get it done!  And, I love the process, and making people happy with what they get.

4.  How does your creative process work?

Well, it usually starts with me seeing something and going, “HUH.  I CAN MAKE THAT”.  I inherited that from my mother.   She does that too.  And, so do all my sisters.  Sometimes it looks like what I thought, sometimes it doesn’t.  But, there have been LOTS of times when it doesn’t turn out how I originally saw it, but I love how it turned out anyway…  And, being that I live 5000 miles away from my mom and sisters, I’m VERY thankful for MMS so that I can send pics of the projects to ask them questions.  And, to brag when something actually works out…


Thanks for stopping by!!  Thanks to Anne for nominating me!!  Next week, Feb 2, be sure to check out Cindy Fodor  at Stampthelove.com  and Maria Pane at StampinandscrappinwithRiRi.com

And TODAY… go check out Cheryl Hamilton, createwithcheryl.wordpress.com and Andi Potler at absolutekreations.com


With a dig…dig…diggy… VALENTINE!!

Standard

OOH Today is Valentine’s Day!!

Now, the day hasn’t really made THAT big of an impression on me… but it’s fun when I have a good idea.  And, I like my idea for this year.  If I do say so myself.  Thought of it myself.  Well… most of it.

So, when Isaac was born, people would tell me “He’s ALL boy”.  And, I never really understood exactly what that meant.  Especially I grew up in a FAMILY of girls.  Three sisters.  My husband has TWO sisters.  Then Isaac comes, and as a baby, people are telling me he is a boy.  Duh.  But, as he has been growing…  it’s hitting me like a slap on the forehead.  And on his head (he just got 5 stitches on his eyebrow after a very boyish crash involving a chair, exercise ball… and apparently a mommy who needs to be more careful when she is sweeping… So the BOY says.

ANYWAY… This is what Isaac’s Valentines’ are gonna be:

20130213_215648


It’s a CUP of DIRT AND WORMS!!  Nah, just a cup of crushed graham crackers and gummy worms.  And, I made these tags:

20130213_215457


This comes from the I DIG YOU stamp set.  I markered them, stamped, and cut out.  Used the tiny brads to put on the wheels and then put them on the large tag from the two tags die.  This was cut from the early espresso core’dinations paper, embossed and sanded (sorry… paper isn’t available anymore.  email SU… to tell them they need to re-release it.)  I found these tiny shovels on amazon to add to the tag.  (Isaac LOVES shovels).

20130213_222025


This is the finished product.  Put lids on the dirt cups and tied in a bag.  I LOVE the new Natural Trim ribbon (Spring Occasions Catalog).  It has the look and weave of burlap but is a lot softer and easy to use.

Here is the mess of them:

20130213_222058


This is what inspired the diggy valentine…

20130126_115243

The stamp set is a MUST have for all proud BOY families.

And, being we have family all over the country, I had to make a valentine to send away.  This is what the family on the mainland got:  (I created it in My Digital Studio).  It doesn’t have a diggy theme, but was too cute to pass up…

valentine-001


and back:

valentine-002


Well….  Hope you have a wonderful VALENTINE’s DAY!!  And, I can’t help but thinking about the biggest, best valentine of all…

For GOD so LOVED the world that HE GAVE his only son that whoever believes in him should not perish but have everlasting life.   John 3:16.


And, check back on SUNDAY for the Stampin’ UP 25th Anniversary Stamp Set Blog tour!!

blogtour-25years

My Heart is Fluttering!!

Standard

Hello!!  And Welcome to the 3rd posting of the Remarkables Blog Tour!!  I hope you are enjoying this… I sure am.

So, Today is about Valentine’s.  Or any other event you’d need LOTS of hearts.  I have to admit.  I first saw this stamp set and didn’t give it a second look.  I have heart stamps.  But, then when I actually PLAYED with it, I fell in love.  And, here’s why:  It’s got matching Framelits.  AND, the heart is the same size in but with different stamps.  I like that I can have the same size of image in many different ways.

And, I am a teacher, so I had Christmas Vacation to play a lot with this set.  It has quickly become a favorite of mine from the Occasions Mini.

Needed a little of inspiration, I took to pinterest to find a color challenge.  This one was a fun one… Rich Razzleberry, Pool Party, Basic Gray, Wisteria Wonder, Whisper White.  I gotta say, Pinterest is the creative jump-start…    And here is what I came up with.  I kind of wanted to do a SUITE of different things… for all the different people you need a little gifty for on Valentine’s Day.

Oh…  and because Heart’s A Flutter is wordless, it works for a lot of different things.  But, I wanted SOME words… so in the samples you see below, all words are from the Tiny Tags Stamp Set.  Nope, I lied.. .Tiny Tags and Pretty Petites (a Sale-A-Bration Sneak Peek…)

20130111_125644

Here we have something for everyone…

First off, is the Valentine’s Card for the Husband (friend, lover, whomever…it’s pretty generic… and you can change the sentiment)

20130106_205350

My favorite, absolute FAVORITE item from the mini is the honeycomb Textured Impressions Embossing Folder (TEIF)

Next we have the gift to our BESTEST FRIEND… (who always appreciates a good hug–both the human and chocolate variety)… The Up-cycled Starbucks Frappachino Bottle filled with a Hershey’s Hugs.

20130111_130453

Then we  have the PERFECT gift for the teachers (and, cause I am a teacher, I can speak from experience)  The Hershey Bar Slider…

20130106_205450

Here is a picture of the bar with it partially open:  (notice that it is HERSHEY DARK)

20130106_205522

And here is the package without the chocolate, so you can see how to put it together.  Punch a hole in the TOP LAYER ONLY of your pocket (and to make the pocket, I just cut card stock a little longer and wider for it to wrap completely around a chocolate bar…or WHATEVER… but this teacher likes chocolate… dark chocolate).  Thread ribbon through it and around a chocolate bar, and tie.  There… It will slide in and out… And BTW… I lied again. The Two Toned Ribbon may be my favorite item.  Well… I CAN’T DECIDE ON A FAVORITE.

Let’s see…where does that leave us…  OH, the little card box.  This is good for your sister, mom, friend, or that person in your life who ALWAYS encourages others.  Cause there are 4 little note cards and mini envelopes that they will just LOVE giving away to people…

20130106_205828

This is a close up of the front of the box.  I used the framelits heart to cut out the heart shape and the new soda caps with crystal effects to add that little detail…  These look great packaged in our gusset cello bags!!

Here is a close up of the contents:

20130111_130210

And next we have the little post-it easel.  These are GREAT for the co-workers. Fast and EASY to make and they are very cost effective as they don’t use a WHOLE pad of post-its.  It will brighten ANYONE’s day on Valentine’s.

20130106_205408

Here it is from the top, closed (mostly…)

20130106_205436

On this, I got out that honeycomb TIEF again!!  And, used the Pool Party Co’ordinations paper.  LOVE IT TOO.  And, I’m getting back into embossing.  I can’t figure out why I didn’t enjoy it.  I always thought I didn’t like it.  But, the SU embossing power melts so smooth… and FAST.  And, the redesigned heat tool (new to this catalog year) WHISPERS compared to the others… (I think I was afraid to emboss cause I’d wake the kid…)  Anyway…

Here is the image of the stamp set…  and if you think you wanna make these Valentine’s, you better get your product ordered.  You have exactly ONE MONTH!!  🙂  And, Hey, Stamp Club Members:  Leave a comment for which project you’d like to make at club this month!!  I can’t decide… I love them all…

129252L

Next Blog in the RemARKable Stamp of the Month Blog Tour

Private Classes!! and Hearts A Flutter Preview

Standard

Hello!!

I wanted to take this time to share a new idea I’m trying to implement… the idea of a private class.  What is this exactly? Well, I’m glad you asked.  A private class takes the pressure out of ‘hosting’ an SU event.  Here is how it goes:

You invite the people (and if you need a space. talk to me) and we will make a pre-determined project.  This month, it is the Heart’s A Flutter Mini Love Note Box (see photo below).  Everyone pays $5 to make the project.  End of story.  That way, this includes the people who just like to ‘hang out’ but aren’t stampers.  It is a fun, enjoyable time and we get to craft together.  Now, should people decide they need to place an order, because they had SO MUCH FUN, they can have their class fee refunded (if they place at least a $30 order).  AND, as the host of the private class, you would get to collect the hostess benefits.

And, in addition to the super generous hostess benefits that SU has, here is what I’m going to offer:

  • Handmade or Digitally designed gift by me
  • If 10 guests come, you can receive a free pack of bakers twine (you choose color)
  • If you collect $100 in outside orders, you will receive a free embossing powder
  • For every private ‘class’ scheduled off of yours, you will receive afree stamp pad (purchased at the booked class)

So… Here is the private class project that will be offered this month (until Feb 14).  Contact me to set up your Private Class.  And, as added incentive, January 22 is the start of Sale-A-Bration. This gives every guest who places a $50 order their choice of FREE product.  It’s the best promotion SU does ALL YEAR.  (and, there are incentives for hostesses as well)

Image

These adorable little love notes (they don’t HAVE to be used for Valentines) would you have you ready to go for the holiday.  They would also make good GIFTS for the holiday… packaged in our gusset cello bags!!  This project uses the Hearts A Flutter Stamp Set.  (Which, you need to come back here on January 13 to see a blog tour featuring this set)

Here is a close up of the box, which uses our new SODA CAPS:

Image

I just love them!!  And, with stamp inside and some Crystal Effects, it makes a really nice ‘epoxy’ type embellishment.  And, that new two-toned ribbon…. words cannot describe how wonderful it is…

Image

Supplies:

  • Hearts A Flutter Stamp Set
  • Hearts A Flutter Framelits Dies (this is sold individually or as a bundle with the stamps)
  • Rich Razzleberry Card Stock and Ink
  • Whisper White Card Stock
  • Mini Square Envelopes
  • Wisteria Wonder Card Stock and Ink
  • Pool Party Card Stock and Ink
  • Basic Gray Card Stock and Ink
  • Crumb Cake Card Stock and Ink
  • Rhinestone Basic Jewels
  • Pewter Embossing Powder
  • Heat Gun
  • Versa Mark Ink Pad
  • Jewelry Tag Punch
  • Tiny Tags Stamp Set
  • Basic Gray/Basic Black 1 1/4″ Satin Ribbon
  • Crystal Effects
  • Fancy Favor Box Die


And, don’t forget about January 13!!

blogtour-stampmonth-Jan

Remarkable Stamp of the Month Blog Tour: Affection Collection

Standard

Hello Again!

Thanks for stopping by on our blog tour for this month…  As you probably know, the chosen stamp set is Affection Collection (item 127949 for clear and #127946 for wood).  It’s found in the Holiday Catalog.

This set is one I probably wouldn’t have looked at in a catalog and chosen.  We got it for convention, and then it was chosen for the blog tour.  Which is nice, cause it is causing me to take a second look at thinks that I originally passed over.

20121208_143527

I had fun making this card.  I kind of had Valentine’s in mind, but it would work great for a wedding, anniversary…  OR, you could substitiute the Love stamp for the Friend Stamp and it could be a multipurpose card!!  I am starting to enjoy doing the layering, shabby-chic, grunge…whatever it’s called (that is what I’m calling the layering of images onto the newsprint paper).  And, I love the pink pirouette paper…adds just the right amount of femininity   (Here is a trick I use… I use pink pirouette paper with pretty in pink ink… I find that the pink pirouette ink is often too light for what I need, but the pretty in pink paper too dark… so this is a good compromise.  And, another trick I read on someone’s blog… sorry I cannot remember where…  Coloring the pearls.  I used the Silver Stampin’ Dazzle Marker (#128978) and also available in gold…  to color the pearls.  This is a very nice technique… when the white pear is too stark for what you want.  And, it adds a little unexpectedness to the image.  Here’s a close up:

20121208_143645

Anyway, here is a list of the items I used:

  • Affection Collection Stamp Set (item 127949 for clear and #127946 for wood)– Holiday Catalog
  • Card Stock:  Crumb Cake, Early Espresso, Pink Pirouette, Very Vanilla
  • DSP:  Newsprint
  • Ink:  Crumb Cake, Early Espresso, Pretty in Pink
  • Accessories:  Pearls, Silver Stampin’ Dazzle Marker, Vanilla Seam Binding, Window Frames Framelits Dies, Wide Oval Punch, Scallop Oval Punch, Stampin Dimensionals, Adorning Edgelits, Sponge Dauber

Affection Collection Clear-Mount Stamp Set

Thanks for stopping!!  Enjoy your Tour!!

Next Blog in the RemARKable Stamp of the Month Blog Tour