Category Archives: Stamp Of the Month

A Little Christmas Bling

Standard
A Little Christmas Bling

So, if you are like me, you always wait till the last minute to remember to WRAP the Christmas gifts.  And, I must confess…. for Isaac’s first Christmas, I thought I was brilliant in hiding his gifts in his closet (cause he could’t see the top) and totally forgot to get them out before he went to sleep on Christmas Eve.  Not one of my better mothering moments.  But, thankfully, as it was his first Christmas, it took him like 2 weeks to open all his gifts.  Just cause it was overwhelming.  But anyway…

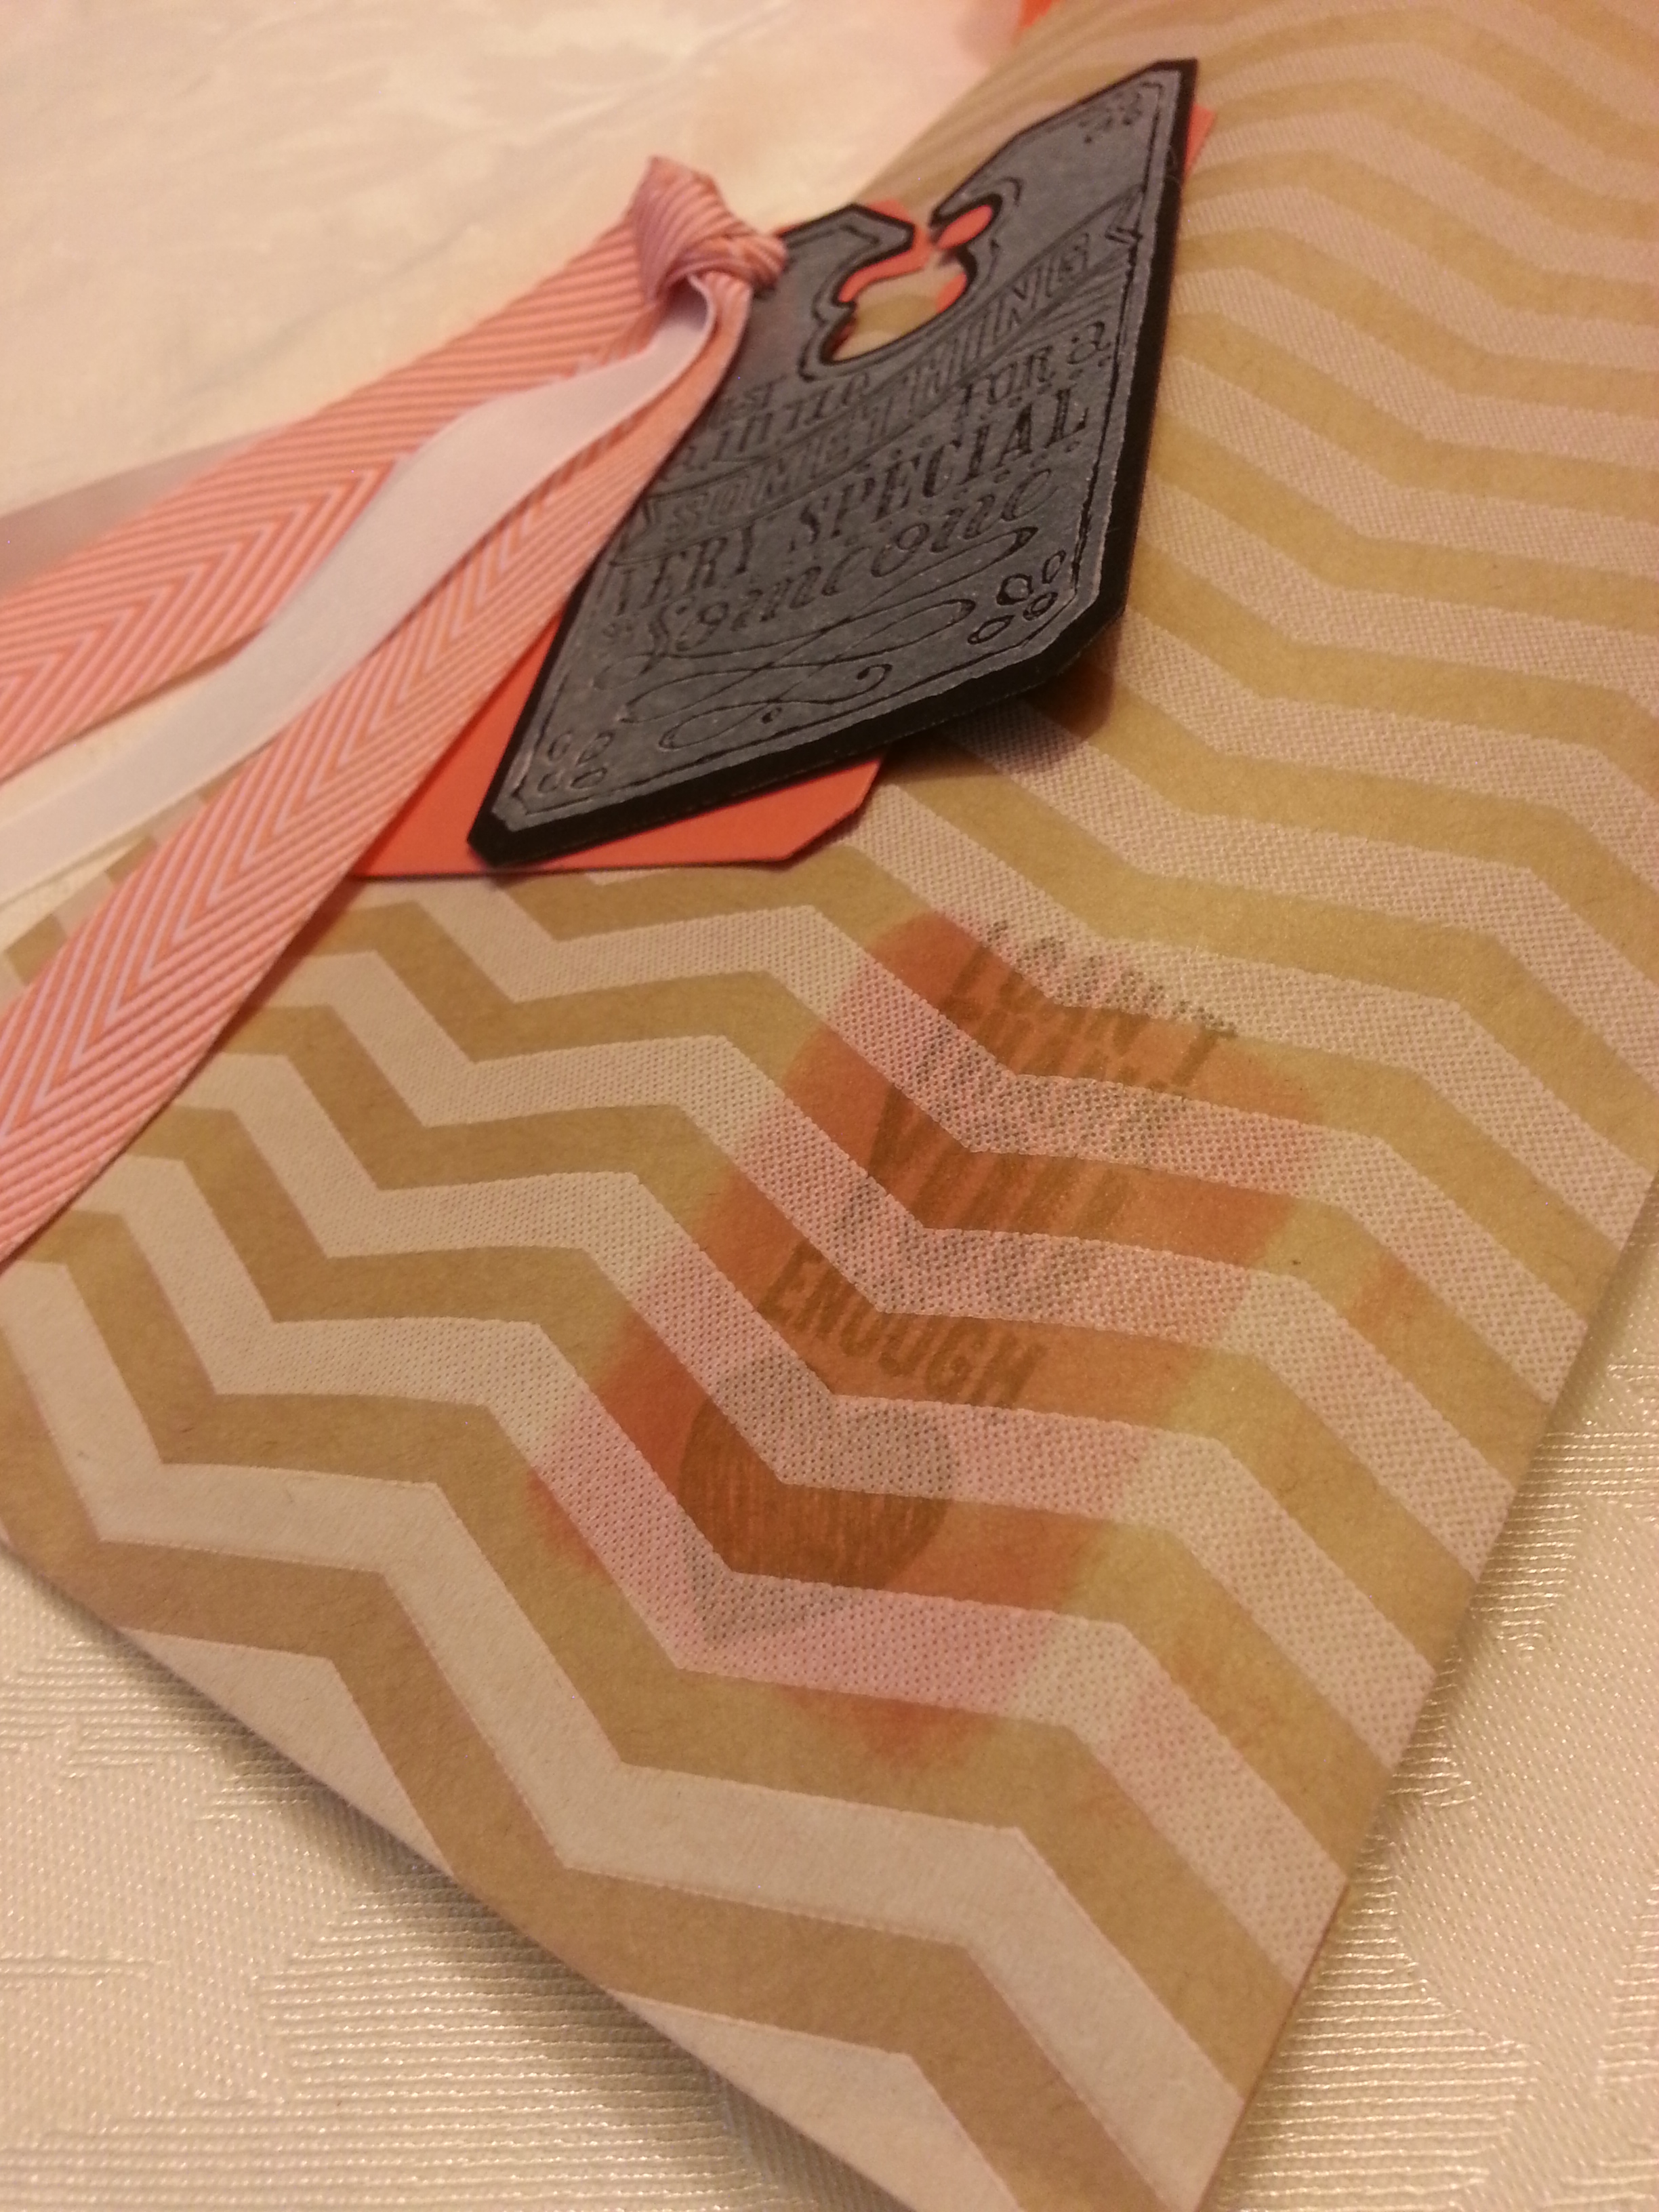
I digress…  I was talking about waiting till the last minute.  And, when you wait till the last minute, you get the gift wrapped, and suddenly remember you need a TAG to go with the brilliantly wrapped gift.  And, that daunting task becomes overwhelming so you settle for those free stick-on to/from tags that the credit card company sends you and there you go.  Except such a wonderful gift with exquisite wrapping should not be degraded by a free to/from sticker.

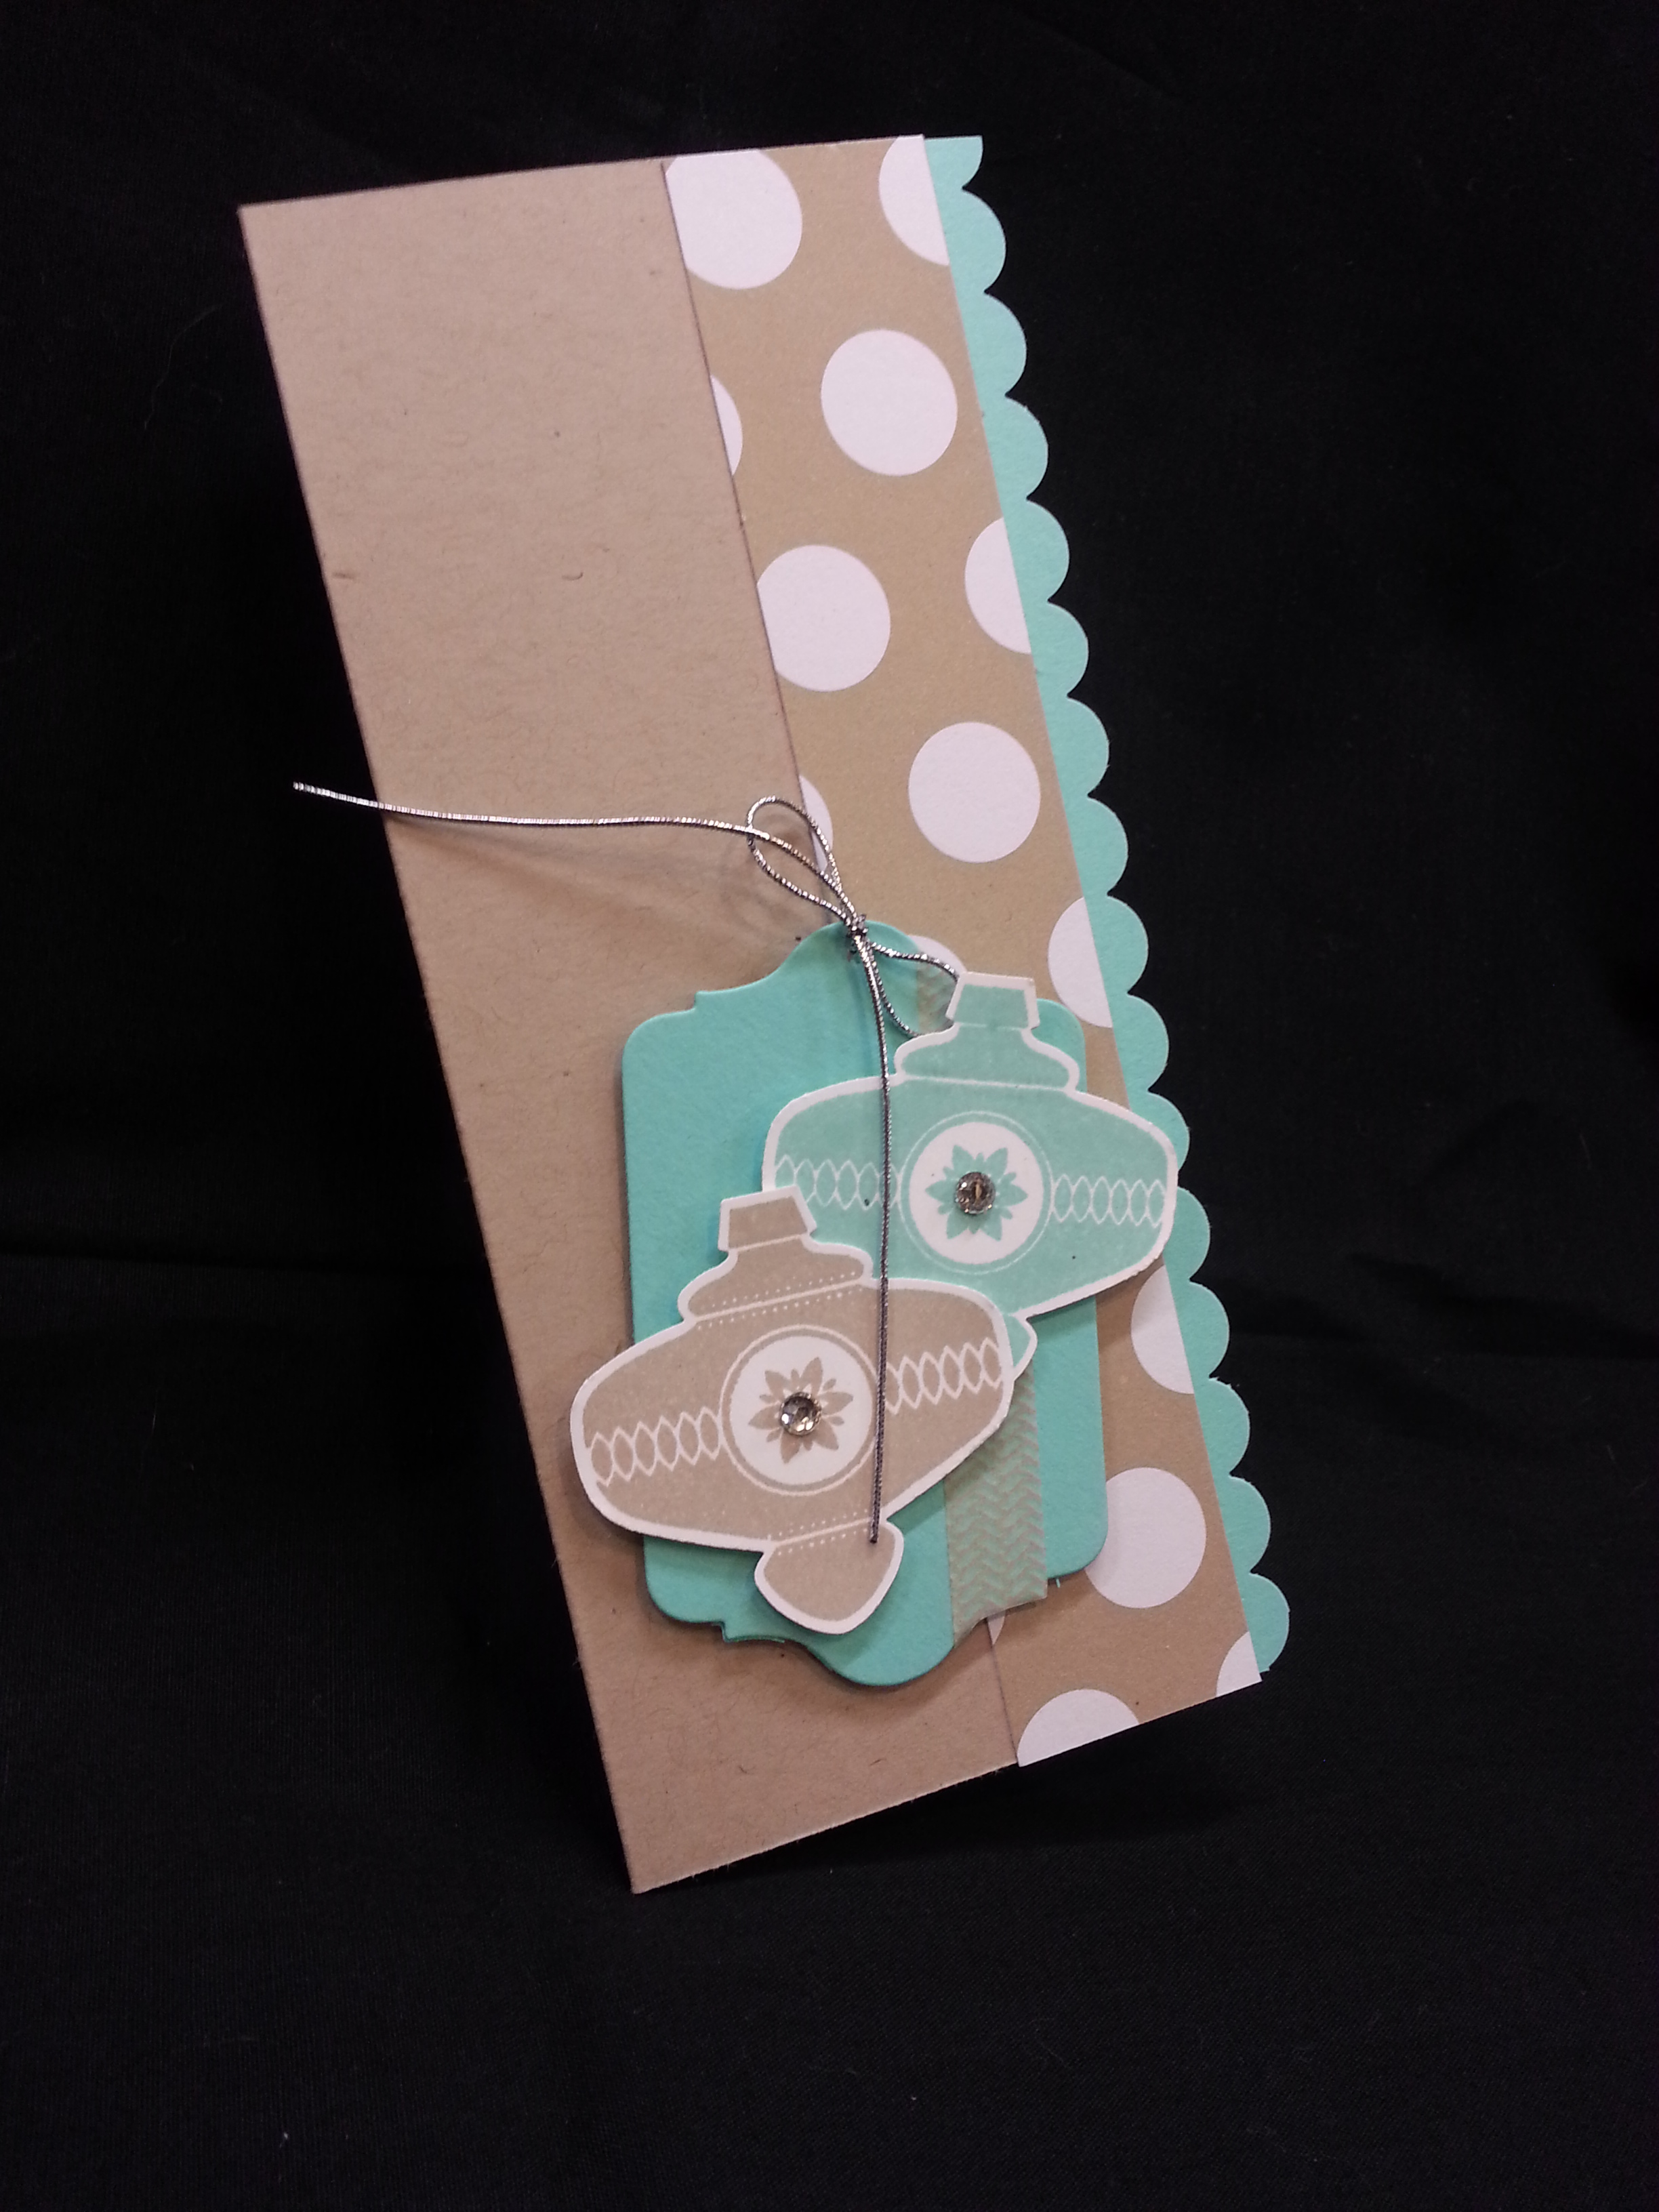
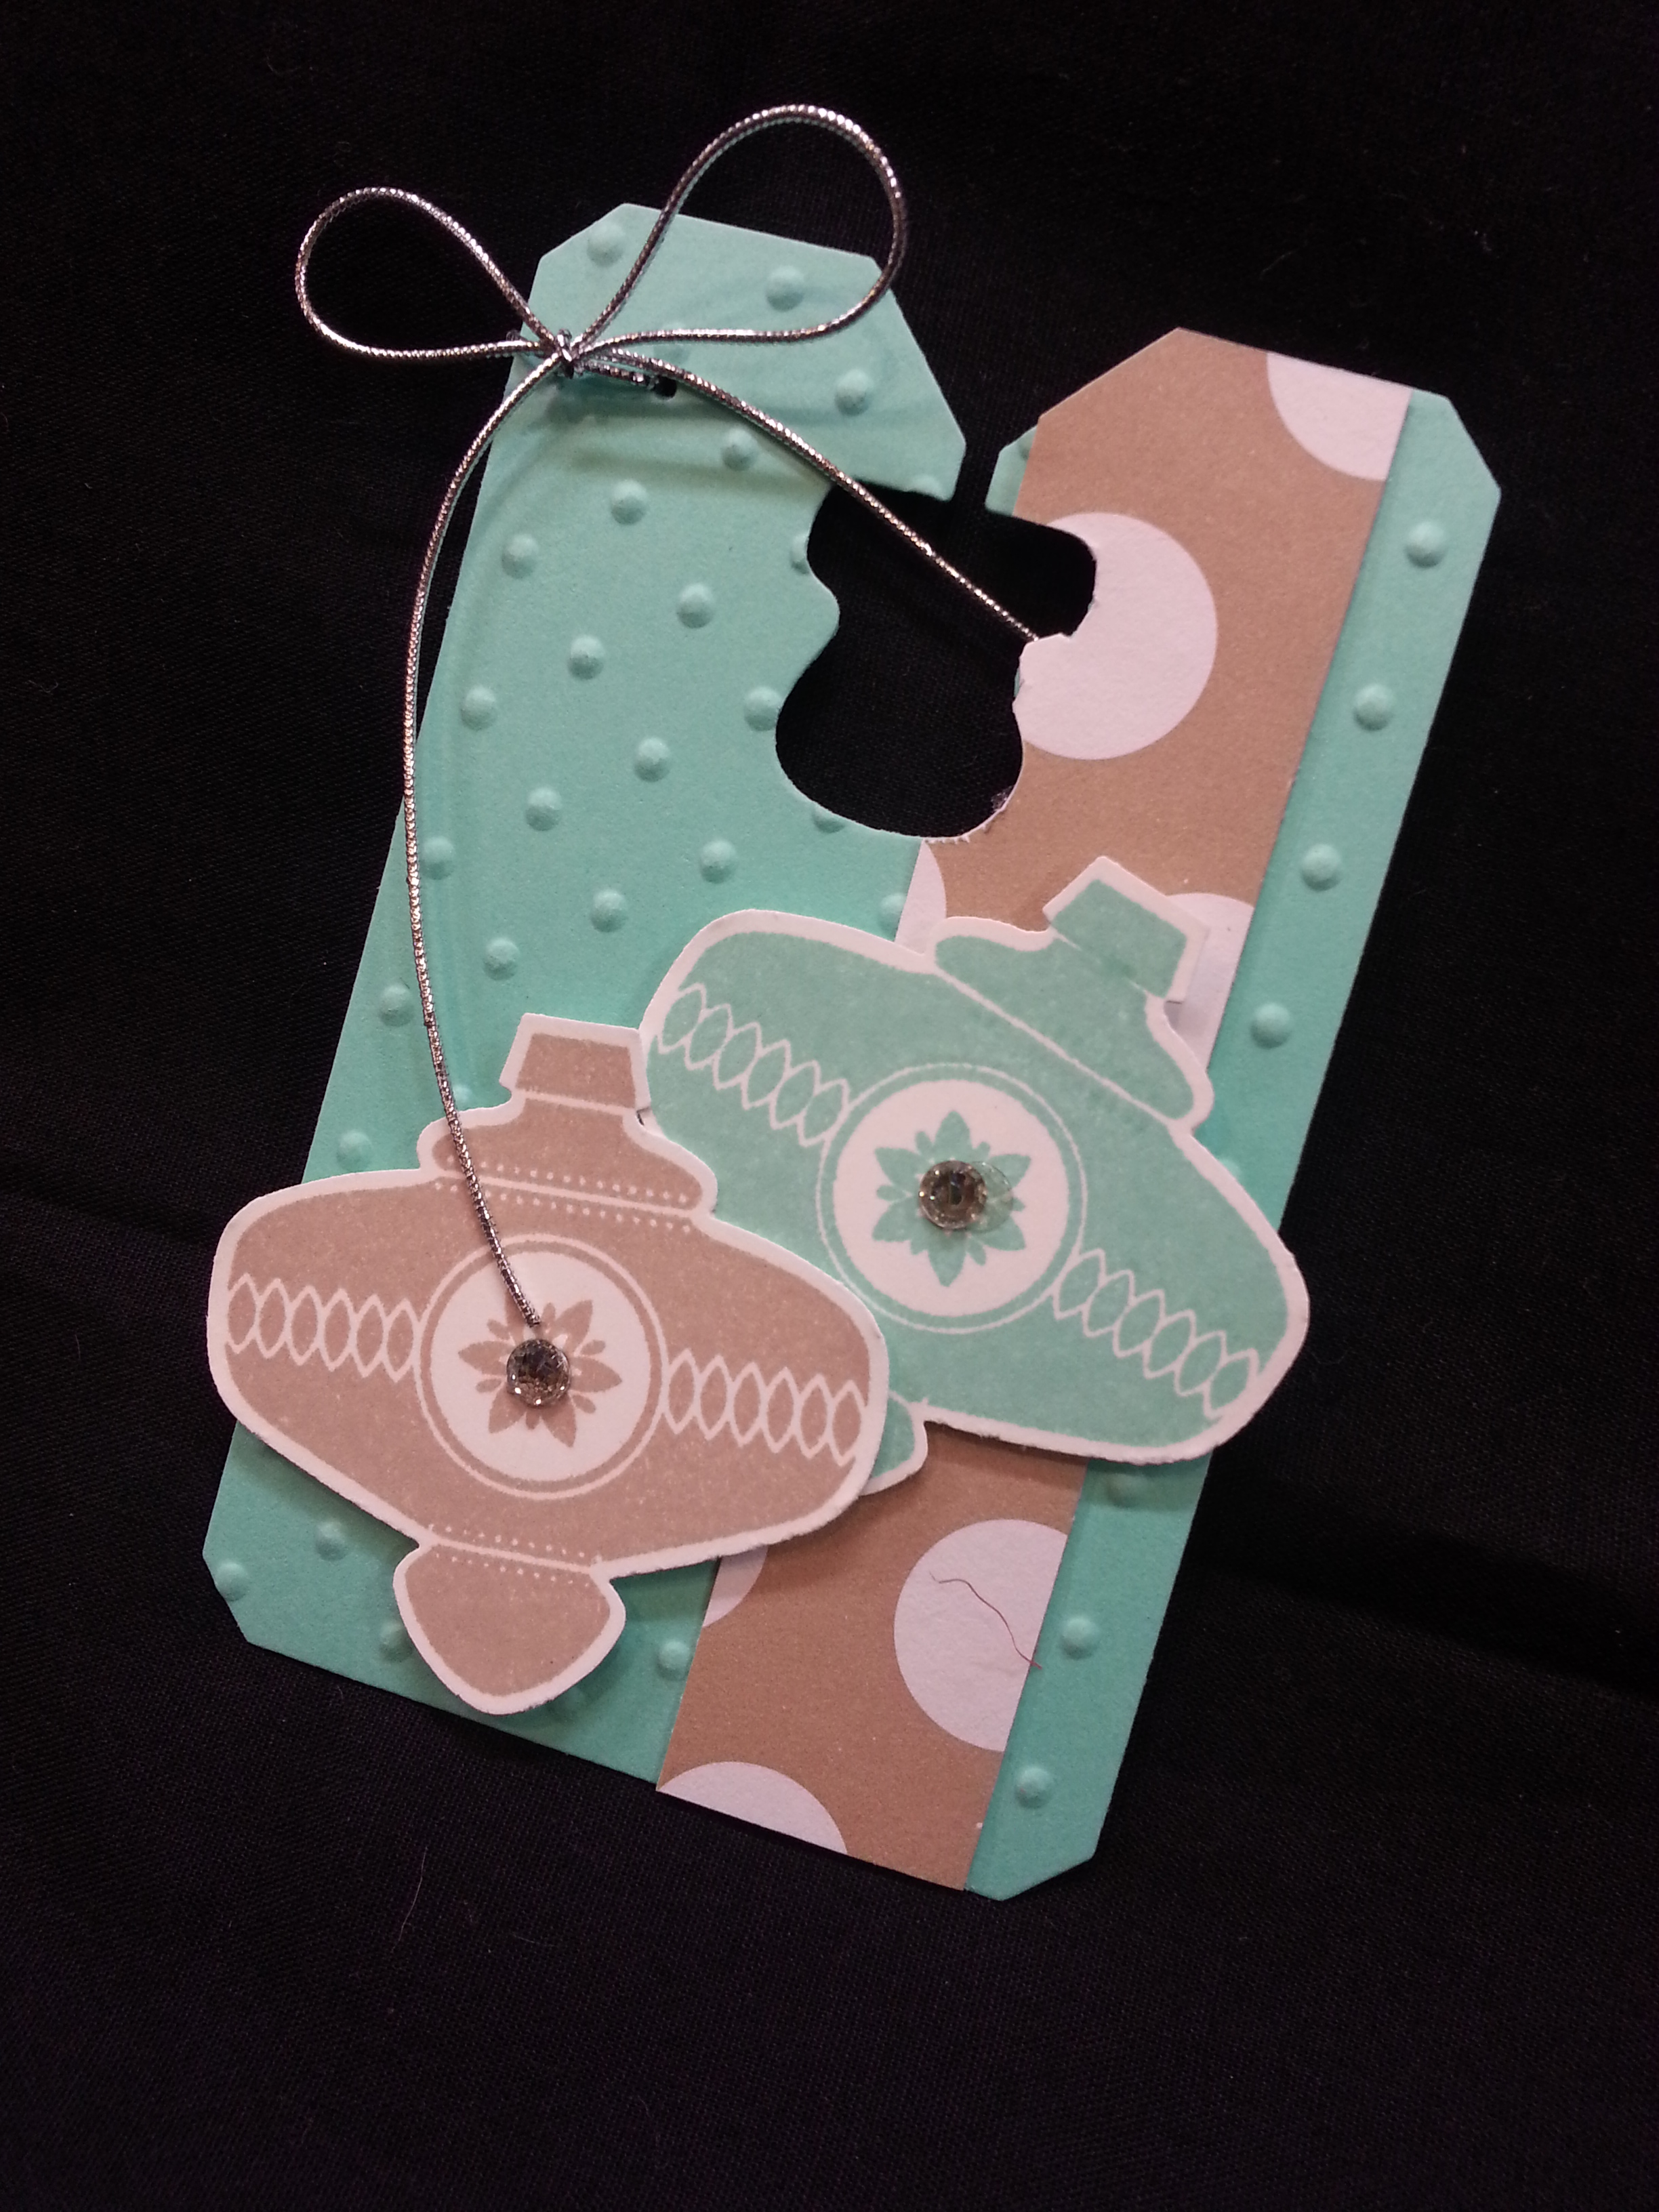
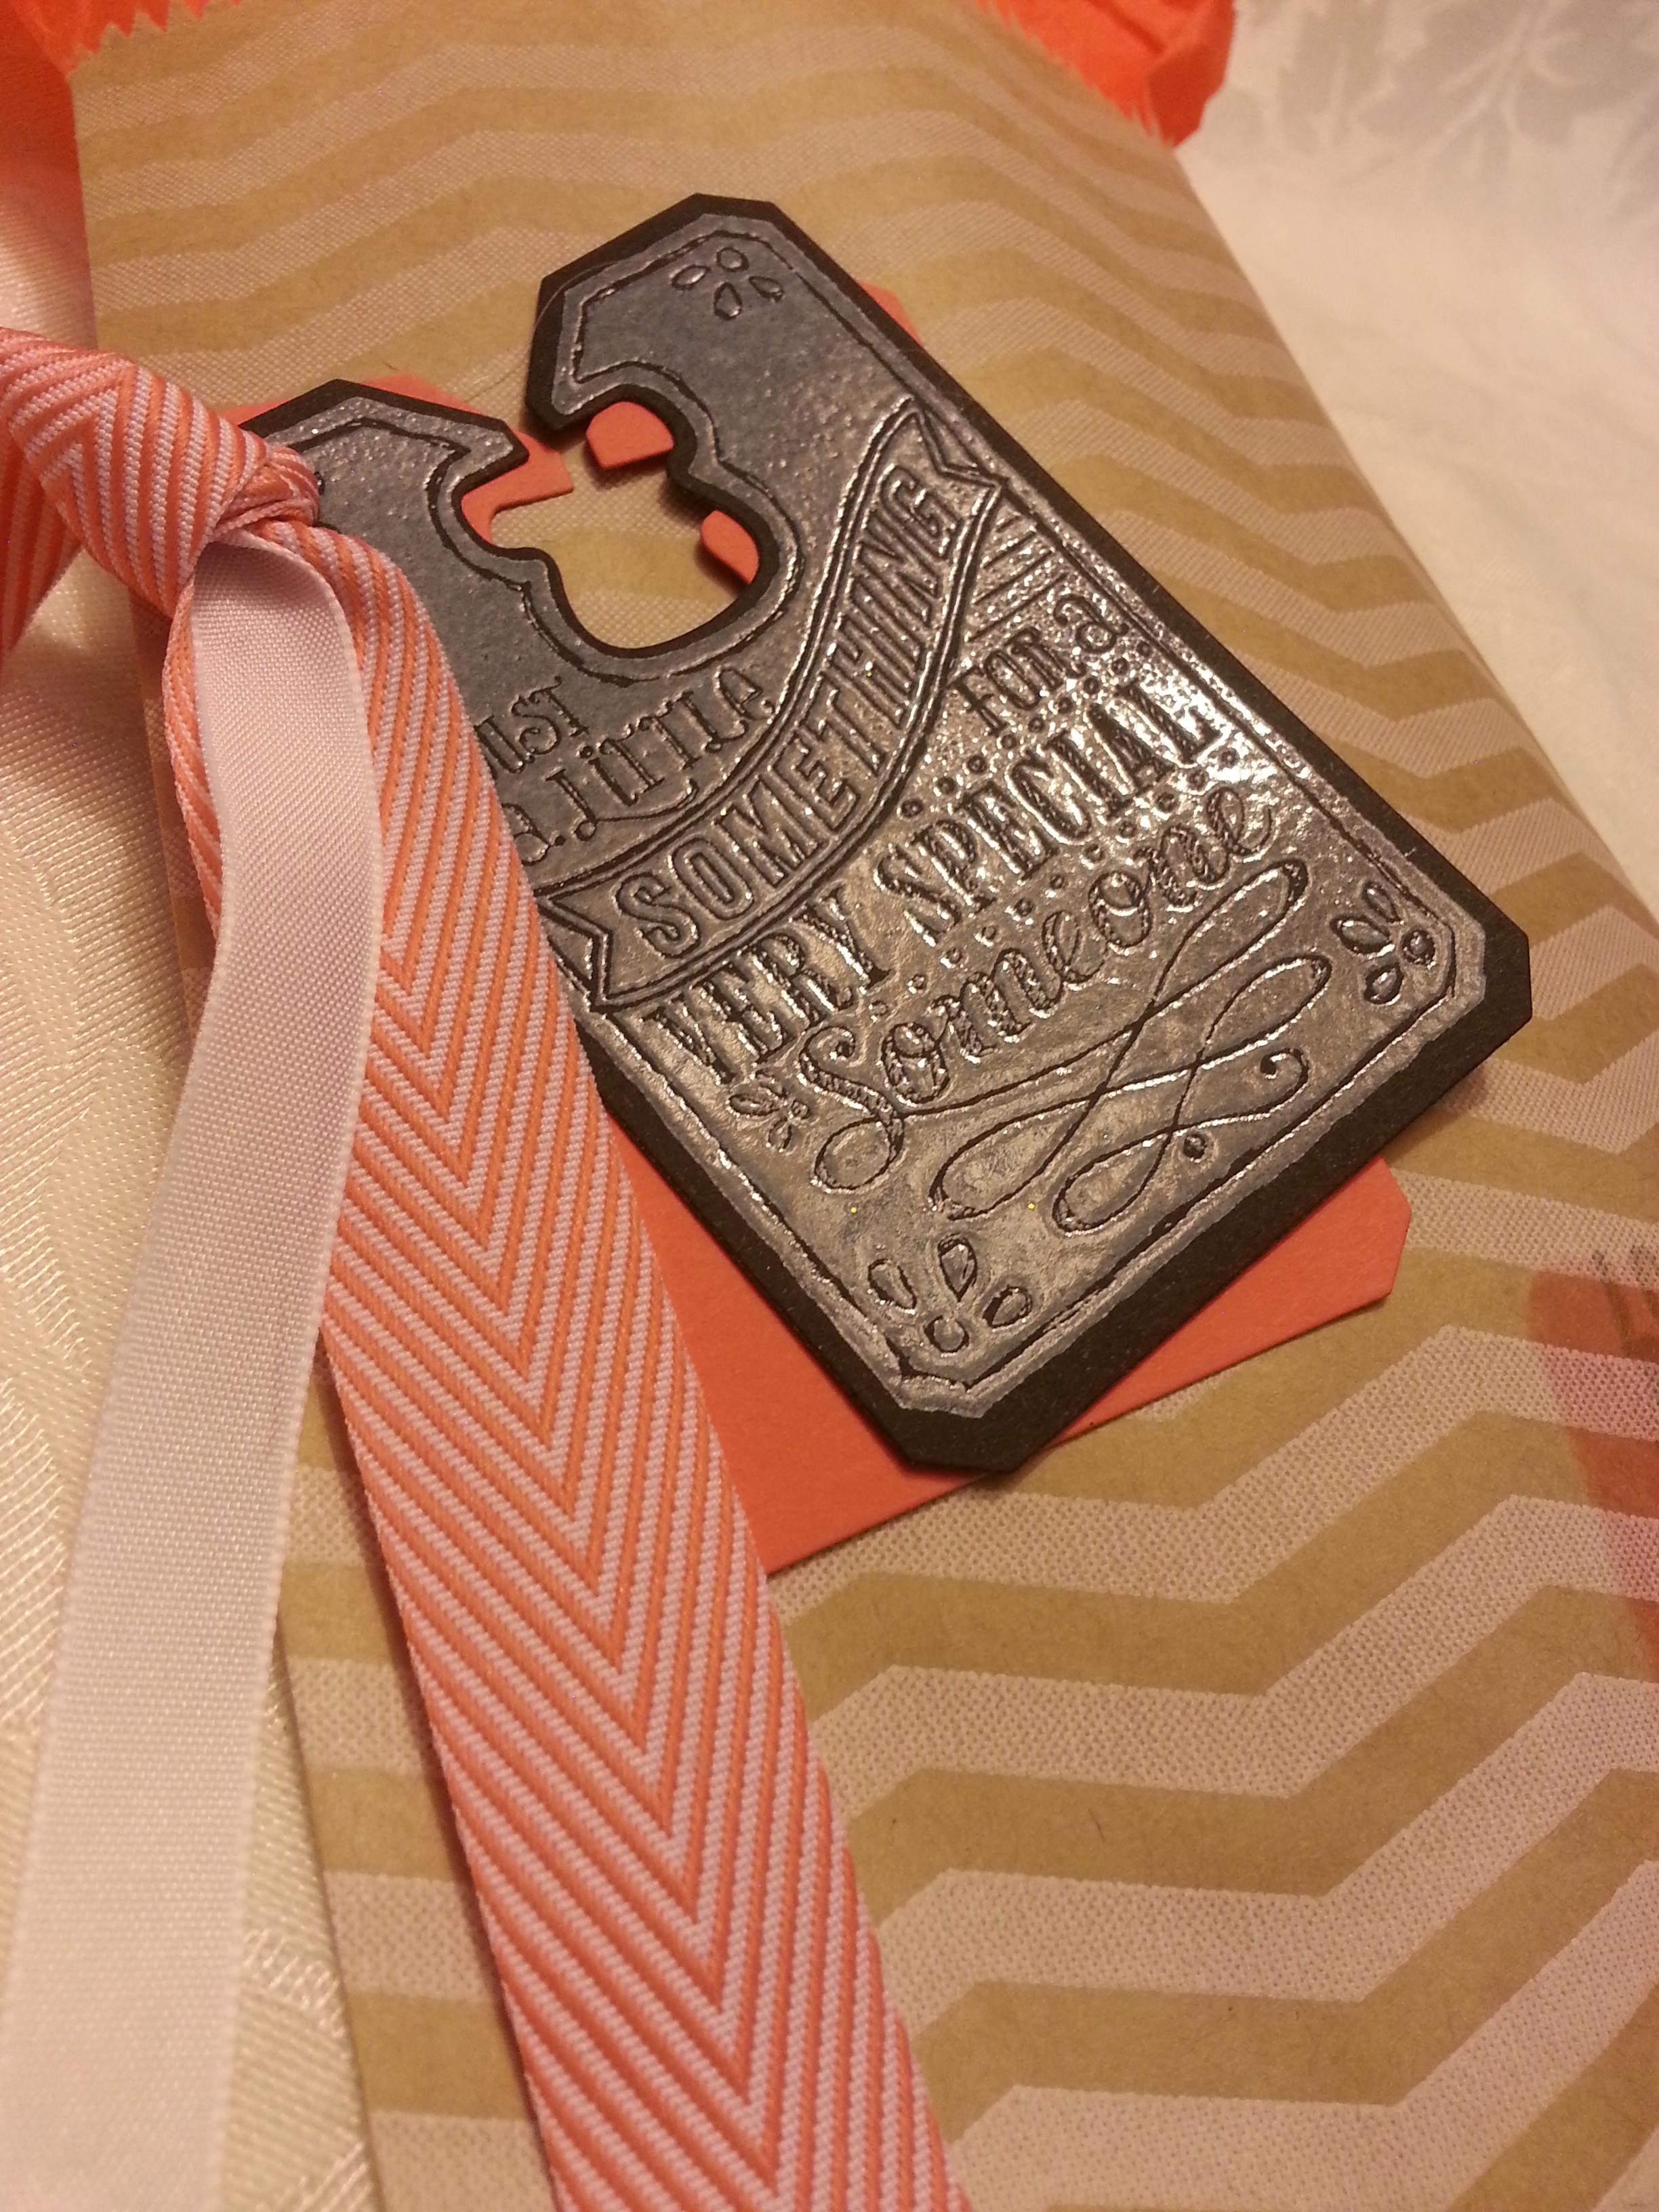
Enter:  Very Merry Tags.

This set is the end-all of Christmas Tag sets.  The images all have a coordinating punch.  SO, you can make just fast, simple tags with that.  OR, you can step it up a bit more and add some bling.  Now, I must confess, what I’m getting ready to show you took all of 10 minutes to make.  Seriously.  They were that simple.

20131109_115233

I wanted to make a little set of 3×3 cards.  I’ve been fascinated by 3×3 cards lately…  But these are perfect to stick on top of a gift.  And, the glimmer paper makes the tag worthy of a gloriously wrapped package.  And, truth be told, you can give so-so gifts in brilliant packages and everyone will think you are fantabulous.  And, yes.  That is a word.  (For proof, just watch which gifts seem to go first at your next white elephant gift exchange… the beautifully packaged…)

20131109_115242

I love the mistletoe stamp.  And, I originally made the berries red, until I think I remembered that they were white.  Thank goodness we have both red and ‘sparkle’ dazzling details.  (I’m pretty sure they’re white… I know I coulda solved this with a quick google search, but I was on a roll…)  And, did you know mistletoe is the state flower for Oklahoma??  Oh the stuff you can learn on this blog…

20131109_115256

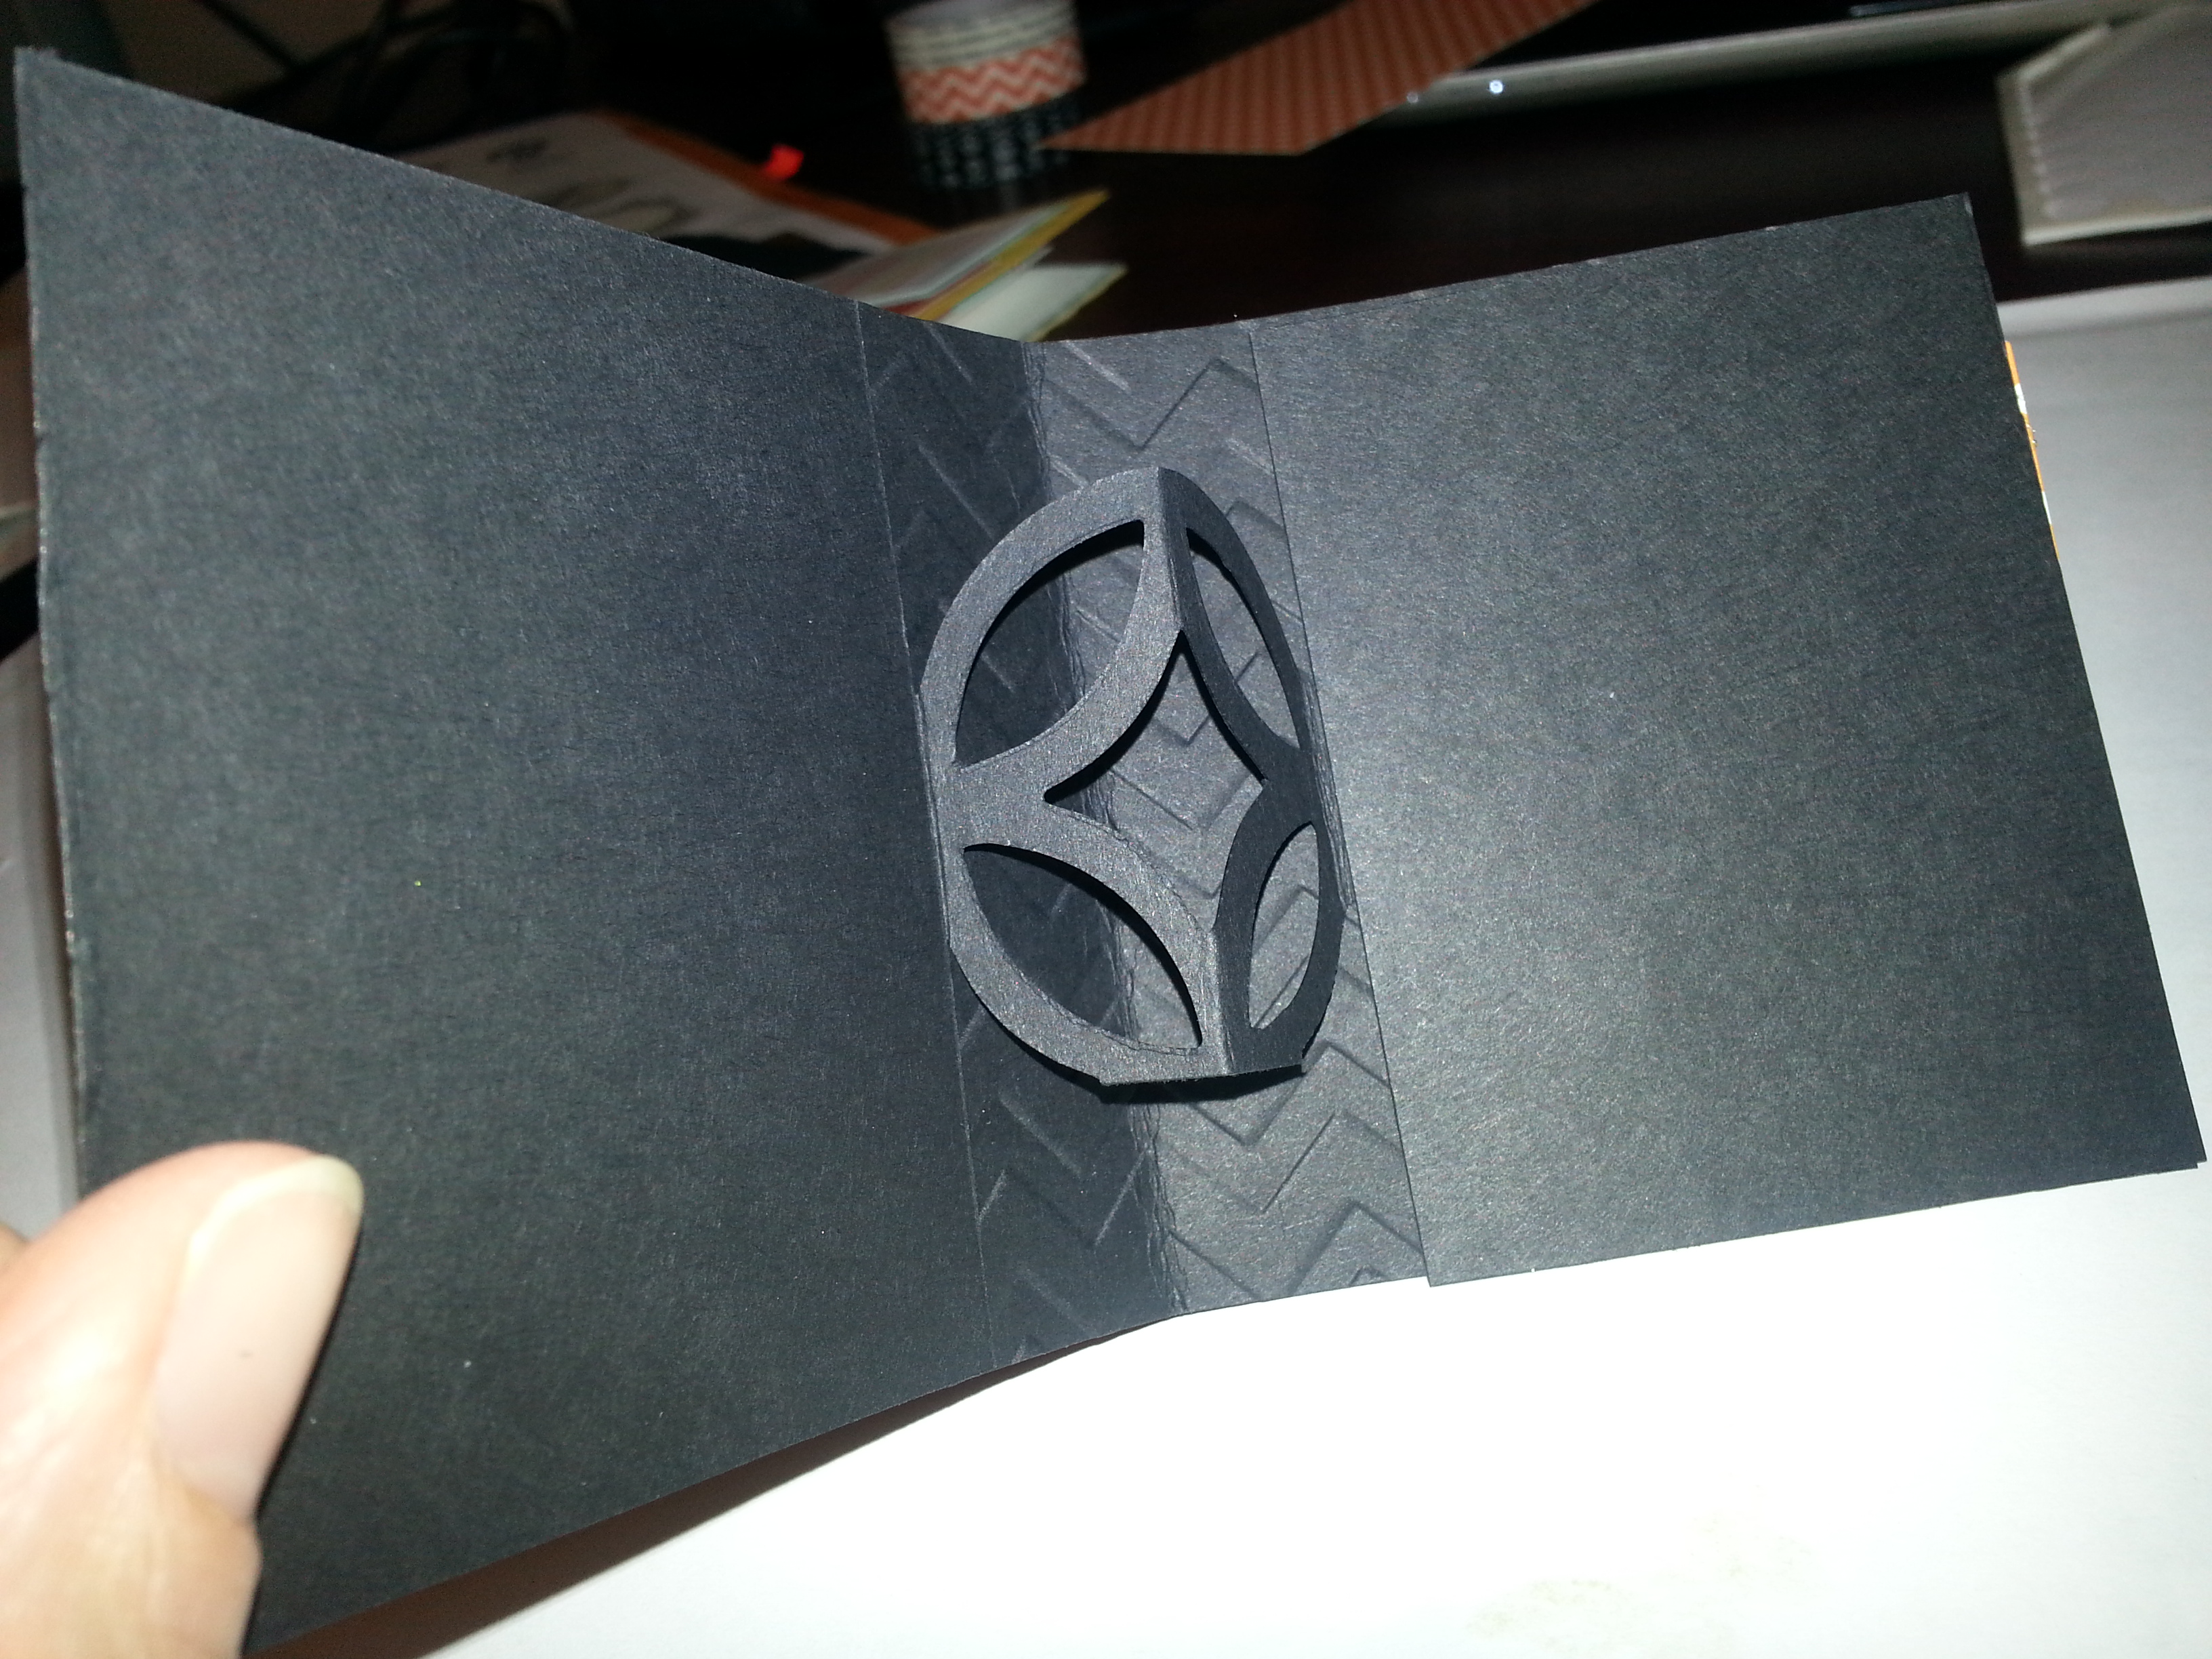
Why use a simple check mark for the nice box when a DIAMOND will do??


20131109_115303

I think the Bah Hum Bug is my favorite stamp in the WHOLE set.  Probably because my favorite Christmas T-shirt is one with the grinch.  It’s FUN.  (and my t-shirt has glitter on it TOO–cause Christmas is just. s0. glittery.)

20131109_115205


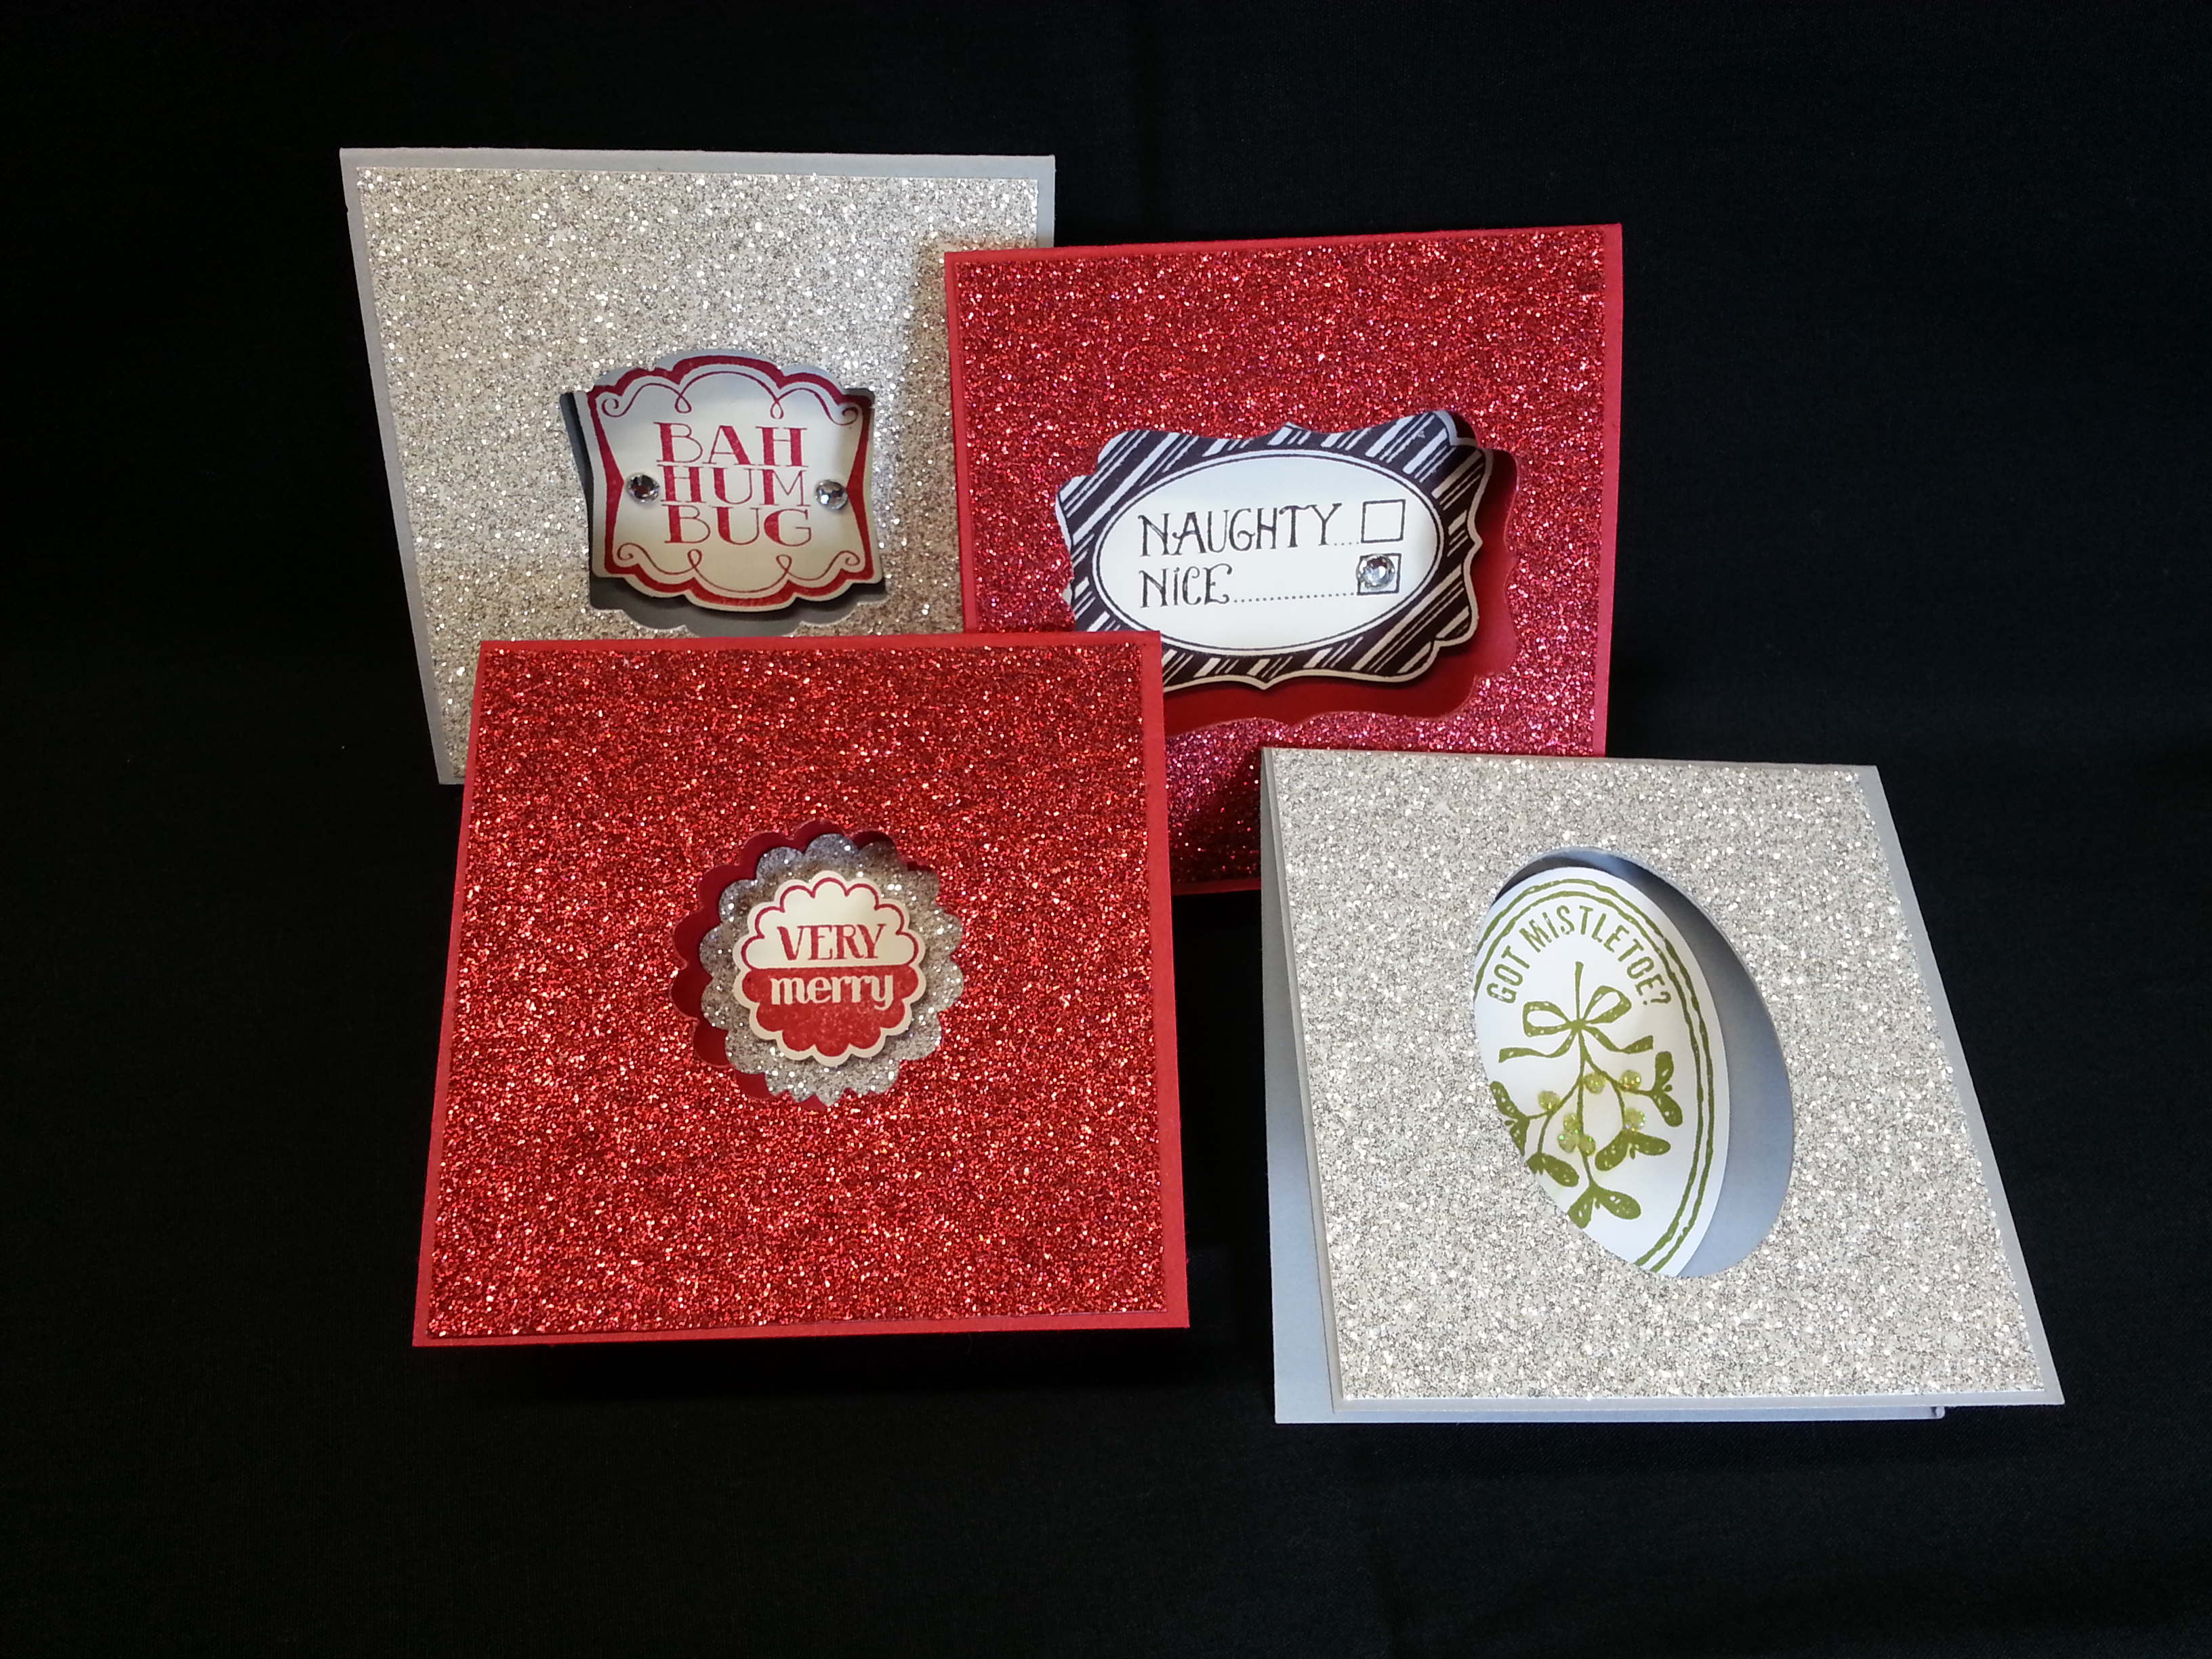
Here is the WHOLE set.  And, you can make fascinating little envies with the punch board for these too.  Or, you can just stick them on top of the package without an envelope…cause they are beautiful all by themselves.  And, it will be glorious.  And only take you seconds to put together.  Score for Very Merry Tags.

You are off to your next stop!!  Thanks for stopping by!

blogtour-stampmonth-next


Nancy Amato           http://stampinallnight.blogspot.com
Melissa Bolinger      http://www.stampinup.net/blog/2089191
Jackie Bottomley     http://www.jackiebottomley.blogspot.com
Susan Carlson         http://stampinmomoffour.blogspot.com
Tamra Davis            http://www.thecardladies.com
Connie Deibler         http://www.conniestamps.com
Crystal Kondo           http://www.card-ed.com
Deb Lehigh               http://thestampinhut.typepad.com
Anne Matasci            http://www.MauiStamper.wordpress.com
Audra Monk              http://thecraftyyogi.blogspot.com
Maria Pane               http://www.stampinandscrappinwithriri.blogspot.com
Andi Potler                http://www.absolutekreations.com
Michele Reynolds     http://www.inspirationink.typepad.com
Pam Staples             http://www.sunnygirlscraps.com
Jeannette Swain       http://www.stampsnwhatnot.com
Janet Wakeland        http://www.remarkablycreated.com


Christmas Collectibles

Standard

Hello Again!!  Welcome to the next stop on the next Stamp of the Month Blog Tour…

This month, I have for you a few projects for your Christmas gift needs…  A card, goodie box, and a goodie bag tag!  All perfect for your gift giving needs.  And, take my advice (and this is totally a “do as I say and not as I do” piece of unsolicited Christmas prepping advice).  START NOW.  then you don’t get overwhelmed in December.  (check back in with me in December and see how well I heeded my own advice).

So, here it is:

First up is the Christmas Card.  And I must confess, I got the color scheme from Pinterest.  The polka-dots from the Christmas paper (Season of Style) and the Coastal Cabana (just fyi, I love this color so much I’m thinking of painting my kitchen a shade of it…).

20131011_184906

Very simple layout.  One of my favorite styles of cards (i.e. the 3×6).  Tag is cut from the Chalk Talk framelits set.  And, a piece of washi…  And, of course, after I made this and was so proud of myself, I realized that silver cord is retired.  But, we do have the perfect silver ribbon that would totally work.  I didn’t wanna take it off cause it’d never look quite right for me to re-do… and I didn’t feel like remaking everything… SORRY.  My apologies.

20131011_184900


And, next up is a little gift tag.  This would go wonderfully on a gift, a cello bag of goodies, or you could even layer it up and put it on the front of a card:

20131011_184915

I love how the coordinating punch works so well with this set.  And, you can punch a bazillion ornaments for all your ornament needs…  You could even make cute ornaments for your own tree.  The children would love to make it…

20131011_184920


Just another view…

And, last up, is the little goodie box.  SU has expanded their packaging line, to my utter joy and excitement.  I LOVE PACKAGES.  And, the best gift, given in a junk package is not nearly as brilliant as if it were packaged well…  so, there is NO excuse for ugly packages this year…

ANYWAY… these boxes are super cute.  They have a clear slide that allows a peek at what is inside.  Don’t get too excited.  I had no idea what to put inside at this point (It’s October, and I’ve already alluded to my procrastination problem…) So, all I have inside this one is the brown crinkle paper.  Which makes it look cute, but the gift receiver may not be very excited about the gift…

20131011_184837


The nice thing about this box is that you can put belly bands ALL the way around the plastic sleeve and its FINE.  Cause the plastic sleeve slides off the box.  So your design stays nice and you can still get into the box.   BRILLIANCE I TELL YOU…. PURE BRILLIANCE.

Here is the set together:

20131011_184828


Hope you enjoyed this installment!  Next, you are off to see Deb Leigh.  Click on the button below.  And, below that is the entire list of those in the blog… If you need…

blogtour-25years-next (1)


Nancy Amato           http://stampinallnight.blogspot.com
Melissa Bolinger      http://www.stampinup.net/blog/2089191
Jackie Bottomley     http://www.jackiebottomley.blogspot.com
Susan Carlson         http://stampinmomoffour.blogspot.com
Tamra Davis            http://www.thecardladies.com
Connie Deibler         http://www.conniestamps.com
Sherri Eddleblute      http://www.sweetestdesigns.blogspot.com
Crystal Kondo           http://www.card-ed.com
Deb Lehigh               http://thestampinhut.typepad.com
Anne Matasci            http://www.MauiStamper.wordpress.com
Robin Merriman        http://www.trinitydesignstudio.blogspot.com
Audra Monk              http://thecraftyyogi.blogspot.com
Maria Pane               http://www.stampinandscrappinwithriri.blogspot.com
Andi Potler                http://www.absolutekreations.com
Michele Reynolds     http://www.inspirationink.typepad.com
Pam Staples             http://www.sunnygirlscraps.com
Jeri St. John             https://jerrisgemtastics.blogspot.com
Jeannette Swain       http://www.stampsnwhatnot.com
Janet Wakeland        http://www.remarkablycreated.com

Stamp of the Month Tour

Standard

Hello!!  Welcome back to our stamp of the month tour.  This month actually features a choice between TWO stamp sets.  And, I could not choose so I did a couple of projects with both sets…

First off, I chose to use Halloween Bash to make a couple cute 3×3 cards.  I was in a 3×3 swap at convention, a little birthday card, that used the lattice die to make a pop up in the middle.  I apologize, but the card didn’t have a name in it.  I’d love to give credit to the brilliantly talented demo who made it… but anyway…

20130904_190712

The chevron embossing folder and LOADS of the awesome Halloween Washi tape makes the front (and all of the card) so fun.  All these images come from the same stamp set ($15.95) and I used the coordinating punches to punch them out.

Here is a look at the inside:

20130904_190658

You can see that there are panels covering the top and bottom of the card.  This is attaching the top and bottom of the lattice die to the card which then holds the pop out in the center…

20130904_190500

I had to score this one to get it to fit in the card.

You can kind of see how the lattice works here:

20130904_190627

I cut the lattice die in half, and scored it at every intersection… then glued the end pieces behind the panels and left the center to fold out…

20130901_151420

Lattice die, that I cut in half…

20130901_151425

and scored.

20130901_151517

I glued the ends to the panels that hold them to the card (3×2.25)

20130901_151616

So, this is what the final inside panel looks like.  Then, you glue the ends of the black panels to the card (top and bottom) and you get this…

20130901_151709

This is what you stick the pop up on.  And, you can use this for ANYTHING.  Not just Halloween.  What a fun surprise!!

AND, when I was making these, I received my envelope board.  So, I had to make matching envelopes.  Though these are 3×3 cards, I decided to make envies for 3.5 cards (which is a little big) because I was worried that the thickness of the card would not let the card fit into the envelope.

One last look:

20130907_164838

20130907_164825

Now… On to Thanksgiving!!

This card uses Magnificent Maple.  For this Thanksgiving card, I really wanted to focus on TEXTURE.  So, I chose to use the burlap ribbon, and the canvas paper…

20130904_190733

The canvas paper is a pretty stark….well…not quite white, but certainly not cream.  So, I spritzed it with a mix of Baked Brown Sugar and alcohol.  I stamped the maple leaf in Cherry Cobbler, Summer Starfruit, and Early Espresso.  I used an espresso card base and starfruit panel under the canvas.  I distressed the edges of the canvas and burlap just to add more texture.

20130904_190745

I used the Tags For You stamp set and coordinating Label Bracket Punch.  And, just a note… I actually stamped the label with versamark and embossed it with the Espresso powder.  If you notice the Espresso leaf, how it isn’t very bold…  this is a property of the canvas.  It kind of soaks the ink.  That’s why I embossed it.  But, Be prepared, it doesn’t make the nice, smooth, glossy embossed texture because it’s on the canvas.  I just did it to make the color stronger.  Remember…I’m going for texture….

20130904_190805

That button is from the Naturals Designer Buttons.  It nice cause it looks like wood.

And, of course, I had to make a matching envelope:

20130907_164808

Well, I hope that got you in the mood for the upcoming “HALL OF HOLIDAYS”.   It seems like it comes quick and goes fast….  You are off to see what Deb Leigh has for you.  Click the button below.  Or, use the list if you need.

blogtour-stampmonth-next

Nancy Amato           http://stampinallnight.blogspot.com
Melissa Bolinger      http://www.stampinup.net/blog/2089191
Jackie Bottomley     http://www.jackiebottomley.blogspot.com
Susan Carlson         http://stampinmomoffour.blogspot.com
Tamra Davis            http://www.thecardladies.com
Connie Deibler         http://www.conniestamps.com
Sherri Eddleblute      http://www.sweetestdesigns.blogspot.com
Crystal Kondo           http://www.card-ed.com
Deb Lehigh               http://thestampinhut.typepad.com
Anne Matasci            http://www.MauiStamper.wordpress.com
Robin Merriman        http://www.trinitydesignstudio.blogspot.com
Audra Monk              http://thecraftyyogi.blogspot.com
Maria Pane               http://www.stampinandscrappinwithriri.blogspot.com
Andi Potler                http://www.absolutekreations.com
Michele Reynolds     http://www.inspirationink.typepad.com
Vicki Soni                  http://www.paperinkle.com
Pam Staples             http://www.sunnygirlscraps.com
Jeri St. John             https://jerrisgemtastics.blogspot.com
Jeannette Swain       http://www.stampsnwhatnot.com
Janet Wakeland        http://www.remarkablycreated.com

Tag…you’re IT!!

Standard

Okay, So I don’t know how the title has anything to do with the card I made, but I had to use it…  cause it was so corny…

Anyway… Welcome back to the Stamp of the Month tour….  This month we are using the Ronald McDonald House Charities Set called “Tag It”.  This set is special because $3 from the sale of the set is donated to RMHC.  It’s so cute, and it’s for a good cause!!  This set is $16.95 for clear or $22.95 for wood.

The other great thing about this set is all the images coordinate with the Chalk Talk Framelits.  So…. there is a matching cut-out for each one…to make it a tag!!  How great is that??!!??

So, here is the card I made.  I was kinda of drawn to the Christmas image.  It’s August.  I know, but we are already starting to think about our Christmas Stamp Classes and just, well, hum.  I don’t know.  I just decided to do Christmas.  Go put on some Christmas music then come back and finish reading this post…

20130809_214906

So, there you have it…  My Christmas Card in August.  I decided I wanted to maker a card, as opposed to a set of tags, so I decided I needed some other images to play with.  Gorgeous Grunge to the rescue.  We got this stamp set as part of or Convention goodies, and I gotta say, I had trouble WAITING till convention to get it.  It makes such glorious background stuff.  And, WASHI.  I am truly, honestly, and FULLY in LOVE with WASHI TAPE.  It’s so easy to use.  And, that’s the SU washi in the Christmas Colors (p. 25 in the Holiday Catalog…$4.95 for 3 rolls…which is a STEAL).  Anyway, The inks I used in the background were Early Espresso and Crumb Cake.  I wanted to keep it neutral and use the washi to add color.  I love that it is a little see-through.  This makes it real fun to layer.

For the card I used Crumb Cake and then layered with Early Espresso.  I stamped on Very Vanilla.

20130809_215017

Close up of the tag.  You can kinda see my flub up there…. here’s why…

20130809_215051

Can you see in the light that it is embossed?  I wanted it embossed, but wanted it TWO colors.  And, really didn’t want to have to cut out stuff.  SO….  I wanted to clear emboss over ink.  And you typically would do this by stamping your stamp in the versamark ink, then into the color ink.  But, cause I wanted 2 colors, I decided to try and marker it after stamping in the versamark.  Don’t do that.  It doesn’t work.  I had to get creative with how I used the ink pad and ink the image with the edges and corners of the ink pads.  That’s why the flub.  And, this happened:

20130809_201511

See the red seam binding?  It’s cleverly disguising a red spot on the image, where I dropped the stamp into the red stamp pad after having the espresso ink on it already.  (BTW:  the red is Cherry Cobbler).    And, I like the cherry cobbler seam binding on the card.  Don’t you just love happy accidents?  Anyway, back to embossing…. stamp the image in versamark, cleverly apply the ink from the other stamp pads, then sprinkle with clear embossing powder and emboss.  I decided to hand trim the image out because I wanted to be able to layer it onto the espresso tag that I made with the coordinating framelit…  so, yes, I cut it by hand…

20130809_215036

SO.  Now.  TAG.  YOU’RE IT.  It’s your turn to play with this wonderful stamp set, give to charity (when you order the set) and make some fantastic projects with it!!  But, wait…. finish the blog tour of course!!

Your next stop is Deb Leigh.  Click on the button below…

blogtour-stampmonth-next

If that doesn’t  work, you can use the list below to go on to the next blog…

Nancy Amato           http://stampinallnight.blogspot.com
Melissa Bolinger      http://www.stampinup.net/blog/2089191
Jackie Bottomley     http://www.jackiebottomley.blogspot.com
Susan Carlson         http://stampinmomoffour.blogspot.com
Tamra Davis            http://www.thecardladies.com
Connie Deibler         http://www.conniestamps.com
Danielle Denhardt    http://www.purrfectlycreative.com
Sherri Eddleblute      http://www.sweetestdesigns.blogspot.com
Crystal Kondo           http://www.card-ed.com
Deb Lehigh               http://thestampinhut.typepad.com
Anne Matasci            http://www.MauiStamper.wordpress.com
Robin Merriman        http://www.trinitydesignstudio.blogspot.com
Audra Monk              http://thecraftyyogi.blogspot.com
Maria Pane               http://www.stampinandscrappinwithriri.blogspot.com
Andi Potler                http://www.absolutekreations.com
Michele Reynolds     http://www.inspirationink.typepad.com
Vicki Soni                  http://www.paperinkle.com
Pam Staples             http://www.sunnygirlscraps.com
Jeri St. John             https://jerrisgemtastics.blogspot.com
Jeannette Swain       http://www.stampsnwhatnot.com
Janet Wakeland        http://www.remarkablycreated.com

So… I know…. it’s an addiction

Standard

BUT I LOVE BAGS.

All kinds of bags.  Cool paper sacks.  I’ve not met a tote I didn’t like.  Hand bags.  ALL OF IT.  In college, my roommate and I decorated our dorm room with different kind of shopping bags from every store we liked.  The entire room.  It was awesome.

Anyway, what does this have to do with today’s blog tour???

STAMPIN’ UP has just introduced the absolute most coolest, bestest, little packaging bag.  And, yes, I should be excited about the stamp set we are using… Chalk Talk (and, I AM. We’ll get to that in a second.) But I nearly fainted from delight when I saw these little chevron printed bags in the catalog.  And, they are a steal at 10 for 3.95.

Here it IS:

20130712_085905


(Ignore the fancy background…  we were having to improvise)


Anyway, I LOVE THESE BAGS.  And, when Chalk Talk was chosen as the set, I knew immediately what I had to do.  I also LOVE this set.  And the coordinating framelits.  The framelits are what make the set AMAZING too… cause they all cut out perfect tags.  Christmas is going to be amazing this year with these sets and accessories  AND BAGS.

I digress…

The stamp was SCREAMING to do the chalkboard technique (get it… Chalk Talk??)  Black background, white embossing powder.  Or you can do white ink and clear embossing powder if you are into improvising…  which I have had to be, as of late…

And, the chevron bag pairs PERFECTLY with the new chevron ribbon.  Which is a DREAM….  This one is Calypso Coral.

20130712_085911


I also used the framelits for a mask.  See the orange splotch in the bottom right corner?  I used a framelit from the tags framelit set to be a mask for a sponging the calypso ink (you can see where I screwed up and some of the sponging got outside the mask–some people may find this a flaw… I prefer to think of it as my humanity…)  To prevent this, you could use a post-it note on the sides of the framelit so the sponging doesn’t get where you don’t want it.  ANYWAY, I stamped over the sponged portion with another stamp from the Chalk Talk set.  I’m telling you, this is the perfect gift-giving combo.  Wouldn’t you love a pair of earrings, a nail polish, or a Stampin’ Up! gift certificate given in this package??


20130712_085920


A close up of the masking…


20130712_085959


And, some tissue tops it off!!  I am head over heels….  🙂


Now, off you go to see what Deb Leigh did with this fabulous stamp set….  Enjoy!!

blogtour-stampmonth-next


If that icon doesn’t work, click on Deb Leigh’s link below:

Making Cards The OLD FASHIONED* Way

Standard

*Without a Big Shot.

Due to ill-fated planning, I at the moment do not have a big shot at my disposal.  And, it’s because I did not think ahead and waited to make this card till the last minuted, yada yada… YEAH, I KNOW.  BUT…  I’m whining to my mom cause I don’t a have a big shot and she tells me to make a card the old fashioned way.  SERIOUSLY.  HOW IS THIS POSSIBLE.  She’s a quilter.  That’s like telling her to quilt without a NEEDLE.  (either hand or machine…).  Still.  Can’t let the druthers get the best of us… so here ya go…

A card made the OLD FASHIONED WAY (snort.)  Welcome to this installment of the Stamp of the Month Blog Tour.

20130607_231928

This set is the ‘set of the month’ for this Blog Tour:  Mosaic Madness.  And, it has a gorgeous embossing folder that matches, but, ahem.  This is being made the old fashioned way.  Maybe that should be a challenge… what can you make without a big shot???  (as you can see, I’ve come quite attached to mine.

Anyway, enough whining… about this card…

To say I like the new color, Baked Brown Sugar, would be an UNDERSTATEMENT.  I LOVE LOVE LOVE it.  (and, if you know Isaac, you would know if you repeat the word three times, it’s the equivalent of infinity).

I kinda wanted to do something a little different than what I was seeing on pinterest and other places (they used LOTS of the embossing folder, so maybe it is good I couldn’t).  And,  I flipped the mosaic punch on it’s side.  Just for a different feel.   (okay, I didn’t literally flip the punch, it’s just sideways and normally you see it up and down)  And, I love the long stamps included in this set.  They make super nice borders.  And, they’re designed as such as that they can be continuous (which, I would HIGHLY recommend the Stamp-a-ma-jig for lining them up.)  Or, if you do a card like mine, you make the seam in the punch out and as long as you are close, It’s All GOOD.

20130607_231949


So, I also added a bit of the strawberry slush and daffodil delight inks.  And, wouldn’t it be nice if SU had a punch FOR EVERY SHAPE THEY HAD (there isn’t a craft room big enough on this planet… but it’d be NICE).  So, I had to cut the little medallions out by hand.  Not bad, they’re easy.  And, remember, we are doing this the old fashioned way.


20130607_232052


Here’s a closer look at the detail.  The top vanilla panel was cut 1/8″ shorter in each direction just to give a small frame.  I stamped and punched the top panel. I stamped the strawberry slush stamp THROUGH the punched out hole.  Then added the two small stamps with dimensional.   And, of course, a diamond. I added several dimensionals on the back of the top panel just so it would create a space for the cut-out section to stand out.

Hope you enjoyed a card made the OLD FASHIONED way.  (i.e. WBS…. without big shot).  Hopefully, next time we will be all back on track and without any hiccups in the whole card-making and mojo flowing, designing business.

You are off to see Deb Leigh and what she has for you!!  Enjoy the tour!!  To get to Deb you can click on the graphic below or use the links provided in the list.

blogtour-stampmonth-next