Monthly Archives: January 2014

A Valentine Treat

Standard


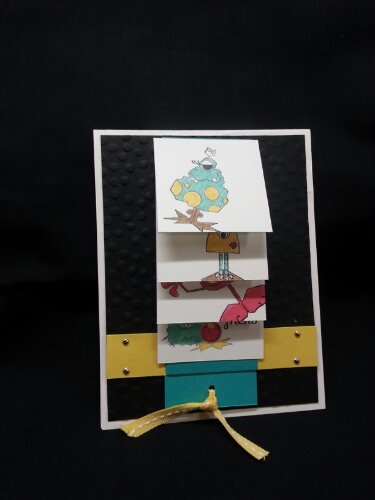
Hello!!  I have a quick little treat bag to share with you today.  I must say, this latest catalog and subsequent releases from SU have really incorporated packaging and gifting into their line-up.  And I LOVE IT.  And, you will too.

These are the Sweetheart Treat Bags (#134610). These treat bags come 12 in a set…Bags, large striped tag, and twine.  AND… the best part is… IT’S ONLY 4.95!!  For 12!!

image


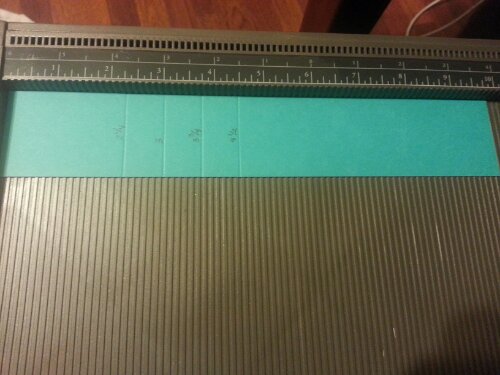
I added the two little banners from the Banner Blast stamp set (it’s an SAB set, and won’t be available until tomorrow) and punched them out with the coordinating punch (again, SAB item and not available till tomorrow–with qualifying purchase.)

image


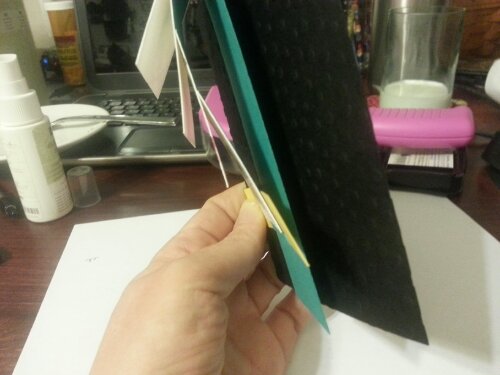
Here it is with some of silver tissue that I folded and used the ‘grass scissors’ from the Spring Occasions catalog to cut the little fringe on the top…

image


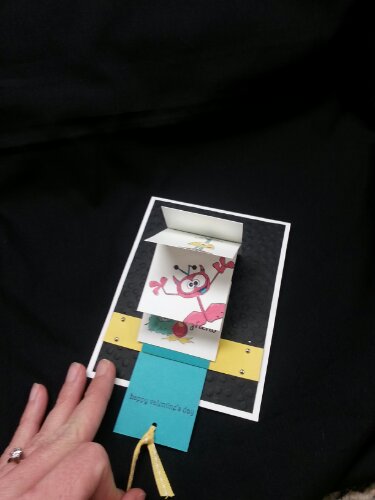
And, of course, what is a Valentine’s treat bag without a TREAT??

These bags are only available until MIDNIGHT MOUNTAIN TIME today.  This means order by 8:00 tonight Hawaii Time to be safe…  You can order through my online store if you so desire.  And, they also have cute kiddie valentines and other valentine cards if you need something quick and easy…

It’s not too early to start on Valentines… It’s only a couple weeks away…


Best of SAB

Standard

Hello!!  And welcome to the FINAL installment of the Best Of Tour!!  I think they saved the best for last.  BEST OF SALE-A-Bration!!  Sale-A-Bration is my favorite time of the SU year cause there is lots of FREE stuff floating around.  And who doesn’t love FREE??

Here are a couple of cards created with said free items and the Best of SAB set…

image

This first card uses the little flower in the Best of Set.  And what I like about this is that an actual SAB set has a larger version of this same flower.  Imagine the possibilities.  And, here, I used the SAB DSP and some of the gorgeous Crisp Canteloup twine that comes with one of the SAB kits.  Super simple and easy, this card is perfect to put a smile on someone’s face.  And, since there are no words, it can be used for any occasion!!

This next card was my first attempt at the file folder card.  So, I could try to explain how to make them, but if you google it, you will see easy peasy videos to make it happen…  And, it is SO easy.  But, you need the awesome envelope punch board.  WAY easy…

image

And, there is more of the super awesome DSP.  I just love this year’s offering.  And, the scallop punch on the card had the words ‘for you’ on it, and after I inked it up, I wiped those words off.  I used a stamp from Fabulous Phrases for the ‘HI’, and the ‘wish big’ from  “A Dozen Thoughts” set (a set I LOVE, btw).

And this is the inside….

image

Another view:

wpid-20140107_205314.jpg

And, oh, this is the same as the first card…but instead of making the background Sahara Sand, I used Basic Black.  I needed to make some for a swap and didn’t have enough Sahara Sand.  Which do you like better??

image

So, you are off to see what Deb Lehigh has for you!!  Hope you enjoy the tour!!

blogtour-25years-next (1)

Remarkably Pin-able Valentines!!

Image

Hello!!

Welcome to the first installment of the Remarkably Pin-able Blog Tour!!  The Stamp-of-the-Month Blog tour has morphed into this one.  And, I think you will enjoy it.  It has a bit of a different focus.  Instead of focusing on ONE stamp set, it will be thematic.  So, I think it will expand the creativity! I am excited.

This month, we are focusing on Valentines, love, or anything related to that avenue… (just in time, I might add…)

So, I have for you a Monster Maniac Valentines!  I love these cute, little monsters!!

wpid-20140107_205030.jpgThis month, I chose to make a waterfall card.  I’ve not done one of these in a LONG time, and my club members were asking to make one.  So, I thought this would be a good opportunity.  I have a quick little photo-tutorial to show you how to do it.

First, you need a strip of paper that is 1.75 by 9.75 inches (I started out at 10 inches but then took it apart and cut it down)  Score it at 2 1/4; 3; 3 3/4; 4 1/2.  For this strip, I’m suing Bermuda Bay.

wpid-20140106_213754.jpg

Then, add adhesive in the scored sections.  I tried to take a picture… hopefully you can see the adhesive…

wpid-20140106_215654.jpg

Next, you need 4 pieces of card stock that are 2×2.  I chose to use Whisper White so that I could stamp and color my little monsters.  Go ahead and stamp whatever you like with the understanding they will be displayed in order.  So you may want to know that you want seen first, second, third, etc…

wpid-20140106_215450.jpg

Then, you attach these little squares to your long strip that you just cut and scored.  Decide which square will be on bottom.  you will need to put adhesive on the back of this one (keep to the center of the back of the 2×2 square) to glue onto the (Bermuda Bay) strip.  This goes on the ‘shortest’ end of the strip.

wpid-20140106_215733.jpg

Then, you will ad the next cards on top… lining them each up with the score marks you made.  Remember, you’ve already added adhesive to the strip so that now you are just placing the cards on.  The bottom half of each card will be ‘unattached’.  This is important.

Next, you will glue the back of the ‘bottom’ of the Bermuda Bay strip (the same one in the photo above.) to a horizontal piece of paper… I am using Daffodil Delight and chose to make my paper 3/4″ x 4″.  This is what will anchor the waterfall card.

wpid-20140106_220034.jpg

Here are a couple of pictures from the side so that maybe you can see the layers.  It seems odd that we aren’t using adhesive here.  But, we cannot if we want the card to move.  I attach the Daffodil strip with brads.

wpid-20140106_220122.jpg

wpid-20140106_220126.jpg

My black backing is 4×5.25″ and I am going to attach it to a white cardstock base.  You can’t really tell in the pictures, but I embossed it with the new Sale-A-Bration embossing folder!! (SNEAK PEEK…)  Attach the entire apparatus (the Daffodil c.s. and the Bermuda Bay c.s.) to the black with brads on the ends of the Daffodil c.s.

wpid-20140106_220610.jpg

Oh, the Bermuda Bay c.s. folds at the top and comes behind itself and sticks out below the daffodil.  It needs to be a little longer so you can attach a ‘pull’ (I used ribbon I tied in a punched out hole).  I also stamped “Happy Valentine’s Day” on this.  You can’t see it in the picture, but it is a ‘hidden message’ that is revealed when you pull the strings.

wpid-20140107_205030.jpgThen, I just glued the black c.s. onto the white card base.  Easy Peasy.  Here is a picture of where I have partially pulled the string to reveal the waterfall.

wpid-20140107_205043.jpg

And, because of all the cutting and scoring we did, the cards ‘flip’ through themselves–revealing all the precious monsters just WAITING to wish you a Happy Valentines…

I even made a little video, but apparently I don’t pay for the version of word-press that allows for videos.  Who knew…

I hope you enjoyed your little Monster Valentine!!  Now you are off to Anne Matasci!

Click on the button below to go to Anne’s site, or use the list provided at the end of the post.

blog-tour-pinworthy-next

Below is a list of all the participants and the links to their direct post.

Nancy Amato:  http://stampinallnight.blogspot.com/2014/01/remarkable-stampers-pinworthy-blog-tour.html

Missy Bolinger
Tamra Davis
Connie Diebler http://www.conniestamps.com/2014/01/whatsnottolove.html 
Sherrie Eddleblute:   http://sweetestdesigns.blogspot.com/2014/01/lovey-dovey.html

Crystal Kondo:  http://wp.me/p2l6Qe-fb  (YOU ARE HERE)

Anne Matasci:  http://wp.me/pCcBw-1tG
Audra Monk:  http://thecraftyyogi.blogspot.com/2014/01/remarkables-lovey-dovey-blog-tour.html
Maria Pane
Andi Potler:   http://www.absolutekreations.com/2014/01/09/remarkable-pinworthy-blog-tour-lovey-dovey/
Michele Reynolds:  http://inspirationink.typepad.com/inspiration-ink/2014/01/lovey-dovey-pinworthy-blog-tour.html

Pam Staples

Jeannette Swain: http://www.StampsNWhatnot.com/my_weblog/2014/01/crazy-mixed-up-love.html

Janet Wakeland:  http://wp.me/pHIQD-5Y7

Happy New Year!

Standard
Happy New Year!

Happy 2014 to YOU!!

So, here is a little peak at one of my FAVORITE project and classes that I have been doing every year for the past several years.  I love these little easel calendars.  They are so fun to create and fun to give as gifts!!  This year, we have something special for you… There are only 3 of the Maui Stampers that make their own versions of these calendars, but we decided to put together a little blog hop for you to see our creations.  It’s fun to see everyone’s different take on every month!!

So, for you on this FIRST day of January 2014 (It’s gonna take me till April to type 2014 on the first try…) I have the cover of page of the calendar and January…

First, the cover page:

wpid-20131230_211602.jpg

I love that quote, “Live the Life You’ve Imagined”.  I’m reminded often that my response to situations is what makes my circumstances good or bad.  And, that is the most critical in determining my happiness or what I get out of different situations…  I don’t have to be an observer of life, but can LIVE it.  And, am excited about this prospect in 2014…

This cover page was created with one of my favorite sets:  Tape it.  And, I use Crisp Cantaloupe, Pistachio Pudding, So Saffron, Baked Brown Sugar inks and the Pistachio card stock for the backing.

And now for January:

This little snow man I received FREE from the SU Convention.  Which I’m happy about, cause I’m not sure I would have bought it. It seems a little weird to live on Maui and do lots of stuff with snowflakes, snowmen, and such other winter scene icons…  So, it was fun to play with a set I don’t normally use.  This particular one is called Snow Day.  And, because I am on Maui, and because of the cheerful demeanor of this snowman, I wanted to make sure he was bright and cheerful…  So I stamped his body in Smoke Slate and did his hat in Tempting Turquoise and buttons in Melon Mambo…  This is SURE to banish winter blues and ring in the new year with a smile!!

image

So, this blog tour will have 3 stops.  Besides my calendar, you will have the privilege of seeing Anne’s and Cheryl’s calendars as well.  They will publish on the first of every month for 2014… ENJOY!!

Click for:

Anne’s Calendar (The Maui Stamper)

Cheryl’s Calendar (Create with Cheryl)