Monthly Archives: August 2013

What do pumpkins have to do with paper?

Standard

The answer to this, I do not know.

But, what I do know is that you only have a FEW DAYS LEFT to take advantage of the Paper Pumpkin Promotion (say that 10 times fast).  This is the monthly subscription service that brings a glorious little orange little box to your door with everything you need for a 30 minute craft ‘timeout’.  Cause we are learning that time outs are sometimes necessary for our own sanity.

Paper Pumpkin is $19.95/month (plus tax) but if you sign up right now, (by August 31) you will get your first TWO months for $10.   Go to mypaperpumpkin.com and use the code PUMPKINDEAL.  This is a wonderful deal.  And, to sweeten the pot, I have a few things to show you.  First off, if you sign up and designate me as your demonstrator, you will get a little gifty from me…

20130817_132043

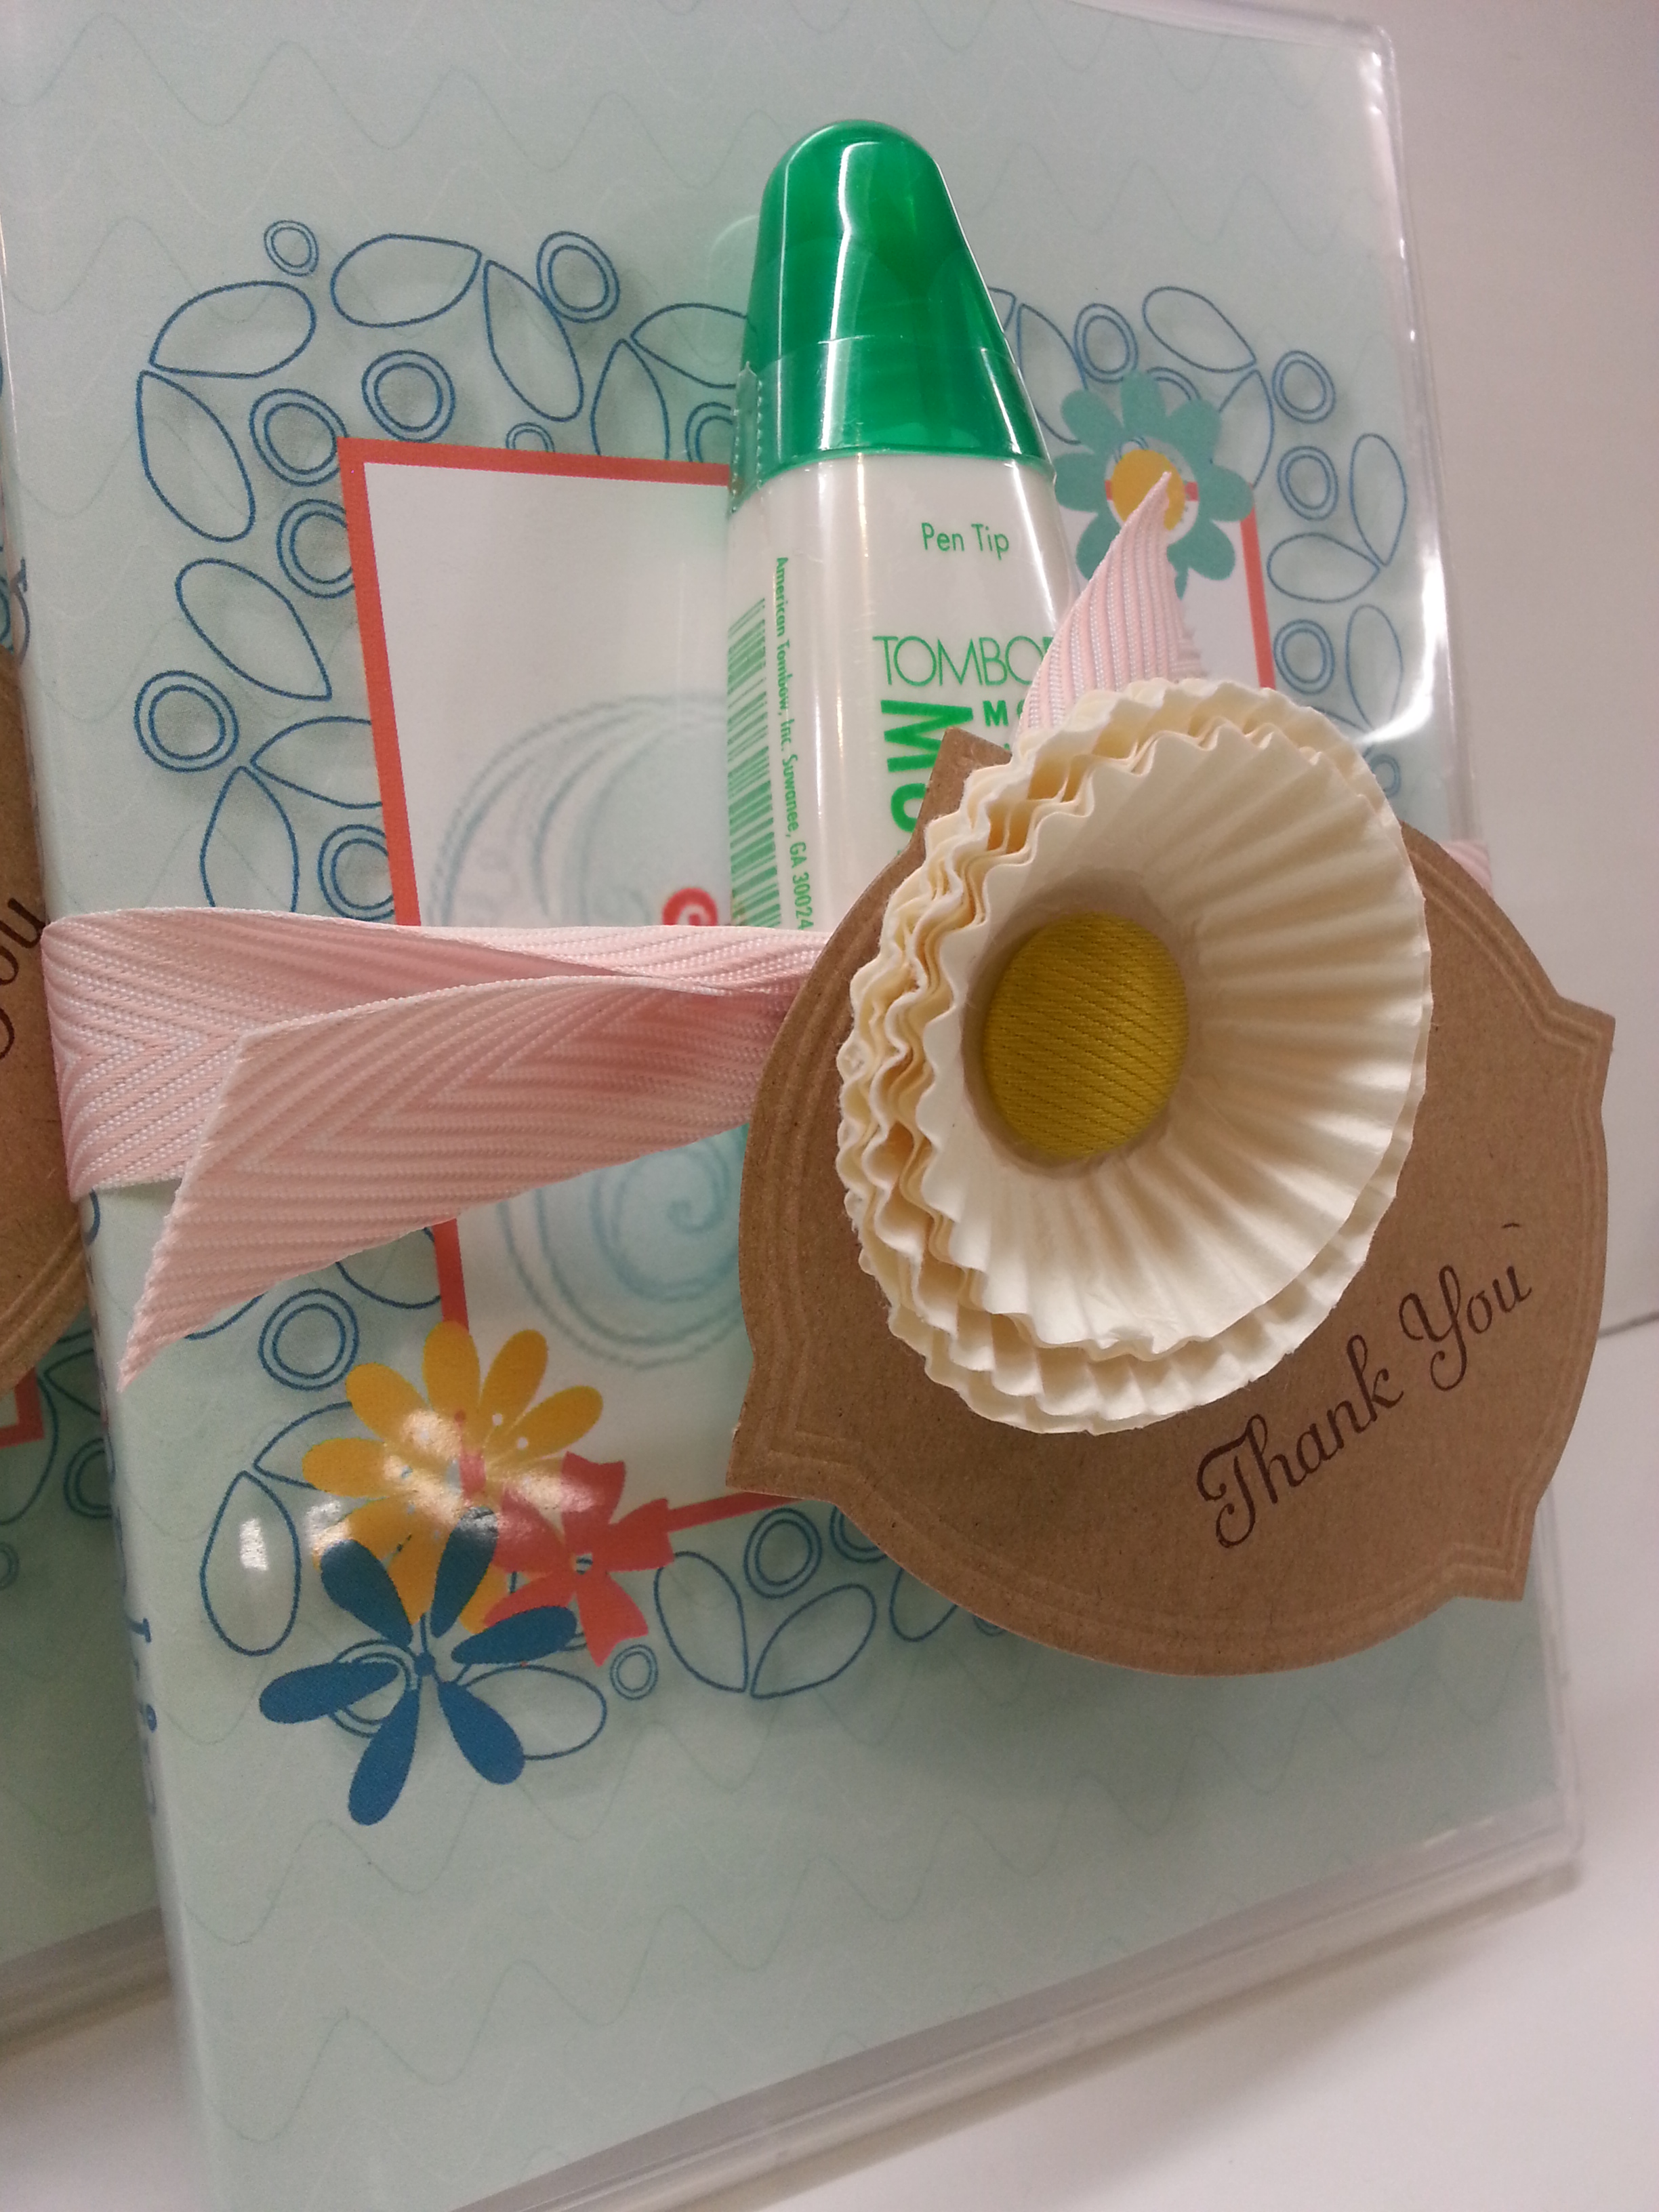
It’s a stamp case to store your paper pumpkin stamps and a tube of Tombow the Wonder Adhesive (as Anne calls it, and I agree).  Adhesive is the only thing that doesn’t come in the kit.

Here’s a close up:

20130817_132057

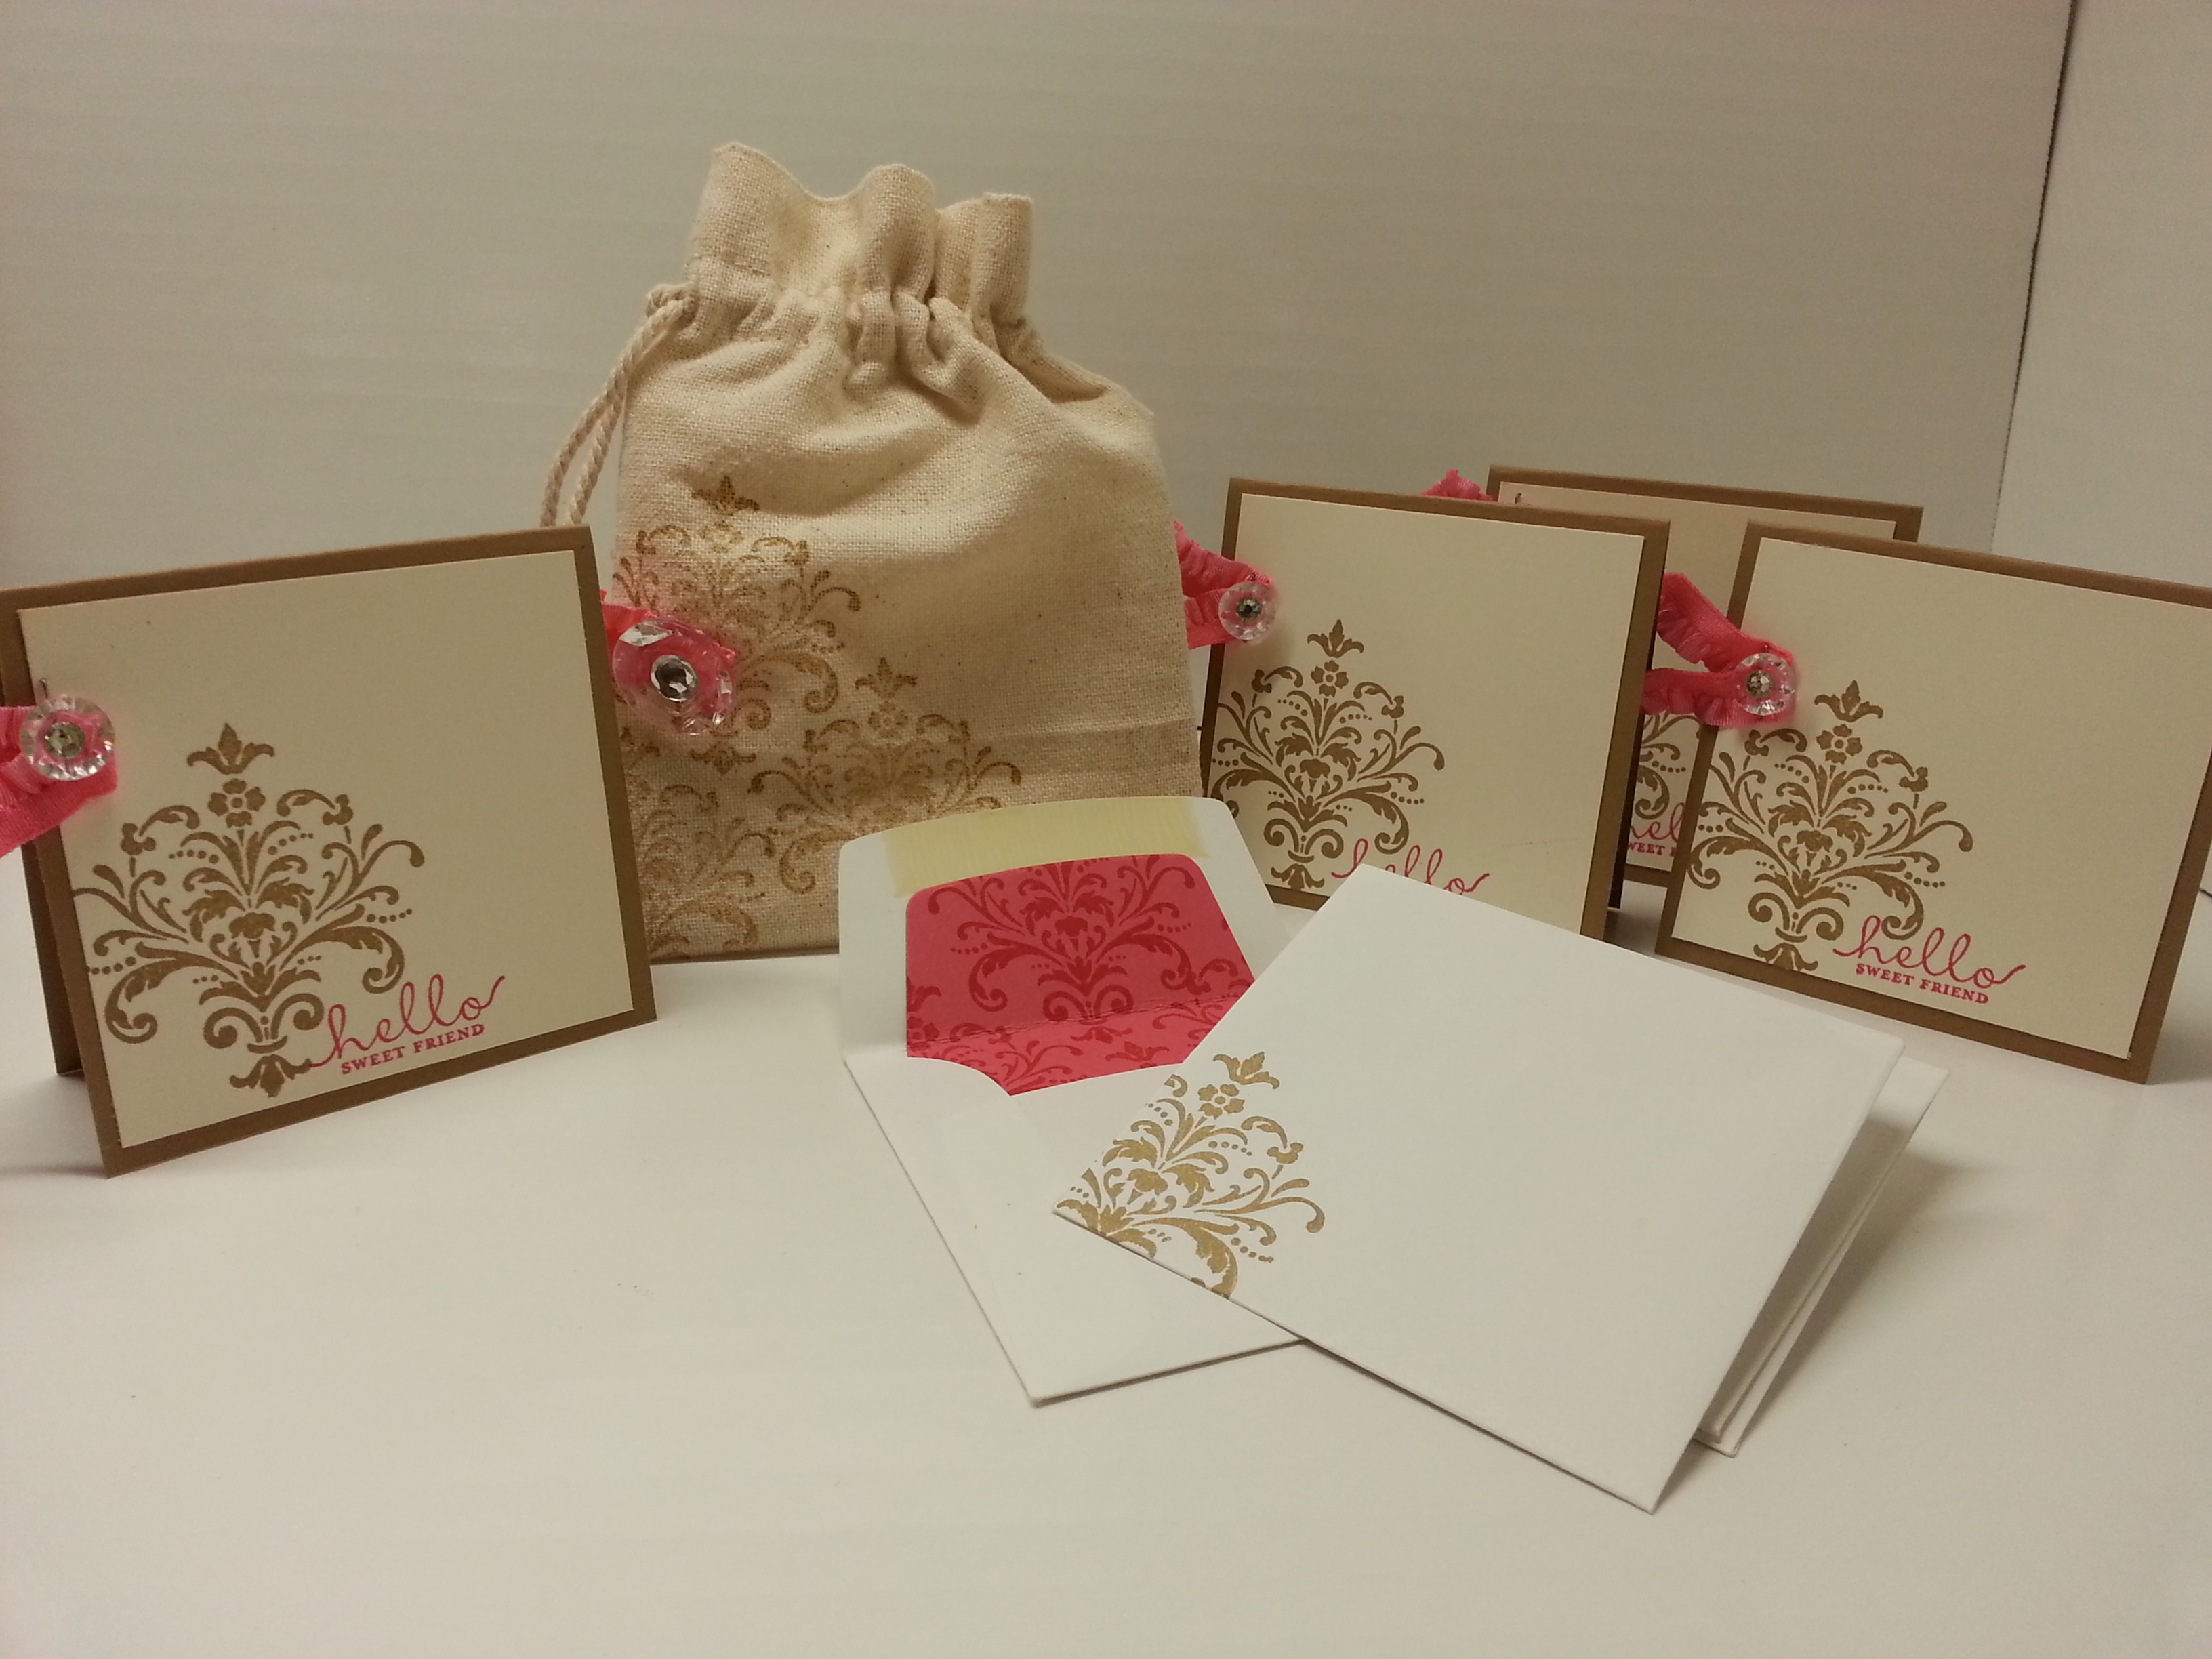
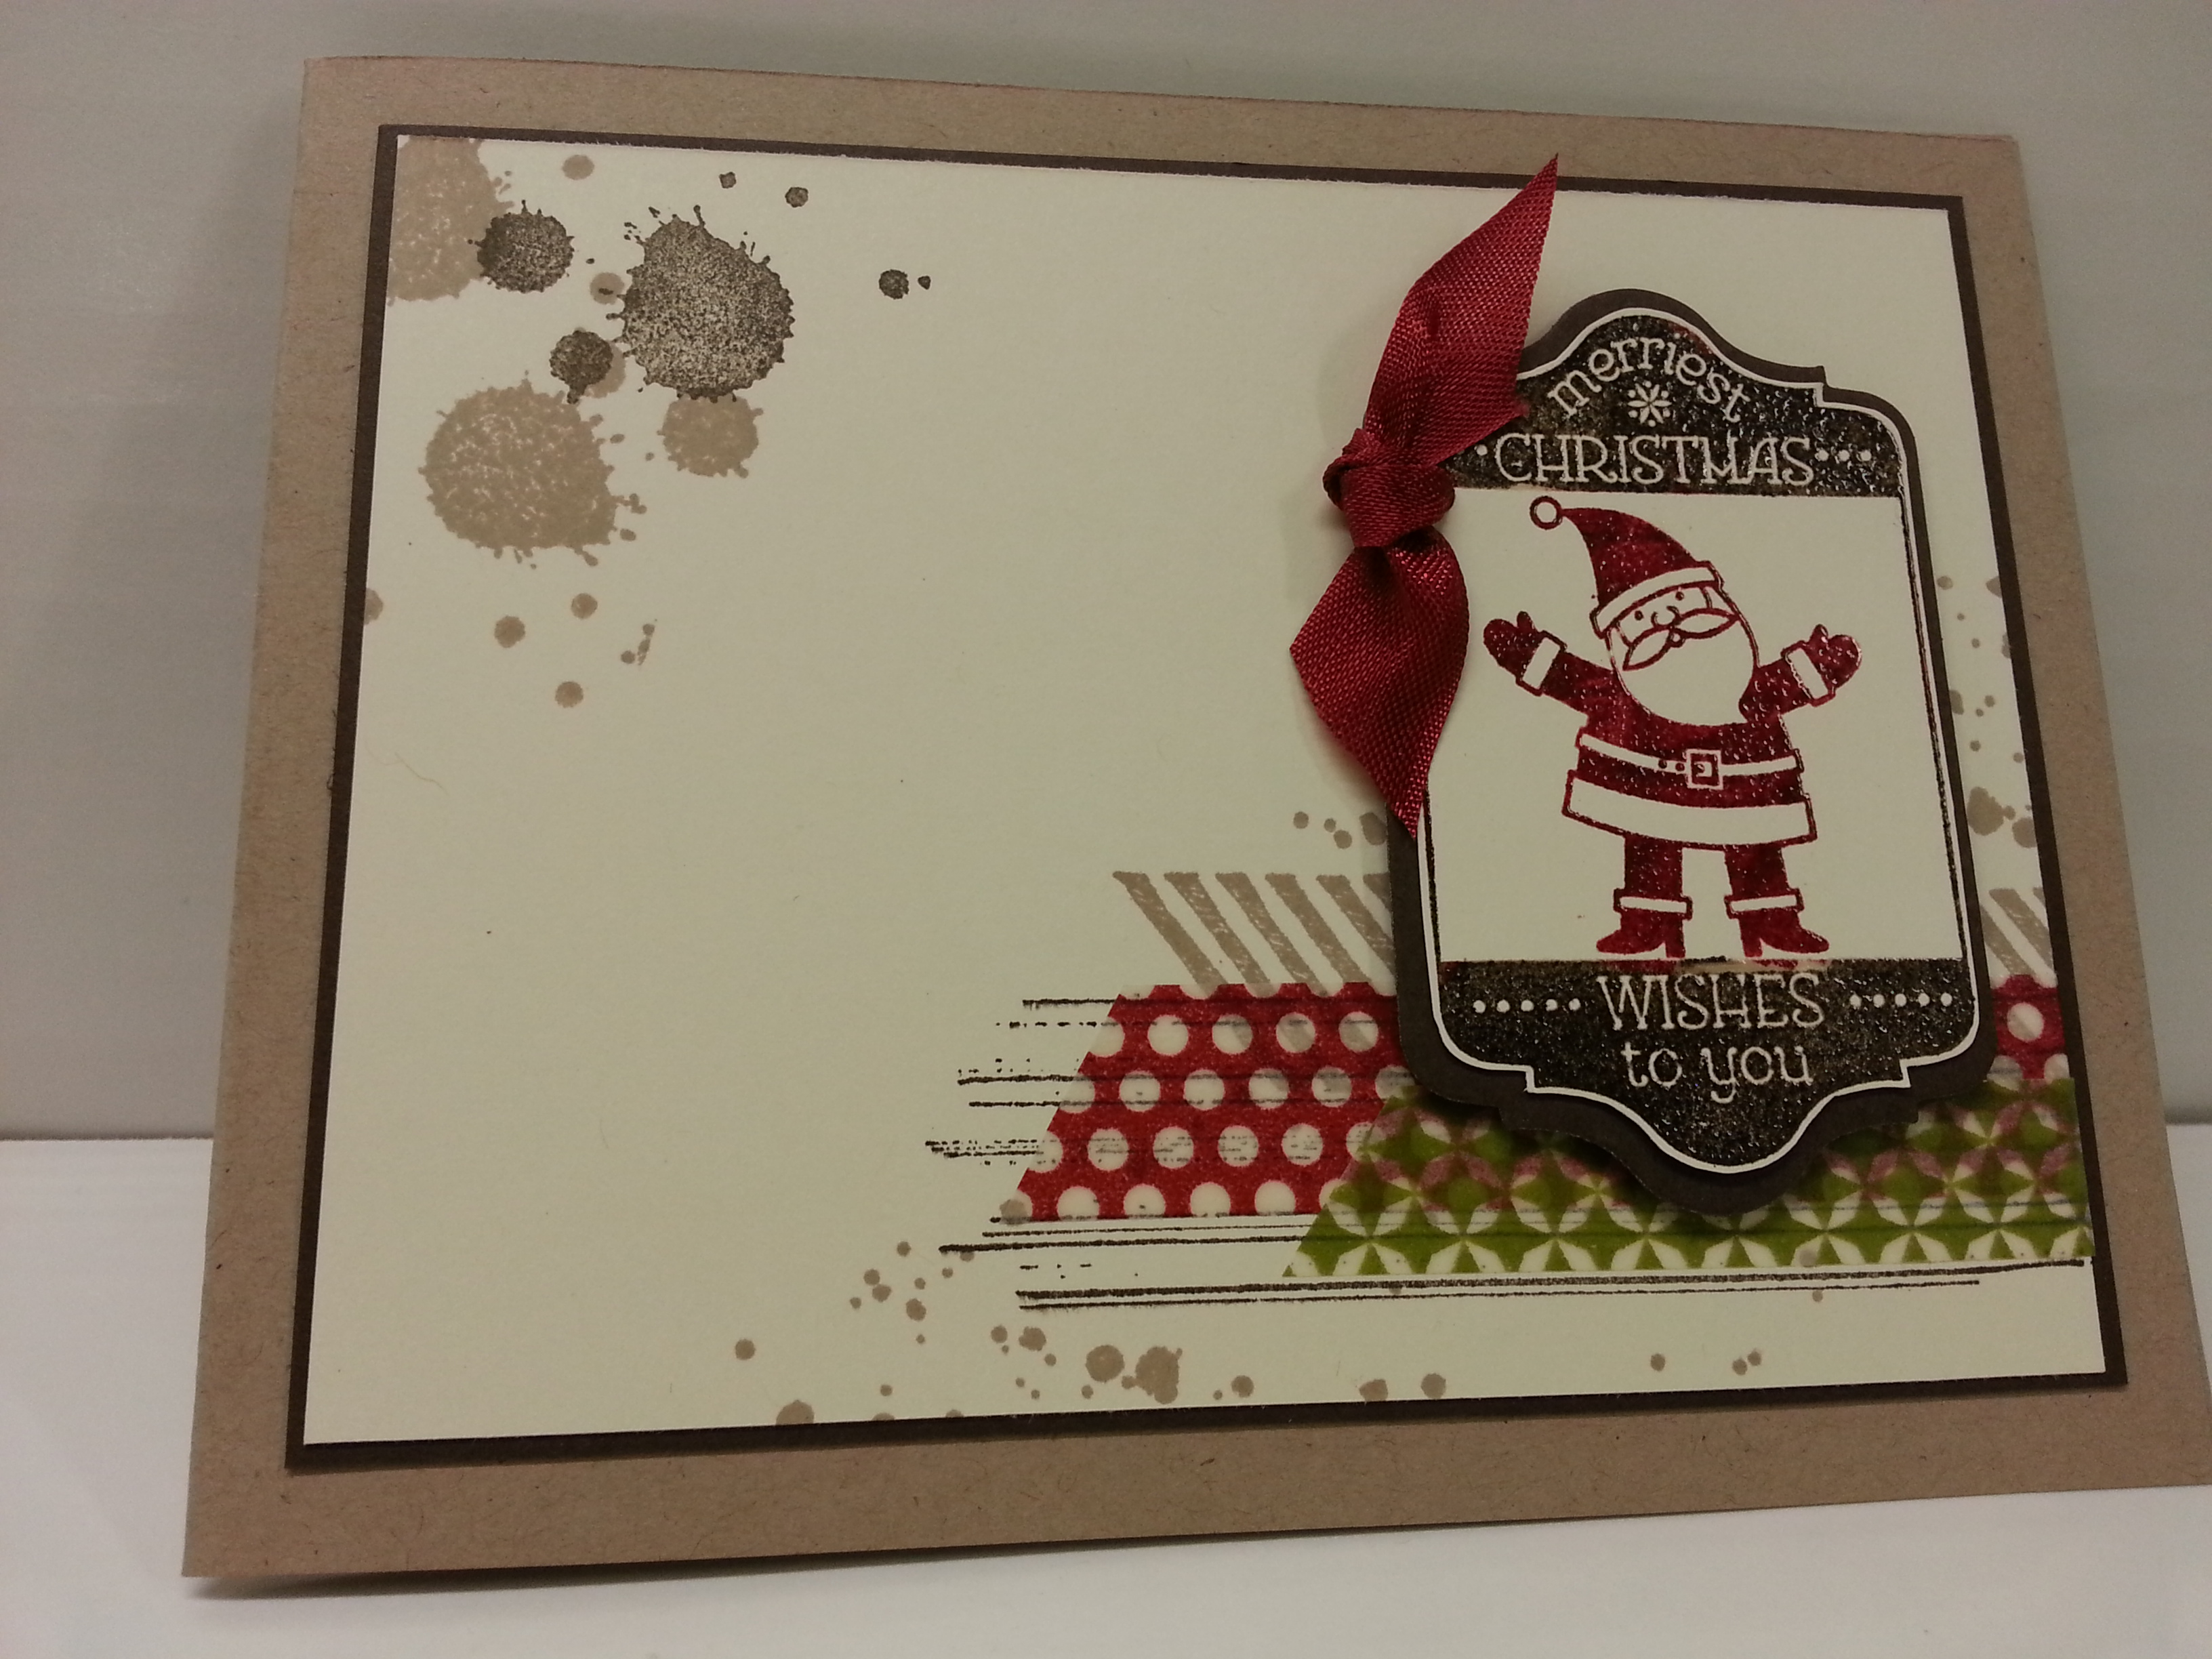
And, here is something I made from the first kit you will receive….  (Now, the card isn’t the one in the kit, but I’m using the same stamps….just to show you the versatility of it.  Cause after you make what is in the kit, you can make OTHER things too…)

And full disclosure.  I totally copied this card.  Out of the most recent Stampin’ Success.  Stampin’ Success is one of the perks of being a demo.  You get a beautiful magazine every couple of months that have LOADS of ideas.  Ideas you can use.  Right away.  Like I just did.  Cause I can.

20130827_182244

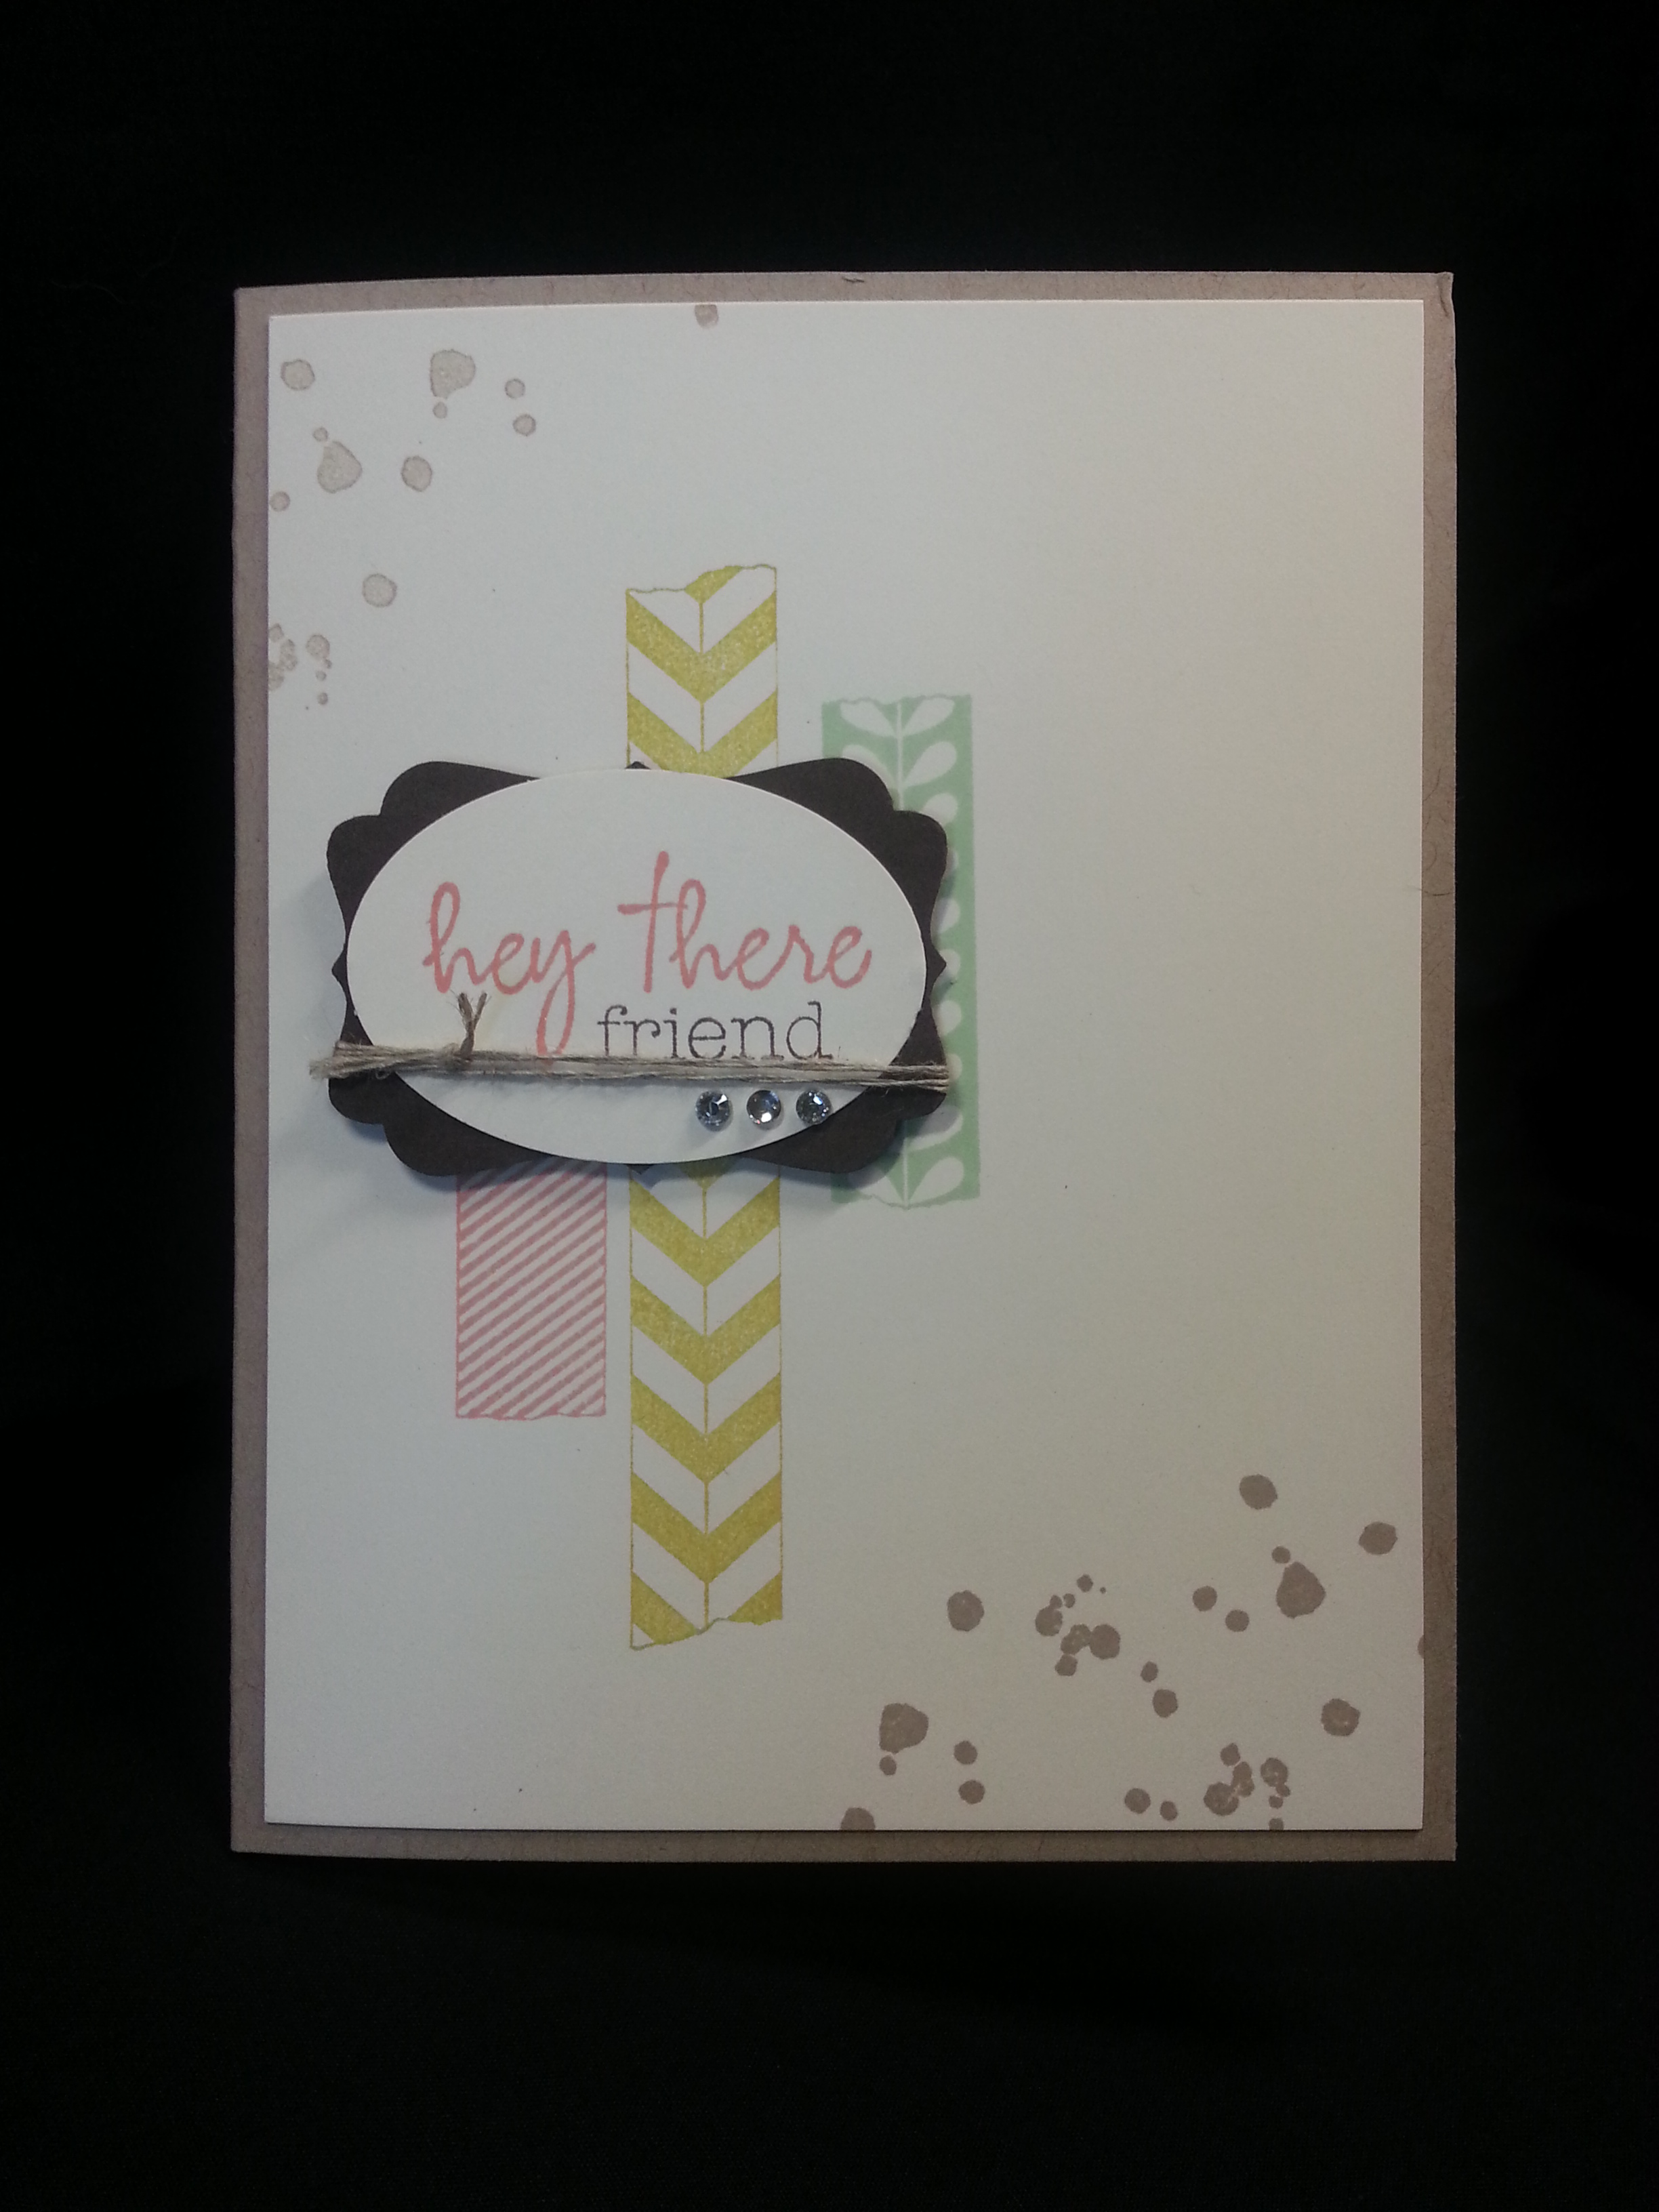
Your starter Pumpkin kit comes with that “hey there” stamp and the splotches stamp.  The stamps that look like washi tape come from a stamp set called “Tape It”.  (BTW, I LOVE that set too).  I used calypso coral, summer star fruit and pistachio pudding ink, and crumb cake ink (stamp off to make it appear lighter).  The cardstock is very vanilla and crumb cake.

Here’s another look:

20130827_182252

I’m experimenting with a black background for photos.  Let me know what you think.  Do you like it better than the white background??

Here is a close up of the embellishment:

20130827_182324

Some bling and linen thread and a couple of punches make the card just stand out.  This card comes together SO fast.  And it is another use for your starter kit!!

And, you can give paper pumpkin as a gift too.  It’s fun to get a coupe of kits and take them and put them together with a friend.  Even friends who don’t craft or are used to stamping.  It’s so easy to do and put together that they will have a good time working on it with you.

So, remember…. by August 31.  Mypaperpumpkin.com  code:  PUMPKINDEAL.

And I guess we can say pumpkins and paper mean an EXCELLENT time out.  Do you follow my logic???

Advertisement

A Graduation Celebration

Standard

So… a few weeks ago, Aaron’s aunty and cousin asked if I would give them a little guidance on decorating for Elyse’s (said cousin) high school graduation party.

I don’t think they knew what they were getting into…. asking me….

I LOVE parties and decorating and all of it. So, I think I scared them a bit, but we had lots of fun.

Anyway. Elyse had been collecting ideas off of pinterest.  And she wanted this one idea where you use book pages to make table runners. So we started there. And had to sacrifice some books (sad, but they went to good use).  And she made these awesome rosettes that we tried to incorporate where we could.  (She showed me one and I gave her homework to make about a million more.)

So… here it is!

image

That’s Elyse. Isn’t she beautiful? And she’s standing next to the desserts.  We used the same book idea and a stash of that First Edition DSP that I nearly had to trade my first born for….to make the pennants.  The colors used were strawberry slush, costal cabana, wisteria wonder, and daffodil delight. 

image

Diploma display. If you look close you can see the table runner. We made scallop edges out of card stock and the tasteful trim die to add color.

image

Instead of a guest book we had people sign these cards…and write a “key to success”.  Notice the little key??  I punched a hole in the corner to put them on a book ring.  These will be great for her to read while she is away at school…

image

These are those rosettes she made. I have no idea how. But that little burlapy thing is the favor. A remake of my convention burlapy thingy. Only hers has 2 nuggets.

image

Oh yeah… it was a tea! I shoulda led with that.  Anyway… we used decorated mason jars for stuff we needed contained. Like cutlery.

image

And cause we had extra pennants, burlap, and jars…. we made some jars of pennants! Cause everyone loves festive pennants.  Filled the jar with heavy stuff and covered it with brown crinkle paper. 

image

And all the festivity made Isaac tired. We couldn’t find him at one point and got to looking for him and found him passed out on Elyse’s bed. 

Anyway. These congratulations are way late and Elyse has already started classes at Oklahoma Baptist University.  (My and Aaron’s alma mater) I’m excited to see what is in store for her and how God will use her! Its exciting to know that she is there with my little sister.  I’m not sure Bison Hill is gonna know what hit it…

BISON! GO WITH KA-RIP!

Wow for a little one.

Standard

The second swap I was part of for convention was a wow card swap.  And the rule for this is that the card was supposed to wow.  So. That’s a tall order. And…. I had signed up for a children’s card swap that got cancelled…. but I had already cut the paper for the card…  so, I decided to have a wow children’s card.  Smaht, yeah me…. (that is Hawaii speak for “brilliant idea… you go girl”).

image

So, this card uses zoo babies stamp set. I had to buy this one cause I was so sad when they retired fox and friends. But… SU! always comes through and replaced it with this cute set. But, looking at the picture… you must be saying… that’s not wow worthy.  Just wait…

image

Before we get to the wow, I want to show you some of the details on the front. I was also sad when the tiny key tag punch retired. But never fear… the little bitty labels punch worked perfectly. And I love those safety pins. They are perfect on baby cards.  That is the crumb cake taffeta.  The colors are so saffron, costal cabana (love it) and baked brown sugar.  I embossed the bottom panel with the polka dots. What did we do with ourselves before embossing??

Okay. Now for the wow. And this wow is so easy that anyone can do.

image

It’s an easel card!  All you gotta do is make sure something on the inside is bumped up so it can hold the paper back.

image

Here’s a view from the side. You cut your card base like normal (5.5x 8.5).  Fold in half.  Then on the front of the card score again at the half way. ( score at 2 1/8).  You will then create the front of the card on another panel and then adhere it to the BOTTOM portion of that scored front.  And it’s that easy.

image

You can see how the top of the giraffe is what holds the card hope.   I love the giraffe and rhino.  It was a little mental cutting them out but it goes fast. Do it while watching TV and it breezes by. I did it while watching Isaac dig in the sand.

What is nice about the easel card is that it can be a nice little decoration for the recipient.

image

And. I love the toucan. 

Since they are so easy… everyone can make a wow card!

image

My “top-notch swap.

Standard

I just realized I haven’t shared MY convention swaps….  so here goes.

So. This year my travel plans were extremely tight before convention. I returned from Kansas just 24 hours before leaving again for Salt Lake. Knowing this, I decided to just sign up for a couple of organized swaps just so I could sign up for things I was interested in. This swap was called “Top-Notch and what I liked about this one is that we had to specify the stamp set we were gonna use. That way we we got 20 cards using 20 different sets!  I signed up to use the Happy Flowers hostess set. Cause it is happy, happy! 

image

I am in love with the new in colors. They are so…. I don’t even know how to describe it. Anyway. I made this with Crisp Cantaloupe embossed with the polka dot embossing folder. I added the pool party trim embossed with chevron. The strip of paper is crumb cake. And whisper white for the scallop trim. I love the crisp whiteness with the crisp cantelouoness.  I cut out the stamped image with the floral framelits die. Then added the flower in the center. For this, I punched the 1 1/4″ scallop 3 times. Put a mini brad through all 3 and misted with water. Scrunch, smooch, sploosh, crinkle…crinkle and you have a nice flower.

image

Then of course rhinestones. Can’t do without rhinestones.

image

So… that’s it! My top notch convention swap. And I gotta say. I thoroughly enjoyed the seal too. Well planned and ran. And got lots of great samples.

Best of…. Shelli

Standard

So, welcome back for the next installment of the BEST OF tour.  This month is Best of Shelli….  This stamp set was hand picked by co-founder Shelli Gardner as some of her favorite images.  One look at the set will tell you why…

And, I’ve been on a 3×3 kick lately, so the project I have for you is this little 3×3 note card set housed in one of those FABULOUS muslin bags from the Holiday Catalog.  Have a look-see:

20130809_215411


So, you probably already know that I’m in love with this year’s In-Colors.  This set of cards features two:  Baked Brown Sugar and Strawberry Slush.  And, it has that incredible stretch ruffled ribbon.  Just a small piece, but that’s all it needs.  I stamped the image in baked brown sugar and used the sentiment from the stamp set “Six Sided Sampler”.  And, I copied that same image on both the envelope and INSIDE the envelope with those awesome framelit envelope liner.  JUST LOVE THOSE.


20130809_215452


Close up of the card so you can see the little flag of ribbon I stapled on.  I covered it with the faceted buttons and put one of those GIGANTIC rhinestones inside to cover the holes.  It adds the perfect amount  of bling and covers the staple…  🙂

20130809_215604


These are those muslin bags.  AND THEY’RE STAMP-ABLE.  I put a thin piece of cardboard inside just to make it rigid and keep color from bleeding through and just had at it.  I copied the same embellishment on the bag, but instead of the staple I used the hot glue gun…

I love these bags because of the drawstring.  It gives a nice little ruffle on the top and the string is long enough to tie in a knot or a bow.  And, it has cute little tassels on the end.  These are 8 for $9.95.  (4×5.5″)  I can TOTALLY see these for gift cards at Christmas.  Or jewelry bags.  or…or… or…

OR… 3×3 note cards!!

20130809_215511

Here is an upclose of the envelopes.  And, the envie insert.  These will SPICE UP ANY envelope and make it the NOT BORING WHITE ENVELOPE.  I used card stock I stamped as the liner… but, probably better would be to use DSP.  Just cause card stock is a little thick.  But, it still works.

20130809_215427


Final product…  It’s SO fun making 3×3 cards….

Next, you are on to Deb Leigh.  Enjoy the tour!!

blogtour-25years-next (1)

If you need to click through the list old-school style, here you go…

Nancy Amato          http://stampinallnight.blogspot.com
Melissa Bolinger      http://www.stampinup.net/blog/2089191
Jackie Bottomley     http://www.jackiebottomley.blogspot.com
Susan Carlson         http://www.stampinmomoffour.blogspot.com
Tamra Davis             http://www.thecardladies.com
Sherri Eddleblute      http://www.sweetestdesigns.blogspot.com
Lynn Embrey            http://www.possibilitiestamperstudio.com
Kathy Hamrick          http://www.countryroads.typepad.com
Crystal Kondo           http://www.card-ed.com
Deb Lehigh               http://thestampinhut.typepad.com
Anne Matasci            http://www.MauiStamper.wordpress.com
Robin Merriman        http://www.trinitydesignstudio.blogspot.com
Andi Potler                 http://www.absolutekreations.com
Michele Reynolds      http://www.inspirationink.typepad.com
Sharon Tisdale          http://www.stampinup.net/esuite/home/coveredbridgesstamper/blog
Janet Wakeland        http://www.remarkablycreated.com


Tag…you’re IT!!

Standard

Okay, So I don’t know how the title has anything to do with the card I made, but I had to use it…  cause it was so corny…

Anyway… Welcome back to the Stamp of the Month tour….  This month we are using the Ronald McDonald House Charities Set called “Tag It”.  This set is special because $3 from the sale of the set is donated to RMHC.  It’s so cute, and it’s for a good cause!!  This set is $16.95 for clear or $22.95 for wood.

The other great thing about this set is all the images coordinate with the Chalk Talk Framelits.  So…. there is a matching cut-out for each one…to make it a tag!!  How great is that??!!??

So, here is the card I made.  I was kinda of drawn to the Christmas image.  It’s August.  I know, but we are already starting to think about our Christmas Stamp Classes and just, well, hum.  I don’t know.  I just decided to do Christmas.  Go put on some Christmas music then come back and finish reading this post…

20130809_214906

So, there you have it…  My Christmas Card in August.  I decided I wanted to maker a card, as opposed to a set of tags, so I decided I needed some other images to play with.  Gorgeous Grunge to the rescue.  We got this stamp set as part of or Convention goodies, and I gotta say, I had trouble WAITING till convention to get it.  It makes such glorious background stuff.  And, WASHI.  I am truly, honestly, and FULLY in LOVE with WASHI TAPE.  It’s so easy to use.  And, that’s the SU washi in the Christmas Colors (p. 25 in the Holiday Catalog…$4.95 for 3 rolls…which is a STEAL).  Anyway, The inks I used in the background were Early Espresso and Crumb Cake.  I wanted to keep it neutral and use the washi to add color.  I love that it is a little see-through.  This makes it real fun to layer.

For the card I used Crumb Cake and then layered with Early Espresso.  I stamped on Very Vanilla.

20130809_215017

Close up of the tag.  You can kinda see my flub up there…. here’s why…

20130809_215051

Can you see in the light that it is embossed?  I wanted it embossed, but wanted it TWO colors.  And, really didn’t want to have to cut out stuff.  SO….  I wanted to clear emboss over ink.  And you typically would do this by stamping your stamp in the versamark ink, then into the color ink.  But, cause I wanted 2 colors, I decided to try and marker it after stamping in the versamark.  Don’t do that.  It doesn’t work.  I had to get creative with how I used the ink pad and ink the image with the edges and corners of the ink pads.  That’s why the flub.  And, this happened:

20130809_201511

See the red seam binding?  It’s cleverly disguising a red spot on the image, where I dropped the stamp into the red stamp pad after having the espresso ink on it already.  (BTW:  the red is Cherry Cobbler).    And, I like the cherry cobbler seam binding on the card.  Don’t you just love happy accidents?  Anyway, back to embossing…. stamp the image in versamark, cleverly apply the ink from the other stamp pads, then sprinkle with clear embossing powder and emboss.  I decided to hand trim the image out because I wanted to be able to layer it onto the espresso tag that I made with the coordinating framelit…  so, yes, I cut it by hand…

20130809_215036

SO.  Now.  TAG.  YOU’RE IT.  It’s your turn to play with this wonderful stamp set, give to charity (when you order the set) and make some fantastic projects with it!!  But, wait…. finish the blog tour of course!!

Your next stop is Deb Leigh.  Click on the button below…

blogtour-stampmonth-next

If that doesn’t  work, you can use the list below to go on to the next blog…

Nancy Amato           http://stampinallnight.blogspot.com
Melissa Bolinger      http://www.stampinup.net/blog/2089191
Jackie Bottomley     http://www.jackiebottomley.blogspot.com
Susan Carlson         http://stampinmomoffour.blogspot.com
Tamra Davis            http://www.thecardladies.com
Connie Deibler         http://www.conniestamps.com
Danielle Denhardt    http://www.purrfectlycreative.com
Sherri Eddleblute      http://www.sweetestdesigns.blogspot.com
Crystal Kondo           http://www.card-ed.com
Deb Lehigh               http://thestampinhut.typepad.com
Anne Matasci            http://www.MauiStamper.wordpress.com
Robin Merriman        http://www.trinitydesignstudio.blogspot.com
Audra Monk              http://thecraftyyogi.blogspot.com
Maria Pane               http://www.stampinandscrappinwithriri.blogspot.com
Andi Potler                http://www.absolutekreations.com
Michele Reynolds     http://www.inspirationink.typepad.com
Vicki Soni                  http://www.paperinkle.com
Pam Staples             http://www.sunnygirlscraps.com
Jeri St. John             https://jerrisgemtastics.blogspot.com
Jeannette Swain       http://www.stampsnwhatnot.com
Janet Wakeland        http://www.remarkablycreated.com