Best of…Greeting!

Standard

As you read this, I’m winding down the convention madness. Which is sad cause I love convention madness. But this is a lovely little stamp set to help my hafta-go-home-and-join-the-real-world blues. Hum.

Anyway, this set brings back a little nostalgia cause that “you made my day” stamp….was in one of the very first SU! sets I bought. Back when you could choose foam mount or wood mount. I got foam mount cause I was cheap. Cause I was just outta college and no mo’ money.

Anyway, being that this super cute greeting set is, well, greetings and no images, I decided to pair it with Flower Shop. Cause it is a cute  set. Six flowers with a matching punch. (SU! is offering these as a bundle, so they are 15% off if you buy the bundle.)  The flowers are great cause they are all the same shape. They each just have a different feel depending on their style. So. I thought they’d go perfect with the greeting set to make a super cute little pack of 3×3 note cards. And. Just a tip. If you purchase the Flower Shop bundle (stamps and punch), I might suggest that you head over to Maui Stamper to look at her post at how to line up the stamps with the punch. The stamps aren’t symmetrical so they do take a little fussing to figure out how to stamp them so you can punch them.  Maui Stamper will show you how to mark them so it will be easy.

Anyway… here you go…

image

Again, excuse the improvising. Made these while I was in Kansas and didn’t have all my stamp supplies or photographing accoutrements. So these are very dark.  On a floral background.  Cause this is what my mom, Quilter Extraordinaire, had in the way of white fabric.  (???? a table cloth????)  (BTW… I have a new idea for a photo booth I am very excited about so hopefully pics will get even better.)

image

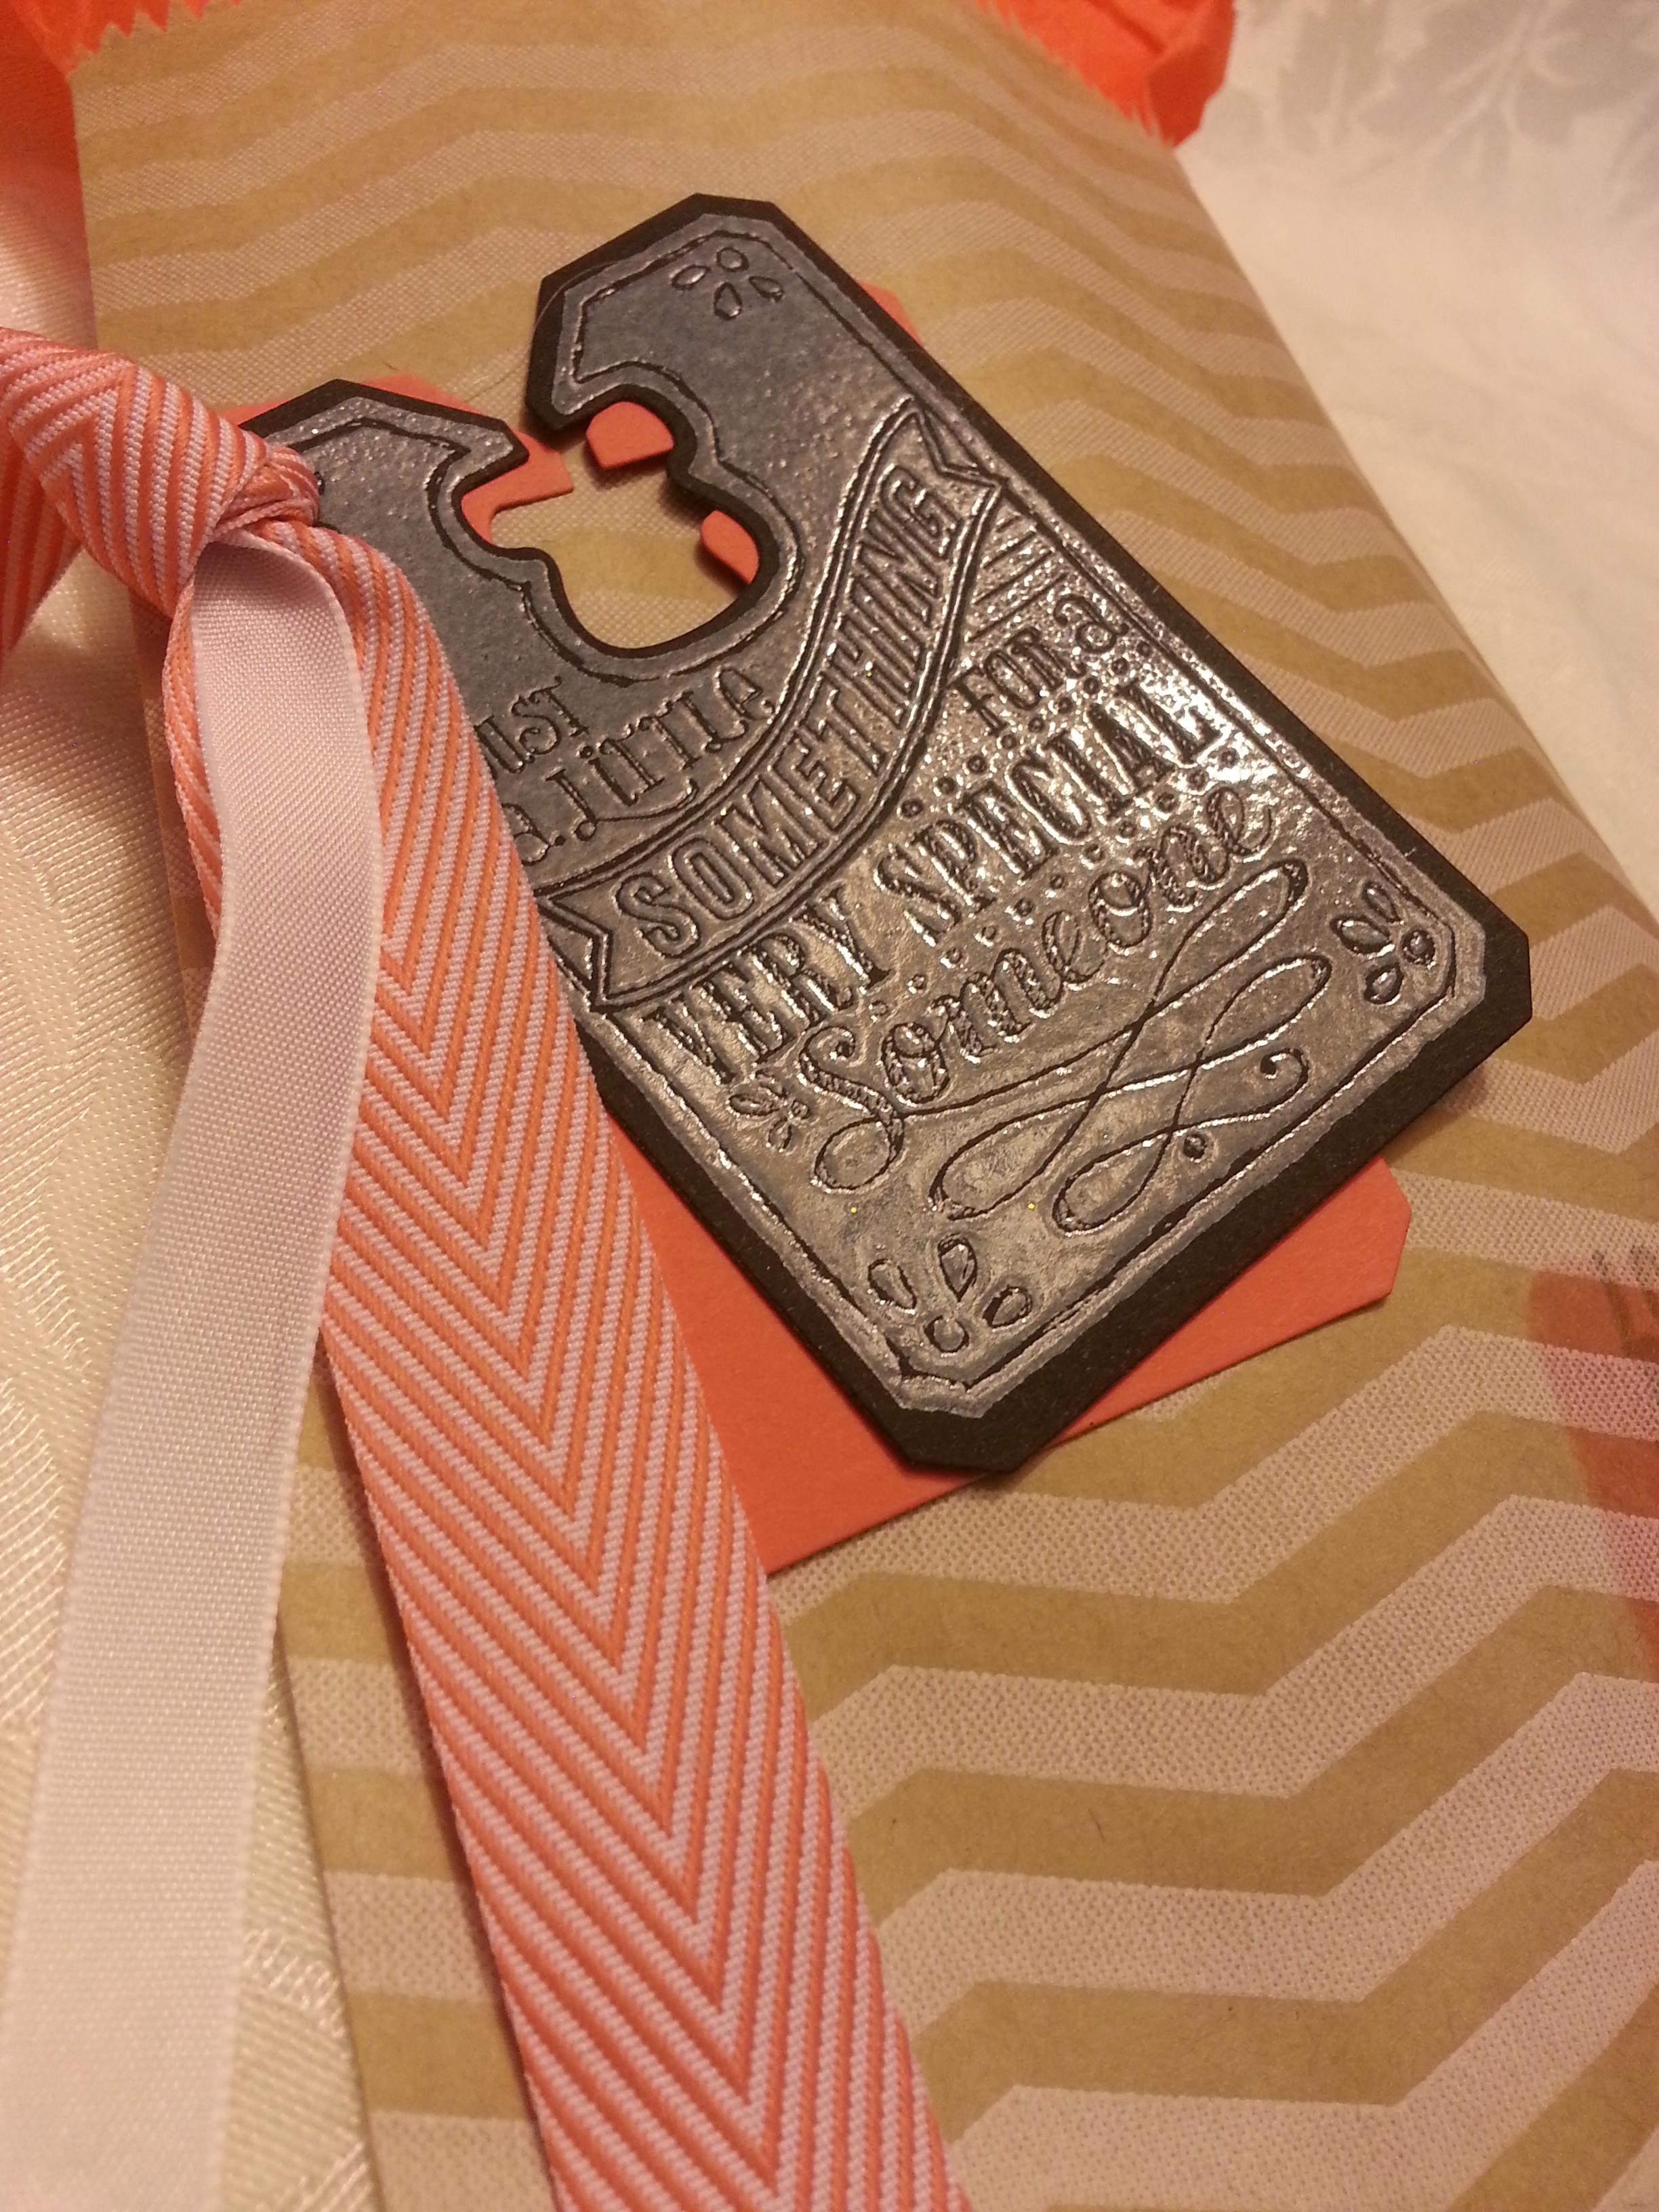
I think this is my favorite greeting stamp. Cause it reminds me of the good ole’ days….

image

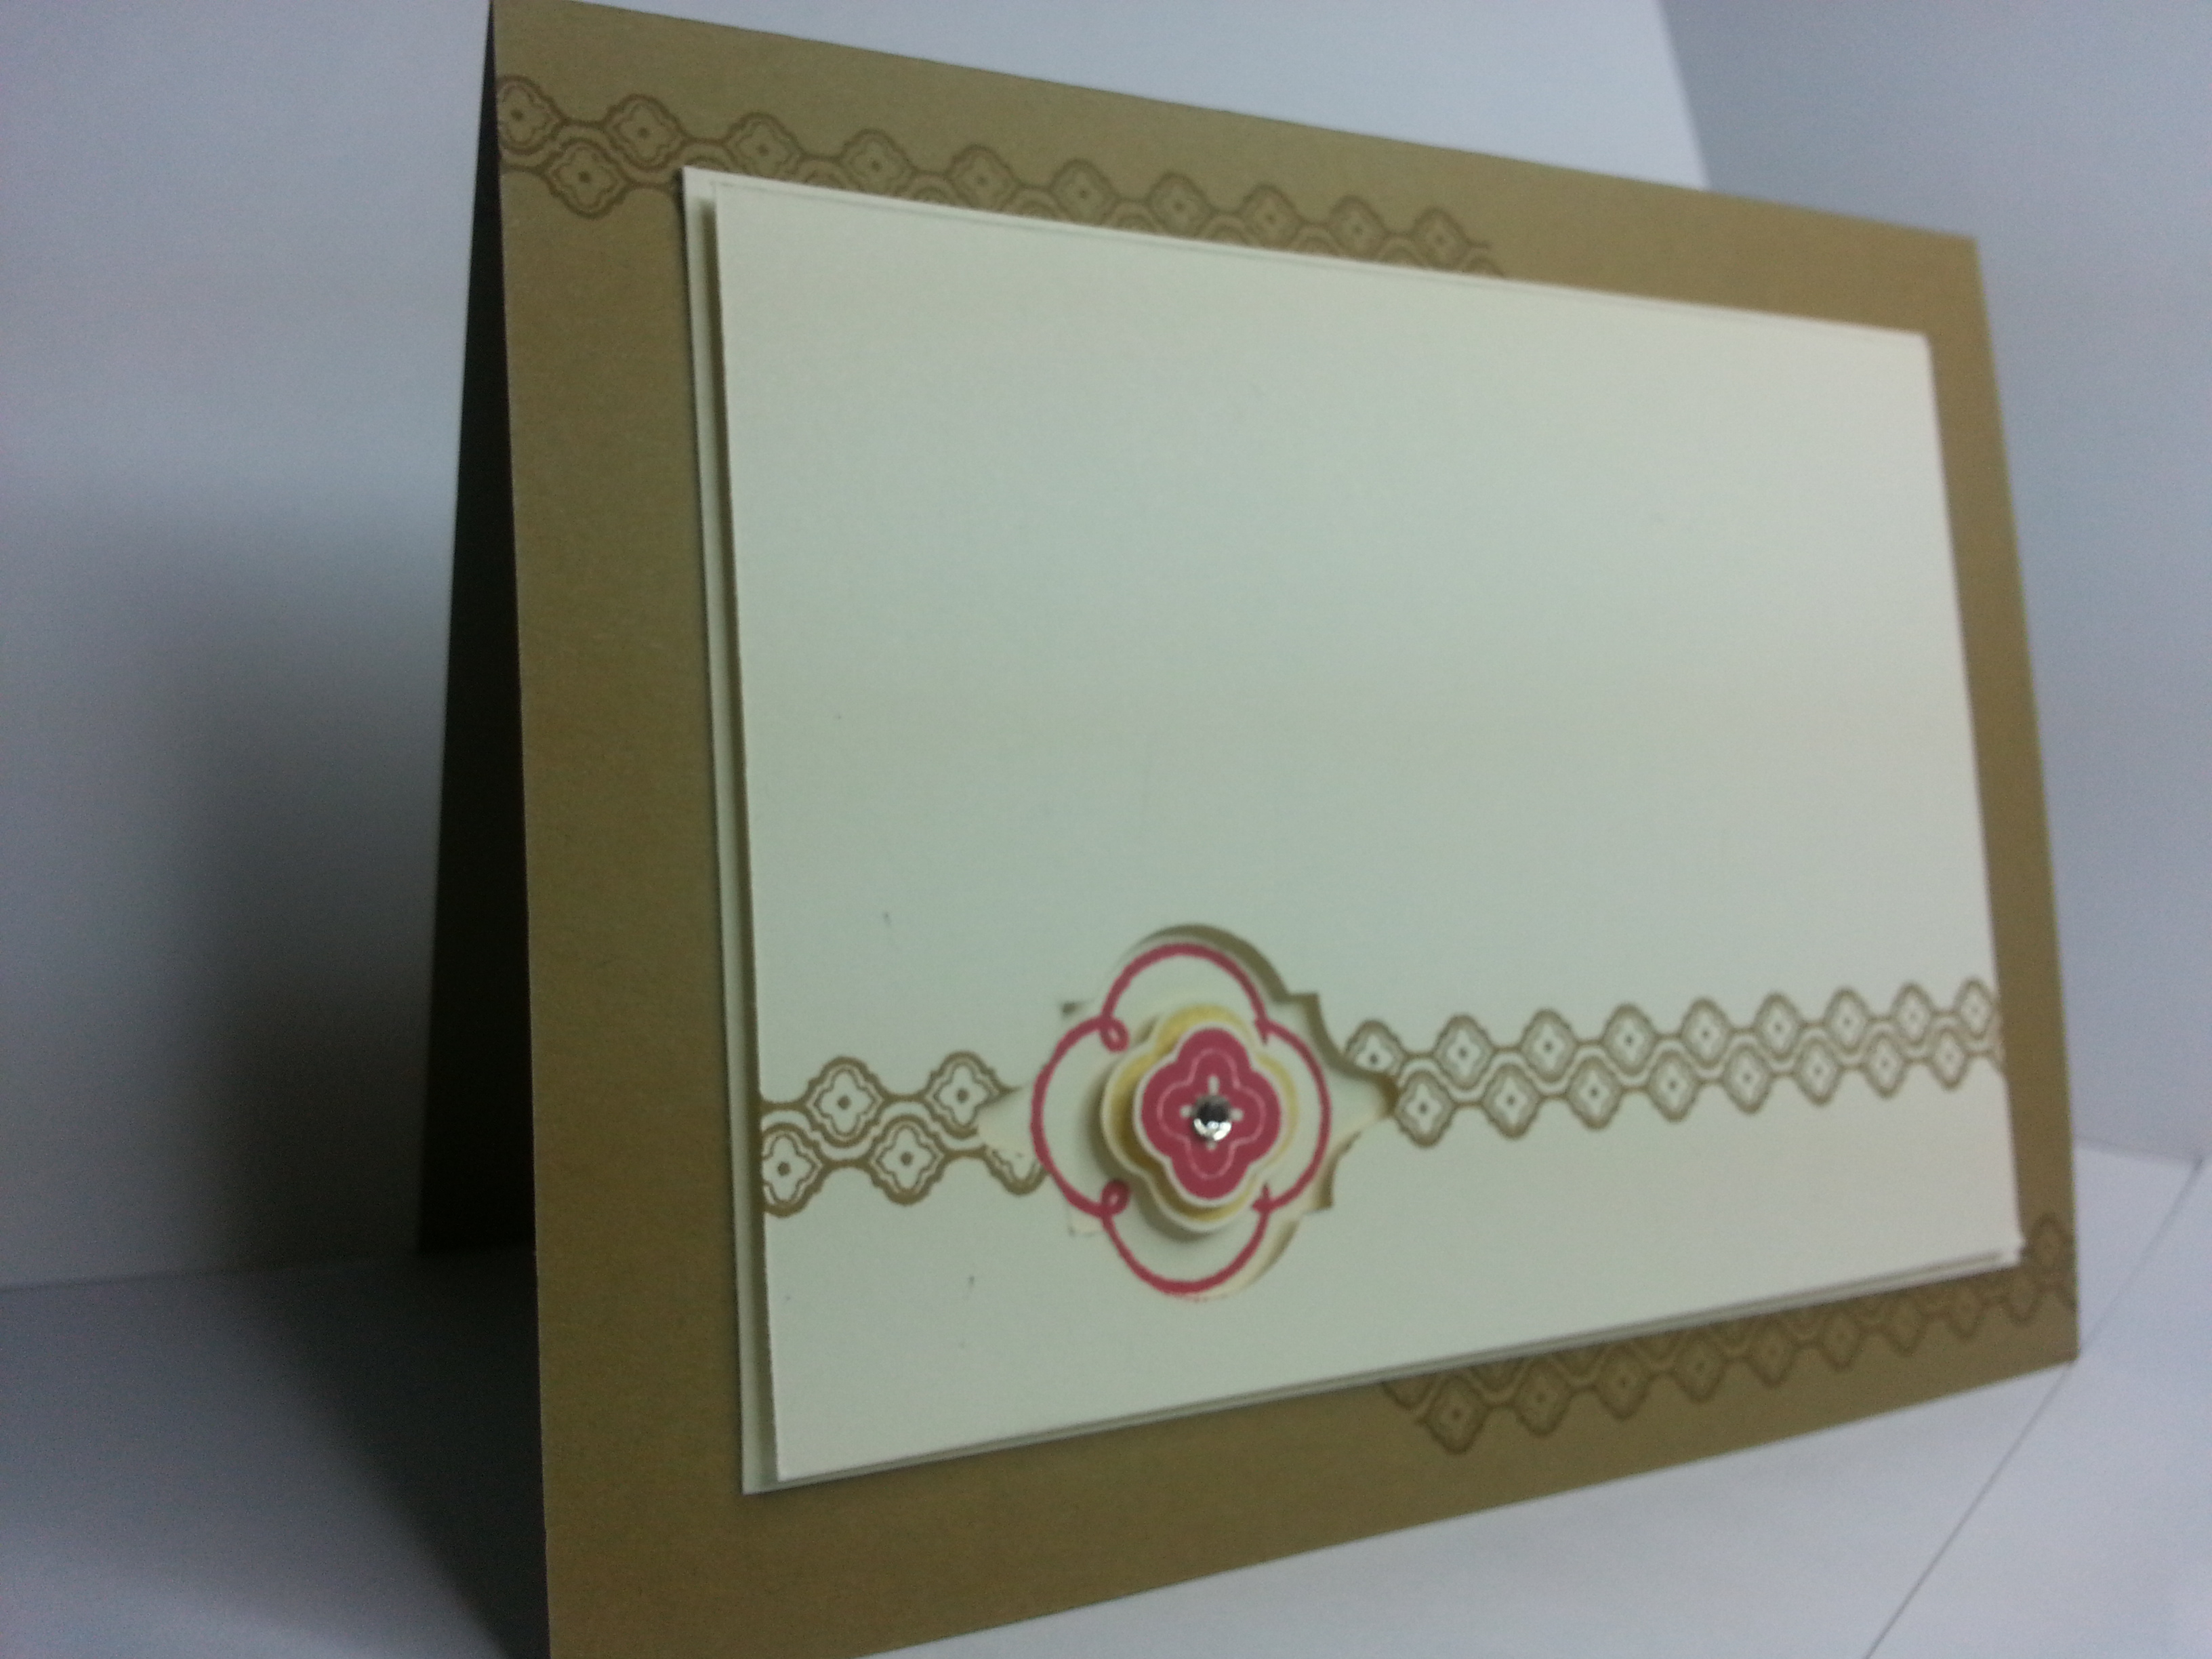
Brown sugar flowers. Yeah, I know…strange. But it works. And wouldn’t this be nice tucked in as a surprise in your husband’s wallet or kid’s lunch?

image

Washi! My first time using it on a card. Love it! And the stamp inks and stamps on it beautifully.  And this thank you is a perfectly good all around thank you. You need it.
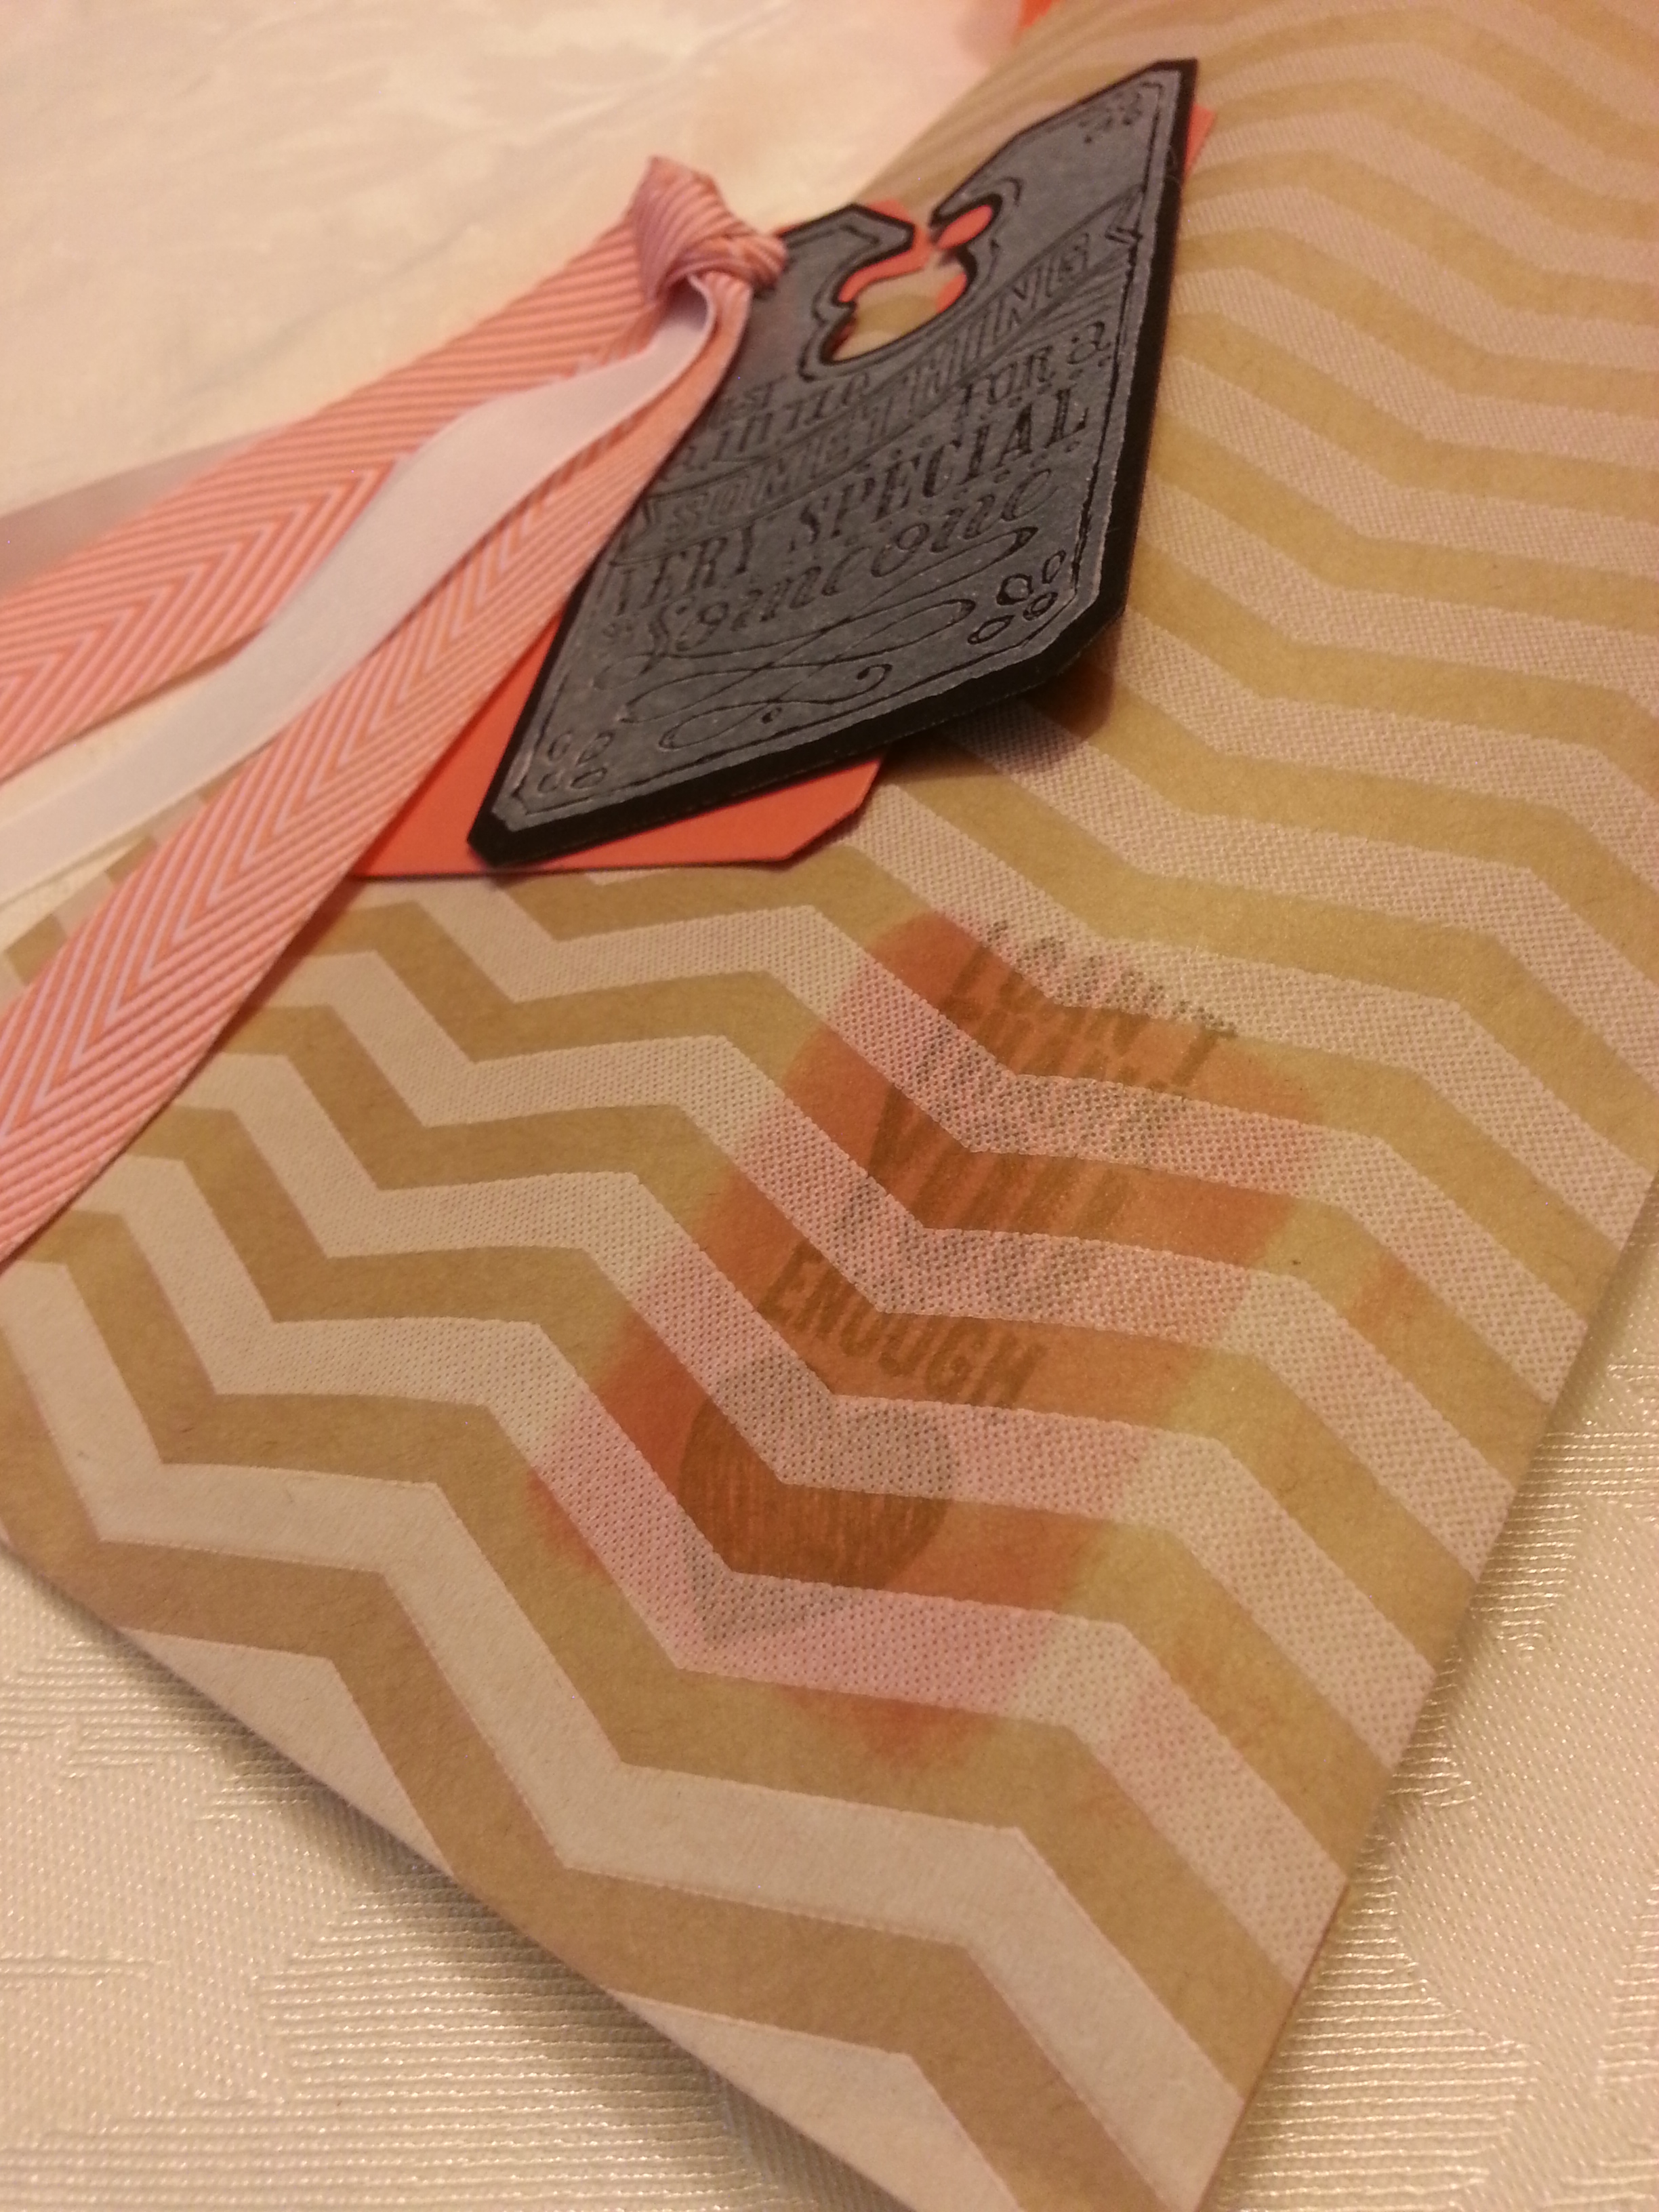
image

For a wedding gift…

image

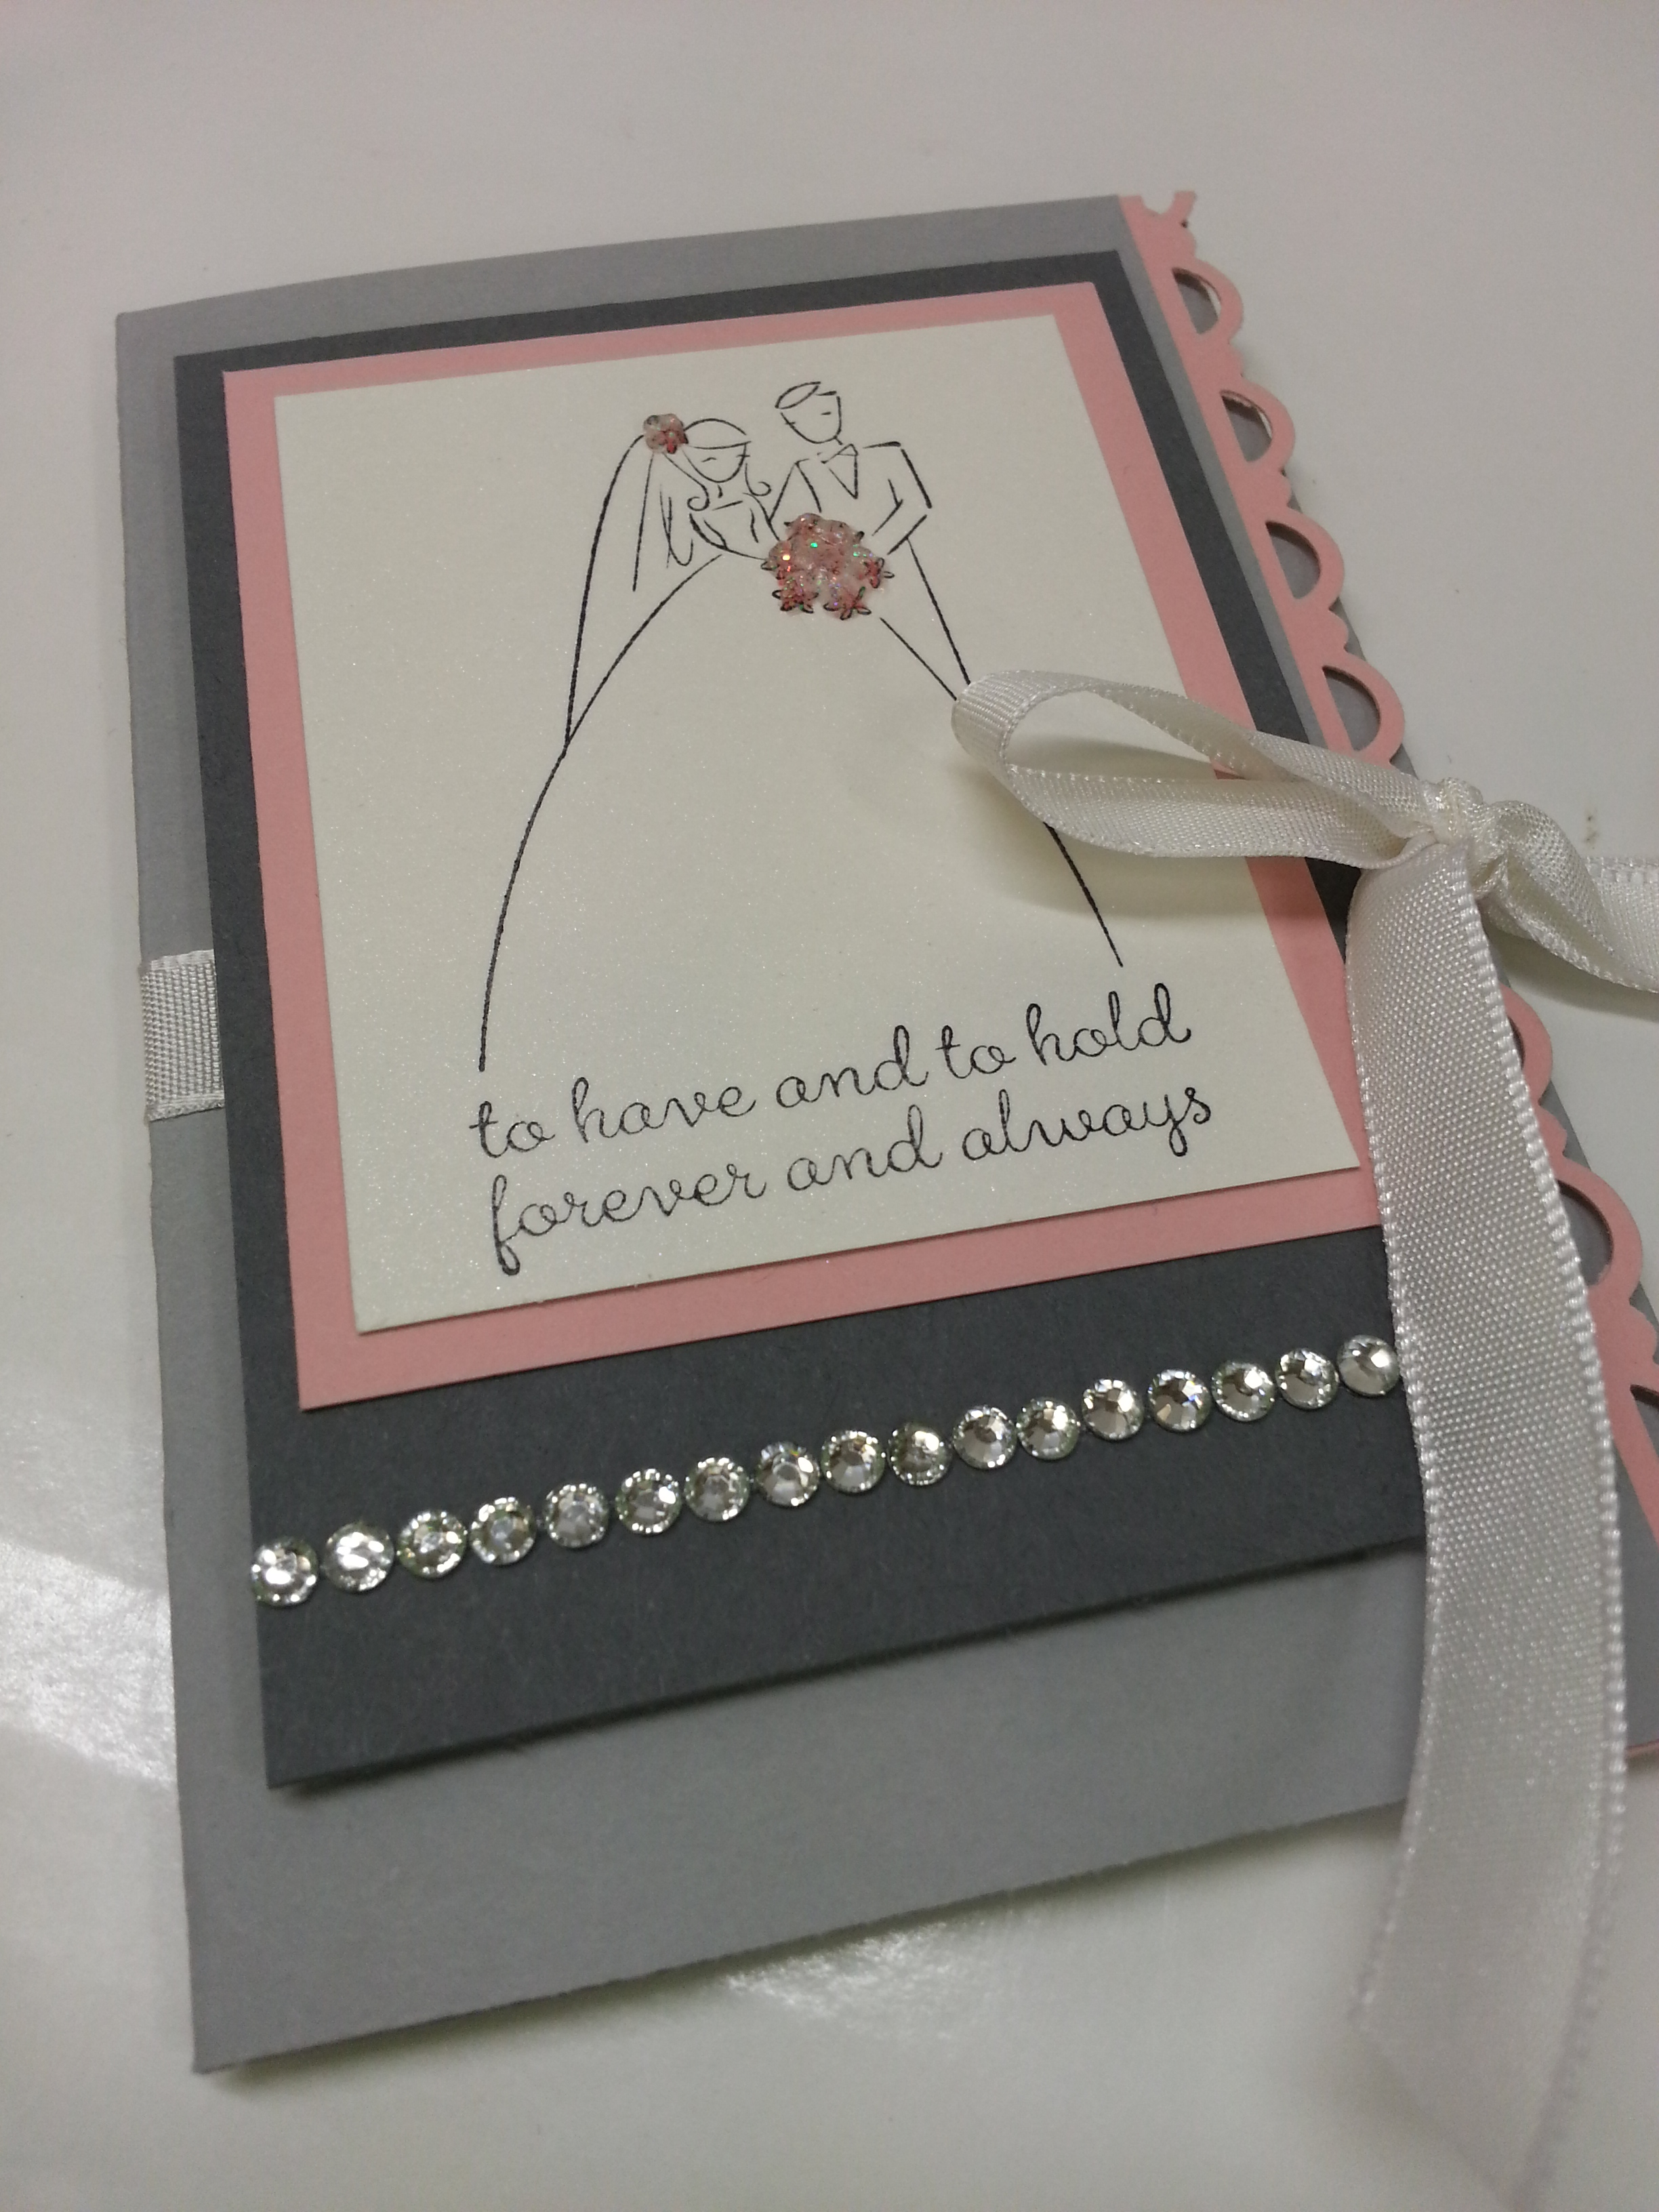
Memory lane aside… this happy day image is the new addition to the set and I love it. So cute.

image

And who wouldn’t want a cheery note telling them they are in someone’s thoughts.

So. That’s my take on the best of greetings. I think it is a super easy to use, great universal set. And a steal at $14.95…

Now you are headed over to Deb Lehigh to see her vision for this awesomely versatile set…

blogtour-25years-next (1)

If that link doesn’t work, here are all the stops:

Convention 2013 Day 2

Standard

No… we didn’t warp ahead in time. I didn’t get a post done yesterday. (Shocker). I was TIRED. Got home from KS on Monday and left for UT on Tuesday. My body has NO IDEA where it is or what time zone it is in. But. Anyway….

Wanted to share with you some pics. Maui Stamper got us these fabulous glasses we have been wearing at all the sessions

image

Aren’t you jealous? They certainly draw attention. Sometimes we forget we are wearing them and as we walk by people they smile and laugh. It took me 2 days to realize they probably weren’t smiling in response to my sparkling personality.  However, I think it was those glasses and a good conversation we had with “Anne’s second Sara that scored us these :

image

We get to go on the am and meet with some steam set designers! Do you hear a chorus of nee-ner nee-ners in the distance?  Cause you should :).  I will let you know how it is….

I wanted to share another swap with you…  this one comes from guest stamper Bronwyn T. She is my down line and coworker. It took working with her for about 4 years but I convinced her to join the stampin frenzy.  I offered to my down line to send a few swaps with me and I would swap them on the floor. Here is her swap….

image

I absolutely love it. Love that new designer series paper. Love the design. Love it.

I also wanted to show you an INSANELY cute and… well, just plane insane project that one of the Artisan Design Team members did…. I do not have any idea how people come up with these things….
Beautiful.

image

Also… we broke a Guinness Book of World Records yesterday for the most cards mailed from a single location at one time. Here is Anne and I posing by the mail truck. They needed one to take all the cards away…

image

Oh. And here is a picture of what greeted us when we arrived yesterday for the first opening session. Mind you, we arrived an hour early….

image

This is the line. :). Lots of fun!

OK. It’s time for bedy-bye. Gotta get up early! Nee-ner ….nee-ner…..

So… I know…. it’s an addiction

Standard

BUT I LOVE BAGS.

All kinds of bags.  Cool paper sacks.  I’ve not met a tote I didn’t like.  Hand bags.  ALL OF IT.  In college, my roommate and I decorated our dorm room with different kind of shopping bags from every store we liked.  The entire room.  It was awesome.

Anyway, what does this have to do with today’s blog tour???

STAMPIN’ UP has just introduced the absolute most coolest, bestest, little packaging bag.  And, yes, I should be excited about the stamp set we are using… Chalk Talk (and, I AM. We’ll get to that in a second.) But I nearly fainted from delight when I saw these little chevron printed bags in the catalog.  And, they are a steal at 10 for 3.95.

Here it IS:

20130712_085905


(Ignore the fancy background…  we were having to improvise)


Anyway, I LOVE THESE BAGS.  And, when Chalk Talk was chosen as the set, I knew immediately what I had to do.  I also LOVE this set.  And the coordinating framelits.  The framelits are what make the set AMAZING too… cause they all cut out perfect tags.  Christmas is going to be amazing this year with these sets and accessories  AND BAGS.

I digress…

The stamp was SCREAMING to do the chalkboard technique (get it… Chalk Talk??)  Black background, white embossing powder.  Or you can do white ink and clear embossing powder if you are into improvising…  which I have had to be, as of late…

And, the chevron bag pairs PERFECTLY with the new chevron ribbon.  Which is a DREAM….  This one is Calypso Coral.

20130712_085911


I also used the framelits for a mask.  See the orange splotch in the bottom right corner?  I used a framelit from the tags framelit set to be a mask for a sponging the calypso ink (you can see where I screwed up and some of the sponging got outside the mask–some people may find this a flaw… I prefer to think of it as my humanity…)  To prevent this, you could use a post-it note on the sides of the framelit so the sponging doesn’t get where you don’t want it.  ANYWAY, I stamped over the sponged portion with another stamp from the Chalk Talk set.  I’m telling you, this is the perfect gift-giving combo.  Wouldn’t you love a pair of earrings, a nail polish, or a Stampin’ Up! gift certificate given in this package??


20130712_085920


A close up of the masking…


20130712_085959


And, some tissue tops it off!!  I am head over heels….  🙂


Now, off you go to see what Deb Leigh did with this fabulous stamp set….  Enjoy!!

blogtour-stampmonth-next


If that icon doesn’t work, click on Deb Leigh’s link below:

Lookie what I made

Standard

So… there is this cake and cookie decorating store that offers cookie decorating classes and I’ve never had opportunity to take one till now. And… no… there aren’t any weddings I’m planning on… Isaac is not getting married… it just happens that the class that I could attend just happened to focus on weddings.  And this one focused on rolled fondant. And embossing fondant. Who knew you could do that in baking??!?  Anyway… here is what I made…

image

And here are the close ups…

image

This one… I actually freehanded the design cause I screwed up on the embossing… namely…it didn’t emboss so…

Here are the others…

image

Do you see the shimmer?  The best part of this class is I learned how to use something called luster dust and cookie glitter.  I don’t know where that had been all my life, but… HOW FUN!!  Of course I had to buy some…

image

Those swirlies were hard to do. We traced the embossed part with the icing bag… but I quickly learned my icing was too stiff and I’m not a fan of the #1 size tip. (Don’t know exactly what that means…. but don’t like it)

Here’s the last one:

image

The bottom of this cake was practice using a flower tip. I still need more practice. 

All in all… a fun class. But took 2 hours to frost 4 cookies.  I need more practice.  I learned there are many similarities to card making.  But, unlike card making…. you get to eat your mistakes!

And the winner is…

Standard

Well… Hello… I owe you the winning graduation memory photo keeper!  This mini scrapbook album is the one that was selected by the project graduation committee for the students to make…

image

My pictures didn’t come out all that great, but it’s supposed to be the graduation cap. And it opens…. first to this….

image

Then to this….

image

Here are closeups of the inside pages.

image

image

This is super simple to make. It’s 2 12×6 papers (scored at six”) connected on a 3″ square piece of paper (it’s white in these pictures so it may be hard to see.). This white paper is scored on the diagonals and once across the middle.  Crease the score marks well.  The corner of each of the pages will fit on a “triangle” on your white paper. And it all folds up nice and neat. Embellish however you like.  I used silver glimmer paper and gray. Just to keep it simple.  The kids loved making these. The hardest part about all this was staying up all night. I realized from this experience that I am older than my brain believes…   🙂  and I have no business pulling all nighters.  Thanks to my good friend, Glenda, for coming and keeping me company…and keeping me awake!

Graduation photo wallet

Standard

So… a while back I was approached by a project graduation committee (from a rival highschool…names have been changed to protect the innocent…namely ME for hobnobbing with the rival highschool) to create a little scrapbook memento that students could complete during the project grad party. I gave them a couple of samples to choose from. This is the one they did not choose…

image

This is the outside. It’s a little photo wallet with a belly band.

Here is another view to see how it opens:

image

Here are the insides

image

Each flap opens up with space to glue photos or have students sign. A simple easy little booklet.

I used the photo polymer stamps here and they are amazing. Haven’t played much with them but I do like them. Especially how well they cling to the block.

Stay tuned for the album they did choose.  I think you will like it.

Another card from our card class…

Standard

So, here’s the 2nd card that I designed from the New Catalog Card Class we had on June 1.  This card features the Hostess set, Happy Flowers from the new catalog.  And Smoky Slate  It’s a BEAUTIFUL color  I’m so happy to finally have a light gray…

20130602_201952

Smoke slate looks great with white.  Very clean and crisp.  And, I added some of the new In-Color… Crisp Cantaloupe, and a small scrap of Wisteria…  The white was cut out using the Window Frames Collection Framelits.  As, you can see, I love framelits.

The Happy Flowers Stamp fits perfectly into one of the Floral Frames Collection Framelits…

20130602_201956

And, that sentiment is from the Hostess Set offerings as well, called Banner Greetings…..  Sorry, but the button is from the Spring Occasions Mini, which is no longer available.  But you could use any of our awesome new buttons…  I just had a bunch I needed to use up.  Cleaning out…

Here’s one last look…

20130602_202106

For a look at our other cards we made for this class, head on over to Anne’s Blog to see the other cards we made in stamp class.  We used Mosaic Madness Set featuring Costal Cabana  Chalk Talk featuring Strawberry Slush In-Color, and the Paper Pumpkin Welcome Kit featuring Pistachio Pudding In-Color.  (Click on her name for her blog site, click on the other links to go to the specific cards we made in the class….)

For the Newlywed…

Standard

Welcome Back!!  This is the next installment of the BEST OF… Blog tour.  This month features a cute set called “Brides and Babies”.

For this month, I decided to make a little gift card holder that you might give a newly-wed couple for their wedding.  It easily could be turned into a baby gift card holder using the other stamps in this set.  This idea and set are VERY USEFUL (to quote my son’s THOMAS books…).  And, if you would like my 2 cents (if you would not like it, skip the next coupla lines)  I’ve decided gift cards are good for newlyweds or newly parents.  Cause it all costs money…  🙂

ANYWAY…. back to the card…  Gift card holder.  Well… as much as I’d love to take credit for this, I must tell you that my friend, and fellow Maui Stamper, Cheryl Hamilton made me a little holder like this with a tea bag in it.  After my back surgery…  She had a completely different design, but the overall folder was the same.  You should check her out sometime (createwithcheryl.wordpress.com).

Here it is:

20130529_225848

So, the colors I used in this were the Smokey Slate (It’s a new one and I absolutely Love it), Basic Gray, and Blushing Bride (hee hee….get it… BRIDE???).  I used the white taffeta ribbon and a squish of the dazzling details glitter paint.  And, I thought this would be the perfect place to use one of those ROWS of the rhinestones.  Cause what do you do with those??  I always use my whole sheet up and have those 3 strips left.  I then wind up cutting them apart and using them all as singles.  I can’t remember EVER using a whole strip.  But, I did.  This time…

And here is the inside:

20130529_225503

That little pennant stamp comes from one of the new Hostess Sets (Banner Greetings).  SUPER cute.  Many Uses.  Anyway…

I cut the paper at 4.25 x 9 and scored at 3″ and 6″ down the 9″ side.  Then I cut the corner off…. maybe this makes sense:

20130529_221859

Can you kinda faintly see the score marks?

Here is how to cut…  Line a score mark up on the top part of the cutting surface of  your trimmer and the corner of the paper on the bottom of the cutting surface of your trimmer.

20130529_221933

Here is it cut apart…

20130529_221947

Fold on the score line.  Add adhesive on the bottom, straight edge of the paper and that makes the pocket when it is folded over.  If you want any trim work on the edge, you should add that before you glue the pocket down.  (I added that scallop trim border punch–but the edgelits we have would look fantastic too).

The size of this whole folder is predicated upon what you wanna put in side.  The tea bag folder I received wasn’t quite so tall.  I could see this made for a PAPER gift certificate (you know, those long ones that might fit in a #10 envelope).  The possibilities are endless.  A bag of tea is nice, you could make super tiny ones for like one of those individually wrapped life-saver things… pack of gum (You’d need to make a gusset on the pocket, but that’s only an additional score line…)

After you decorate it up, you have a super easy, fast little gift card.  And, it’s packaged SO nicely (cause, let’s face it, though gift cards are great gifts, they are BORING to give…)

Oh, I also used the shimmer white paper for the front.  It’s extremely subtle, and the pictures don’t really capture it’s elegance…  but it’s beautiful.  And, perfect for such an occasions…

20130529_231015

It kinda just comes off in this photo as shine, but it is very pretty… a little sparkly but not at all over-powering… I love this paper for  holidays and special occasions.

One last look…

20130529_225837

Well, I hope you enjoyed this post… next you are off to see what Deb Leigh has for you!!  Click the box below or use the list if the link isn’t working like it should…

blogtour-25years-next (1)


Making Cards The OLD FASHIONED* Way

Standard

*Without a Big Shot.

Due to ill-fated planning, I at the moment do not have a big shot at my disposal.  And, it’s because I did not think ahead and waited to make this card till the last minuted, yada yada… YEAH, I KNOW.  BUT…  I’m whining to my mom cause I don’t a have a big shot and she tells me to make a card the old fashioned way.  SERIOUSLY.  HOW IS THIS POSSIBLE.  She’s a quilter.  That’s like telling her to quilt without a NEEDLE.  (either hand or machine…).  Still.  Can’t let the druthers get the best of us… so here ya go…

A card made the OLD FASHIONED WAY (snort.)  Welcome to this installment of the Stamp of the Month Blog Tour.

20130607_231928

This set is the ‘set of the month’ for this Blog Tour:  Mosaic Madness.  And, it has a gorgeous embossing folder that matches, but, ahem.  This is being made the old fashioned way.  Maybe that should be a challenge… what can you make without a big shot???  (as you can see, I’ve come quite attached to mine.

Anyway, enough whining… about this card…

To say I like the new color, Baked Brown Sugar, would be an UNDERSTATEMENT.  I LOVE LOVE LOVE it.  (and, if you know Isaac, you would know if you repeat the word three times, it’s the equivalent of infinity).

I kinda wanted to do something a little different than what I was seeing on pinterest and other places (they used LOTS of the embossing folder, so maybe it is good I couldn’t).  And,  I flipped the mosaic punch on it’s side.  Just for a different feel.   (okay, I didn’t literally flip the punch, it’s just sideways and normally you see it up and down)  And, I love the long stamps included in this set.  They make super nice borders.  And, they’re designed as such as that they can be continuous (which, I would HIGHLY recommend the Stamp-a-ma-jig for lining them up.)  Or, if you do a card like mine, you make the seam in the punch out and as long as you are close, It’s All GOOD.

20130607_231949


So, I also added a bit of the strawberry slush and daffodil delight inks.  And, wouldn’t it be nice if SU had a punch FOR EVERY SHAPE THEY HAD (there isn’t a craft room big enough on this planet… but it’d be NICE).  So, I had to cut the little medallions out by hand.  Not bad, they’re easy.  And, remember, we are doing this the old fashioned way.


20130607_232052


Here’s a closer look at the detail.  The top vanilla panel was cut 1/8″ shorter in each direction just to give a small frame.  I stamped and punched the top panel. I stamped the strawberry slush stamp THROUGH the punched out hole.  Then added the two small stamps with dimensional.   And, of course, a diamond. I added several dimensionals on the back of the top panel just so it would create a space for the cut-out section to stand out.

Hope you enjoyed a card made the OLD FASHIONED way.  (i.e. WBS…. without big shot).  Hopefully, next time we will be all back on track and without any hiccups in the whole card-making and mojo flowing, designing business.

You are off to see Deb Leigh and what she has for you!!  Enjoy the tour!!  To get to Deb you can click on the graphic below or use the links provided in the list.

blogtour-stampmonth-next