September is A World Treasure

Standard


What a way to begin September, with a wonderful day to rest and enjoy family and friends.  It truly is a treasure.

This month’s calendar was made with the World Treasure stamp set (now retired).  But, when I first saw it, I knew I needed it in my collection.  I love this peacock.  I generally don’t have an affinity for peacocks (nor dislike, for that matter…just never thought of it) but I love the detail in this one.  And I love that it can hold it’s own with as an image on a card (or calendar).

wpid-20140120_125133.jpg


I used Bermuda Bay as my color for this month.  I love the cooling effect it has, especially as we start to think forward into fall.


wpid-20140120_125128.jpg


Head on over to see what Anne and Cheryl have for you this month!

BLOOM!!

Standard
Welcome to the next installment of the Pin-worthy Blog Tour…  This month’s theme is Eggstra Creative!!  It’s supposed to be Easter, but I decided to take more of a Spring-y approach just because I wanted to make my decor to last longer than the Easter holiday…
So, I decided to use the banner kit from the SAB catalog as a starting point or this project (it’s FREE with a $50 purchase!!  Heartfelt Banner Kit, 133514)  I must confess, I’ve been bitten by the banner bug.  Had a WONDERFUL time with them at Christmas, loving them still now.  They are so fun to make and these kits make it SO easy…
Anyway. You should have seen me trying to get good pictures of this.  I’m not set up for many things much bigger than cards…

The SAB brochure shows using the paper clips to attach photos to the banner.  Which is an excellent idea.  But, I wanted to spring it up, so I cut out scallop circles (sorry, this particular die was retired, it is the large scallop on the 2 scallop die).  And, embossed them.  Then, I cut out the letters for bloom and put it them on.

20140312_204248


I was super inspired by the cover of the latest issue of Stampin’ Success (one of the many perks of being a demonstrator) and their creped filter paper flowers.  So, I had to make a few.  That’s where the ideas for the flowers came from.  I used the Fun Flowers Bigz die to make the flowers, as well as the 7/8 scallop circle punch, and the Itty Bitty Shapes Punch Pack.  I died the flowers by dipping them into rubbing alcohol and reinker.  Then you smooch and scrunch, and ruffle and fluff.  They are fun to make while you are watching TV…

20140312_204421 20140312_204450

Here it is hung up on the mirror in my entry way…  And, the bottom is the wreath kit from the Spring Occasions catalog… They go well together…  These would be fun to make and send to someone as a nice piece of decor for their home… Mine is gonna be boxed up and shipped out soon… just to send some spring to someone special!!
20140312_204721
Thanks for stopping by!! Next on the list you will go see what The Maui Stamper (my dear friend, Anne) has for you!  Click the button below.  Or, everyone is listed if you need…
blog-tour-pinworthy-next
Crystal Kondo – http://wp.me/p2l6Qe-gu
Pam Staples – http://wp.me/p3p2VA-Il
Jeannette Swain   bit.ly/1iCY9NL  
Janet Wakeland  – http://wp.me/pHIQD-6l6

March Madness

Standard

March is HERE…  and that means at MOST… 9 weeks till the dynamic duo make their appearance.  So, madness is upon us in more ways than one.  (I used to refer to March Madness as the NCAA basketball tournament, but now it is that period of craziness right before twins are born and we decide to make major changes to the house…  so… madness…)

Anyway, you wanna see the March calendar!!  SO, HERE IT IS!!

image

I LOVE THESE COLORS.  Strawberry Slush, Coastal Cabana, and Daffodil Delight.  And the Flower Shop stamp set makes it a perfect way to welcome spring!!  (though from what I understand, a majority of the country is still experiencing winter….  and to you, my condolences…come visit us in Hawaii… perpetual summer…)

image

Here is a close up.  This was the fastest little calendar to make!!  And so much fun!!

Go check out what Maui Stamper and Create with Cheryl have for you…

Stumbling upon a World Treasure

Standard

So. I bought the World Treasure stamp set when this catalog came out. And I bought a lot of other stuff. So, it kinda got pushed back on the shelf. Then I re-stumbled upon it and decided I needed to do something with it. I just love the peacock in the set. And bold colors. So…. here is what I have for you today… (I think the design is a modification of something I got off pinterest. But I can’t remember quite where right now)

image

Card-ed.com

I decided to make a set of cards using the all the stamps from this set… makes a great little gift!

image

Card-ed.com

A word set compliments this little bundle…

image

Card-ed.com

I love the flowers….

image

Card-ed.com

These words came from the World Treasures stamp set itself…  a little ribbon and some rhinestones… and you are finished! Now, I did layer white on white which I used to think was dumb. But it does add depth and dimension. So. I no longer think its dumb… :). Anyway… enjoy…

Papa Kitty

Standard

Tim&Bev2013-002


Take Me Home, Country Roads”

Almost heaven, West Virginia, Blue Ridge Mountains, Shenandoah River.
Life is old there, older than the trees, younger than the mountains, blowing like a breeze.
Country roads, take me home to the place I belong.
West Virginia, mountain momma, take me home, country roads.

All my memories gather round her, miner’s lady, stranger to blue water.
Dark and dusty, painted on the sky, misty taste of moonshine, teardrop in my eye.
Country roads, take me home to the place I belong.
West Virginia, mountain momma, take me home, country roads.

I hear her voice in the morning hour she calls me, the radio reminds me of my home far away.
And driving down the road I get a feeling that I should have been home yesterday, yesterday.
Country roads, take me home to the place I belong.
West Virginia, mountain momma, take me home, country roads.
Country roads, take me home to the place I belong.
West Virginia, mountain momma, take me home, country roads

20130628_175448

Isaac says he misses his “gitga”.  I miss my grandpa…  Love you, Grandpa.


Change

Standard
Change

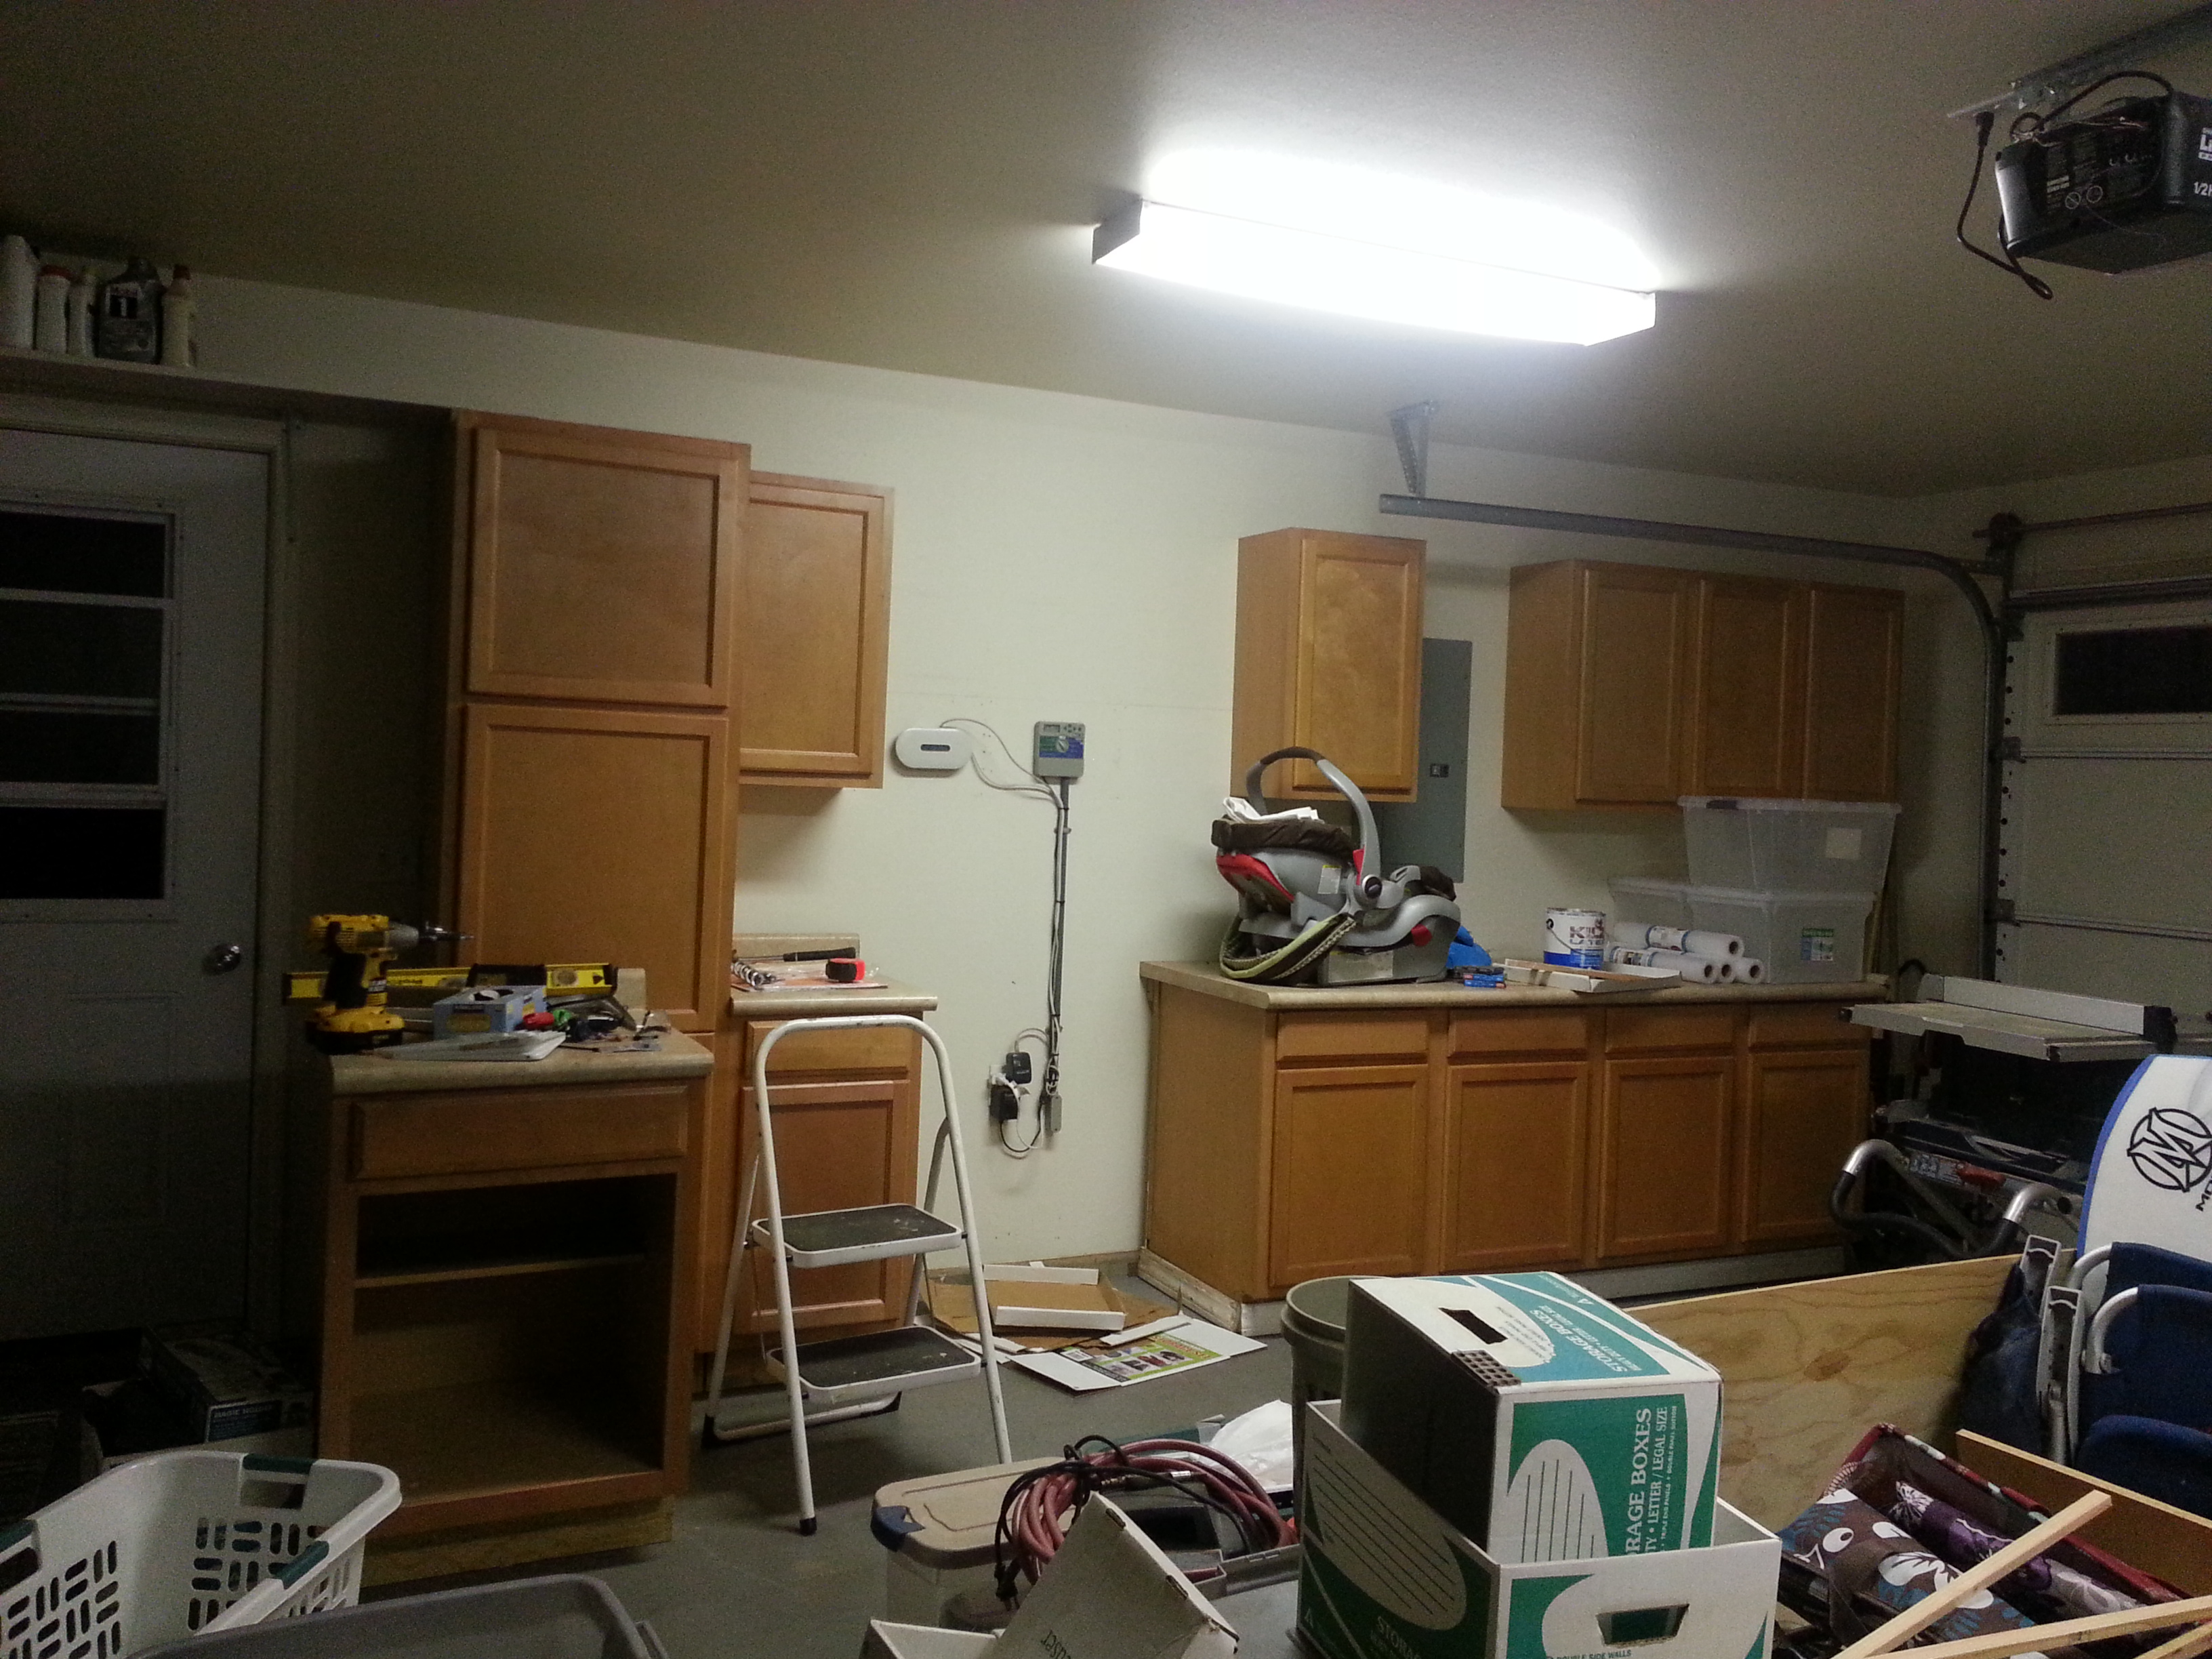
I guess they say that the only constant is change.  And, CHANGE IS A COMIN’.  There is a lot of changing going on around here.  Namely that my craft room, right now, looks like this:  (this is super embarrassing)20140213_062519

And, this is where it is going, thanks to my wonderful, hardworking husband. But, it’s not quite finished.  So, I can’t move in  yet…

20140213_062704

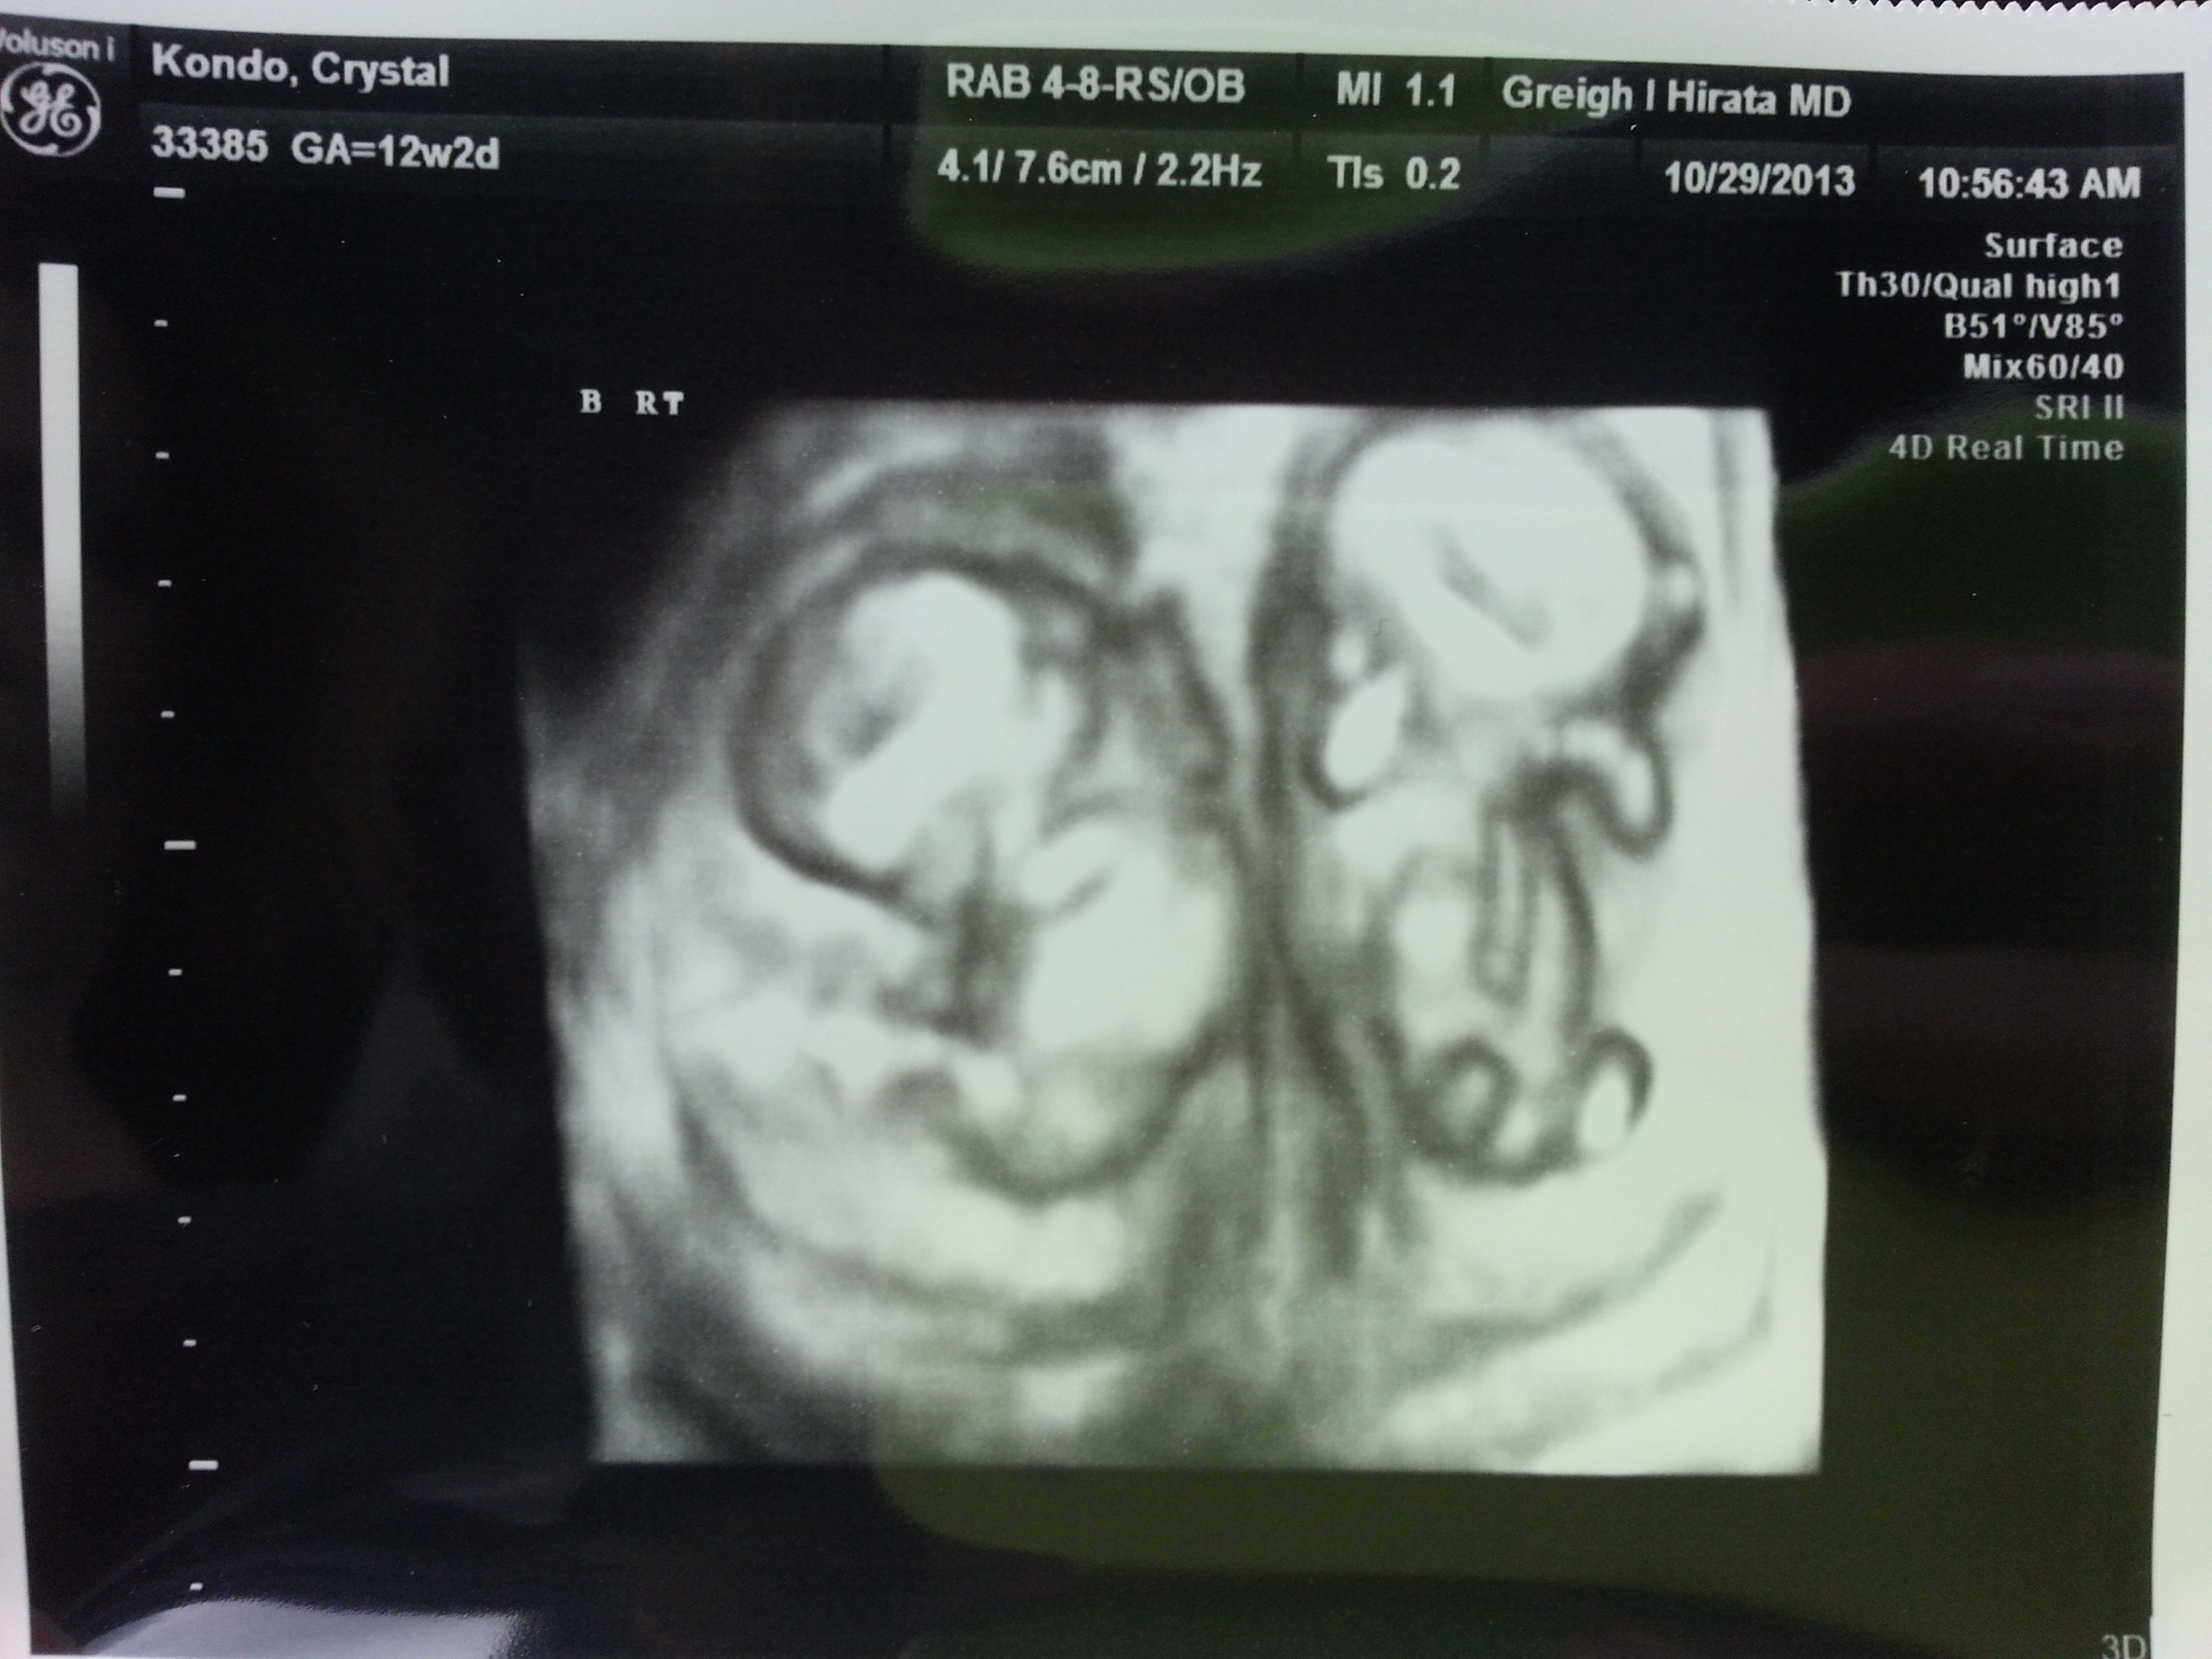
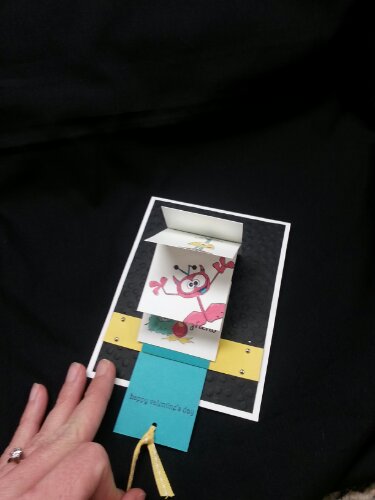
And, this is the reason for the HUGE change:

20131029_141617

They are now much bigger than in this picture, but we can’t get one where they BOTH fit in the screen.  Coming Soon.  And, in order to get ready for them, we needed a nursery.  Which means craft room moves…  SOOOO….  today’s post is some Nursery Decor!!  And, you’re getting a sample of an MDS project cause I don’t think I could find a single stamp at this moment…  let alone embellishments and adhesive.  (refer to photo above)

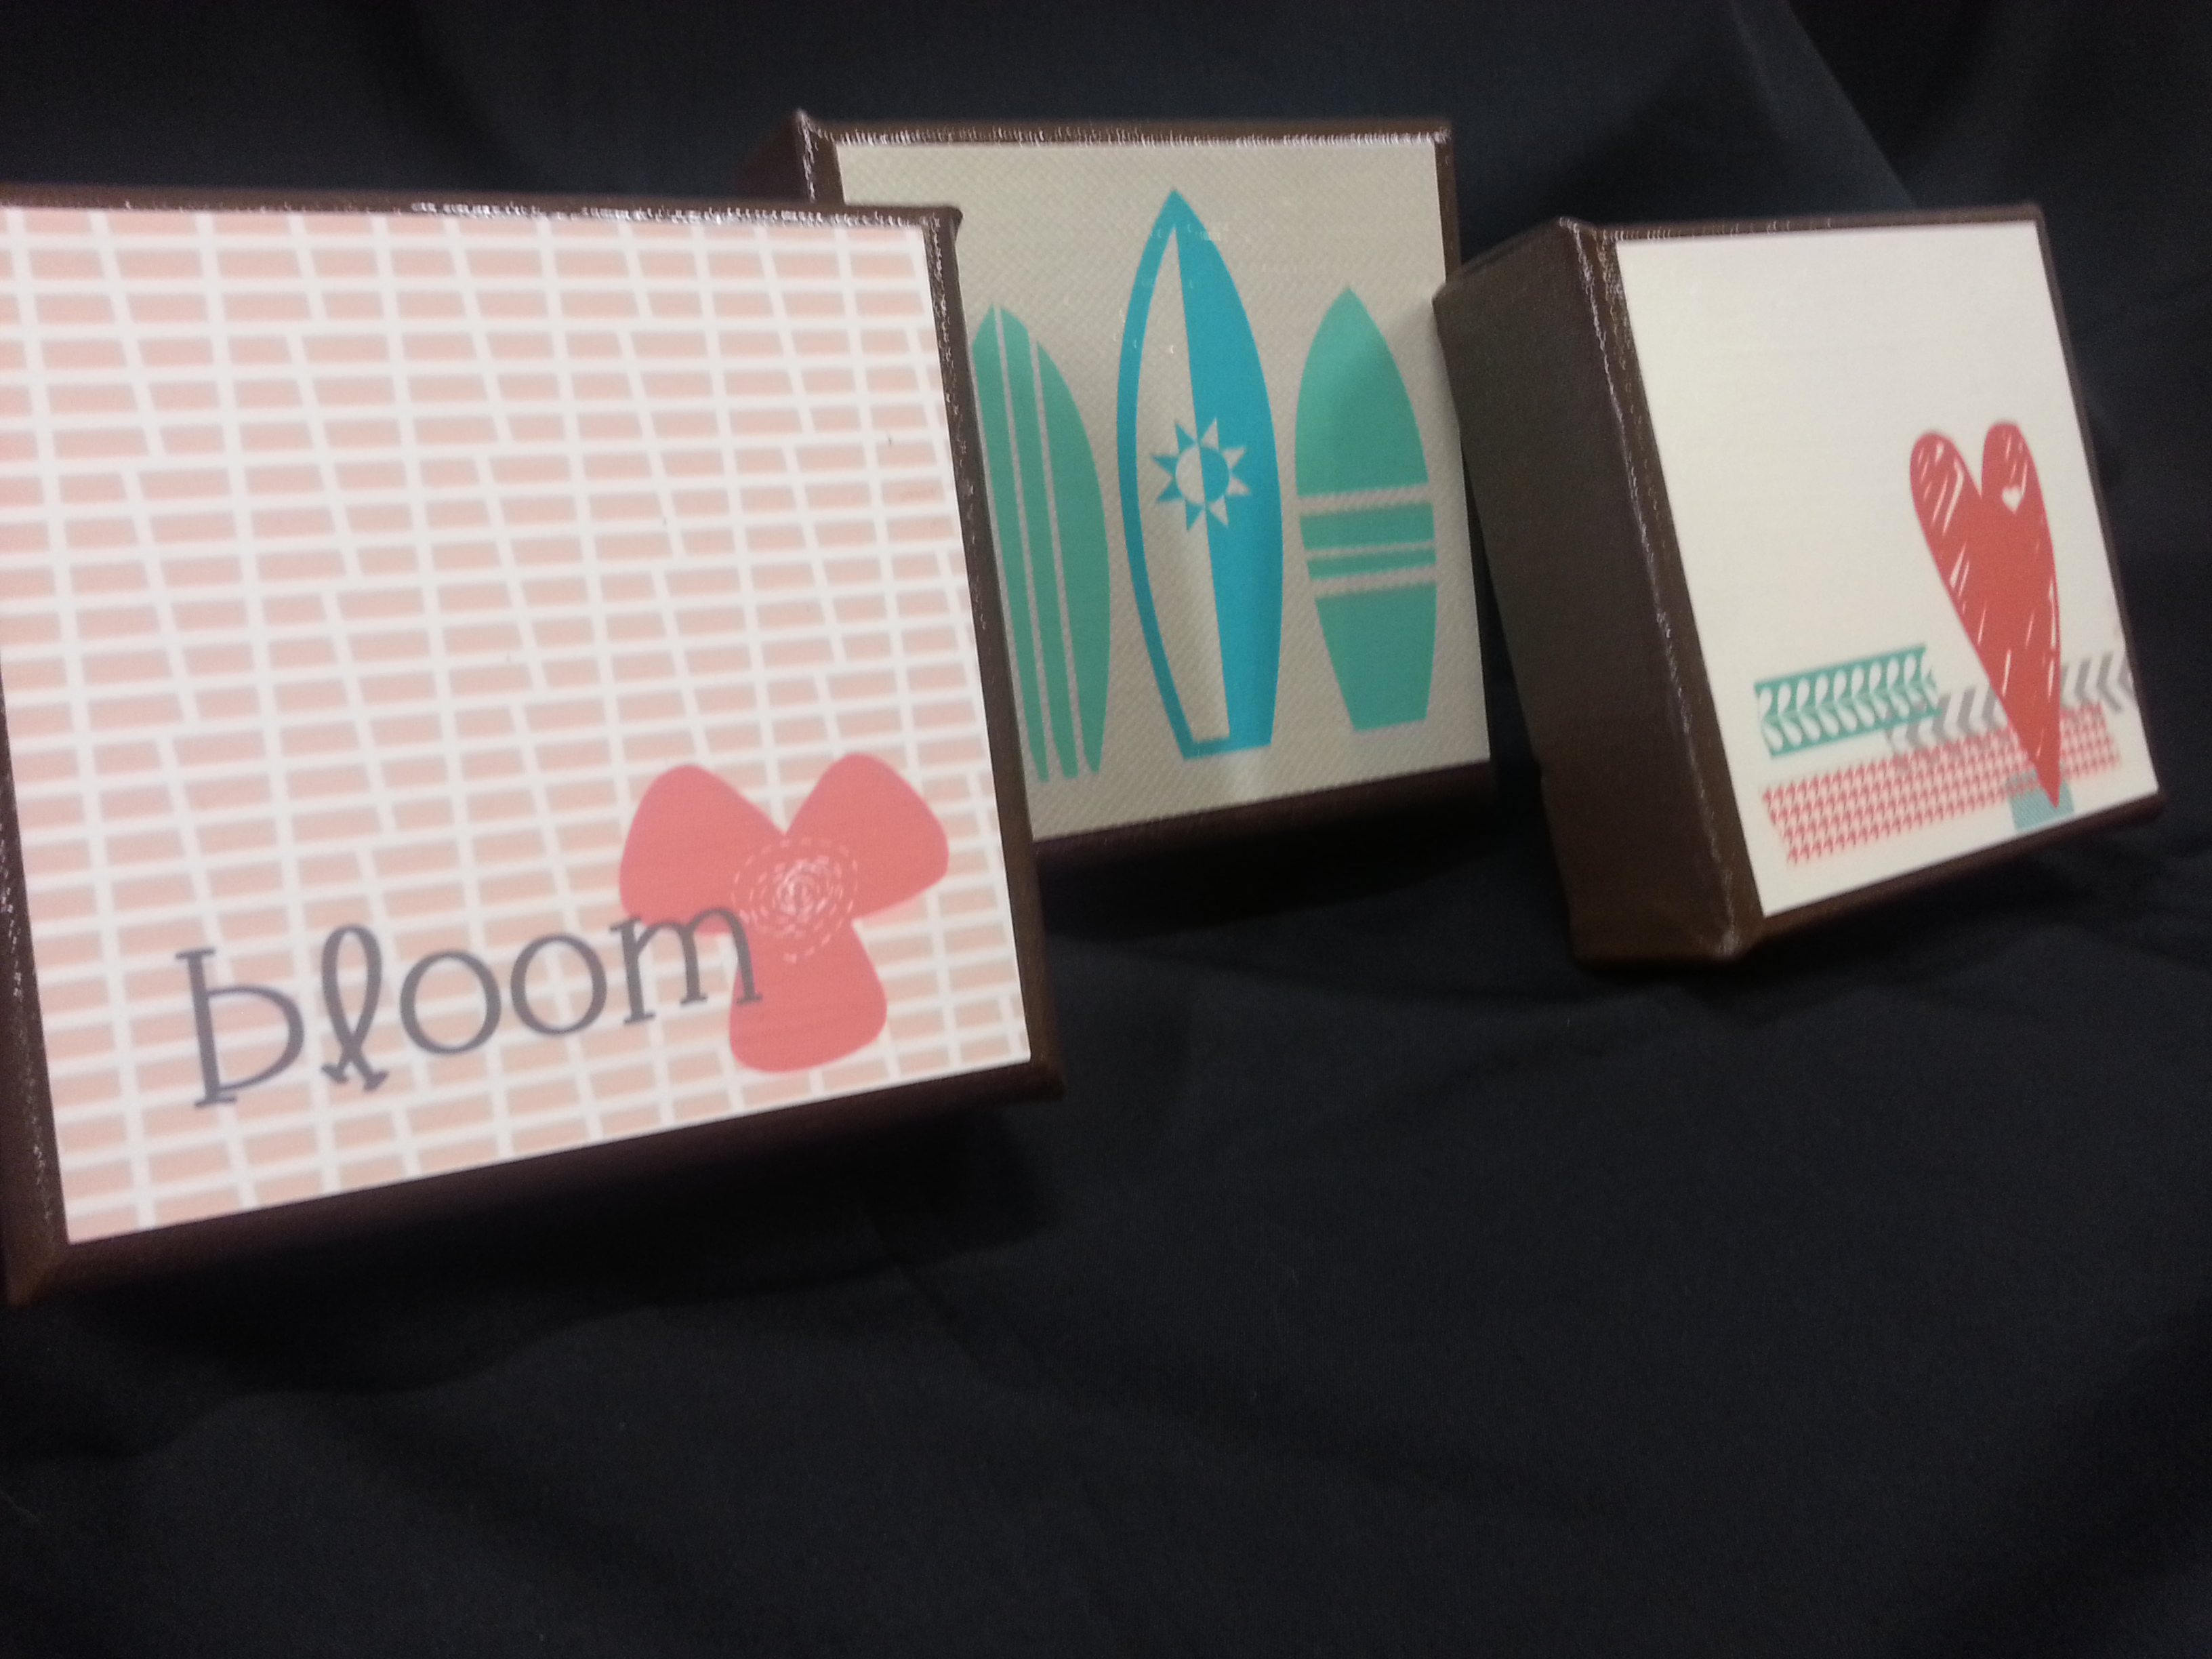
I saw these beautiful, for lack of a better term, tiles, on pinterest.  (OH, pinterest…)  It was an idea for a baby room that had 18 individual blocks with different pictures and geometric prints (these happened to be prints of original artwork).  And, it was super cute.  And, I thought, hummmm… I can do that.  I don’t know if it is my Kansas upbringing, or desire to not spend money (that must not be it, cause I do like to shop) but when I see a craft project I always think:  HUMMMM.  I bet I could make that….  And the challenge was issued…  (Here’s my finished product)

image

In order to make my own tiles, I decided to buy some 5×5 stretched artist canvases.  These happened to be the ‘deep ones’.  (I think they are 1.5″ deep–so they will stick off the wall some).  I painted them with brown acrylic paint.  The cheap stuff you buy for 1.29…

image

I made 18- 4.5×4.5 images in My Digital Studio (I put 4 on a 12×12 layout).  I decided to have them printed through the Stampin’ Up Print services primarily because I don’t have a color printer.  Also, because I knew the colors would be exact and that I could get it on the ‘heavy’ paper.  I think it cost me a total of $15 to print it all…   I trimmed them out and then grabbed a bottle of the “hum…I think I can make that girl’s best friend”:  MODGE PODGE.  And stuck them down.  I put several layers over the top cause I wanted it to have that ‘depth’ and texture that brushing Modge Podge on has…

image

And here are some close ups:

image

I had to vary the images because this Dynamic Duo is made up of one boy and one girl.  And to simplify life, they have to share a space for a while.  (Heck, they are sharing a space now, so I figure they wouldn’t mind.  And, their new space will have much more room. And cute stuff on the walls).

image

I love the tool in MDS that you can recolor embellishments and paper to match whatever you are doing.  I did that a lot with this project…

20140211_193733 (2)

Anyway, my plan is to have 3 rows of 6 tiles on the wall (kind of like the original photo).  I don’t have them up yet, cause there is some prep work to do in the new nursery first.  But, soon…

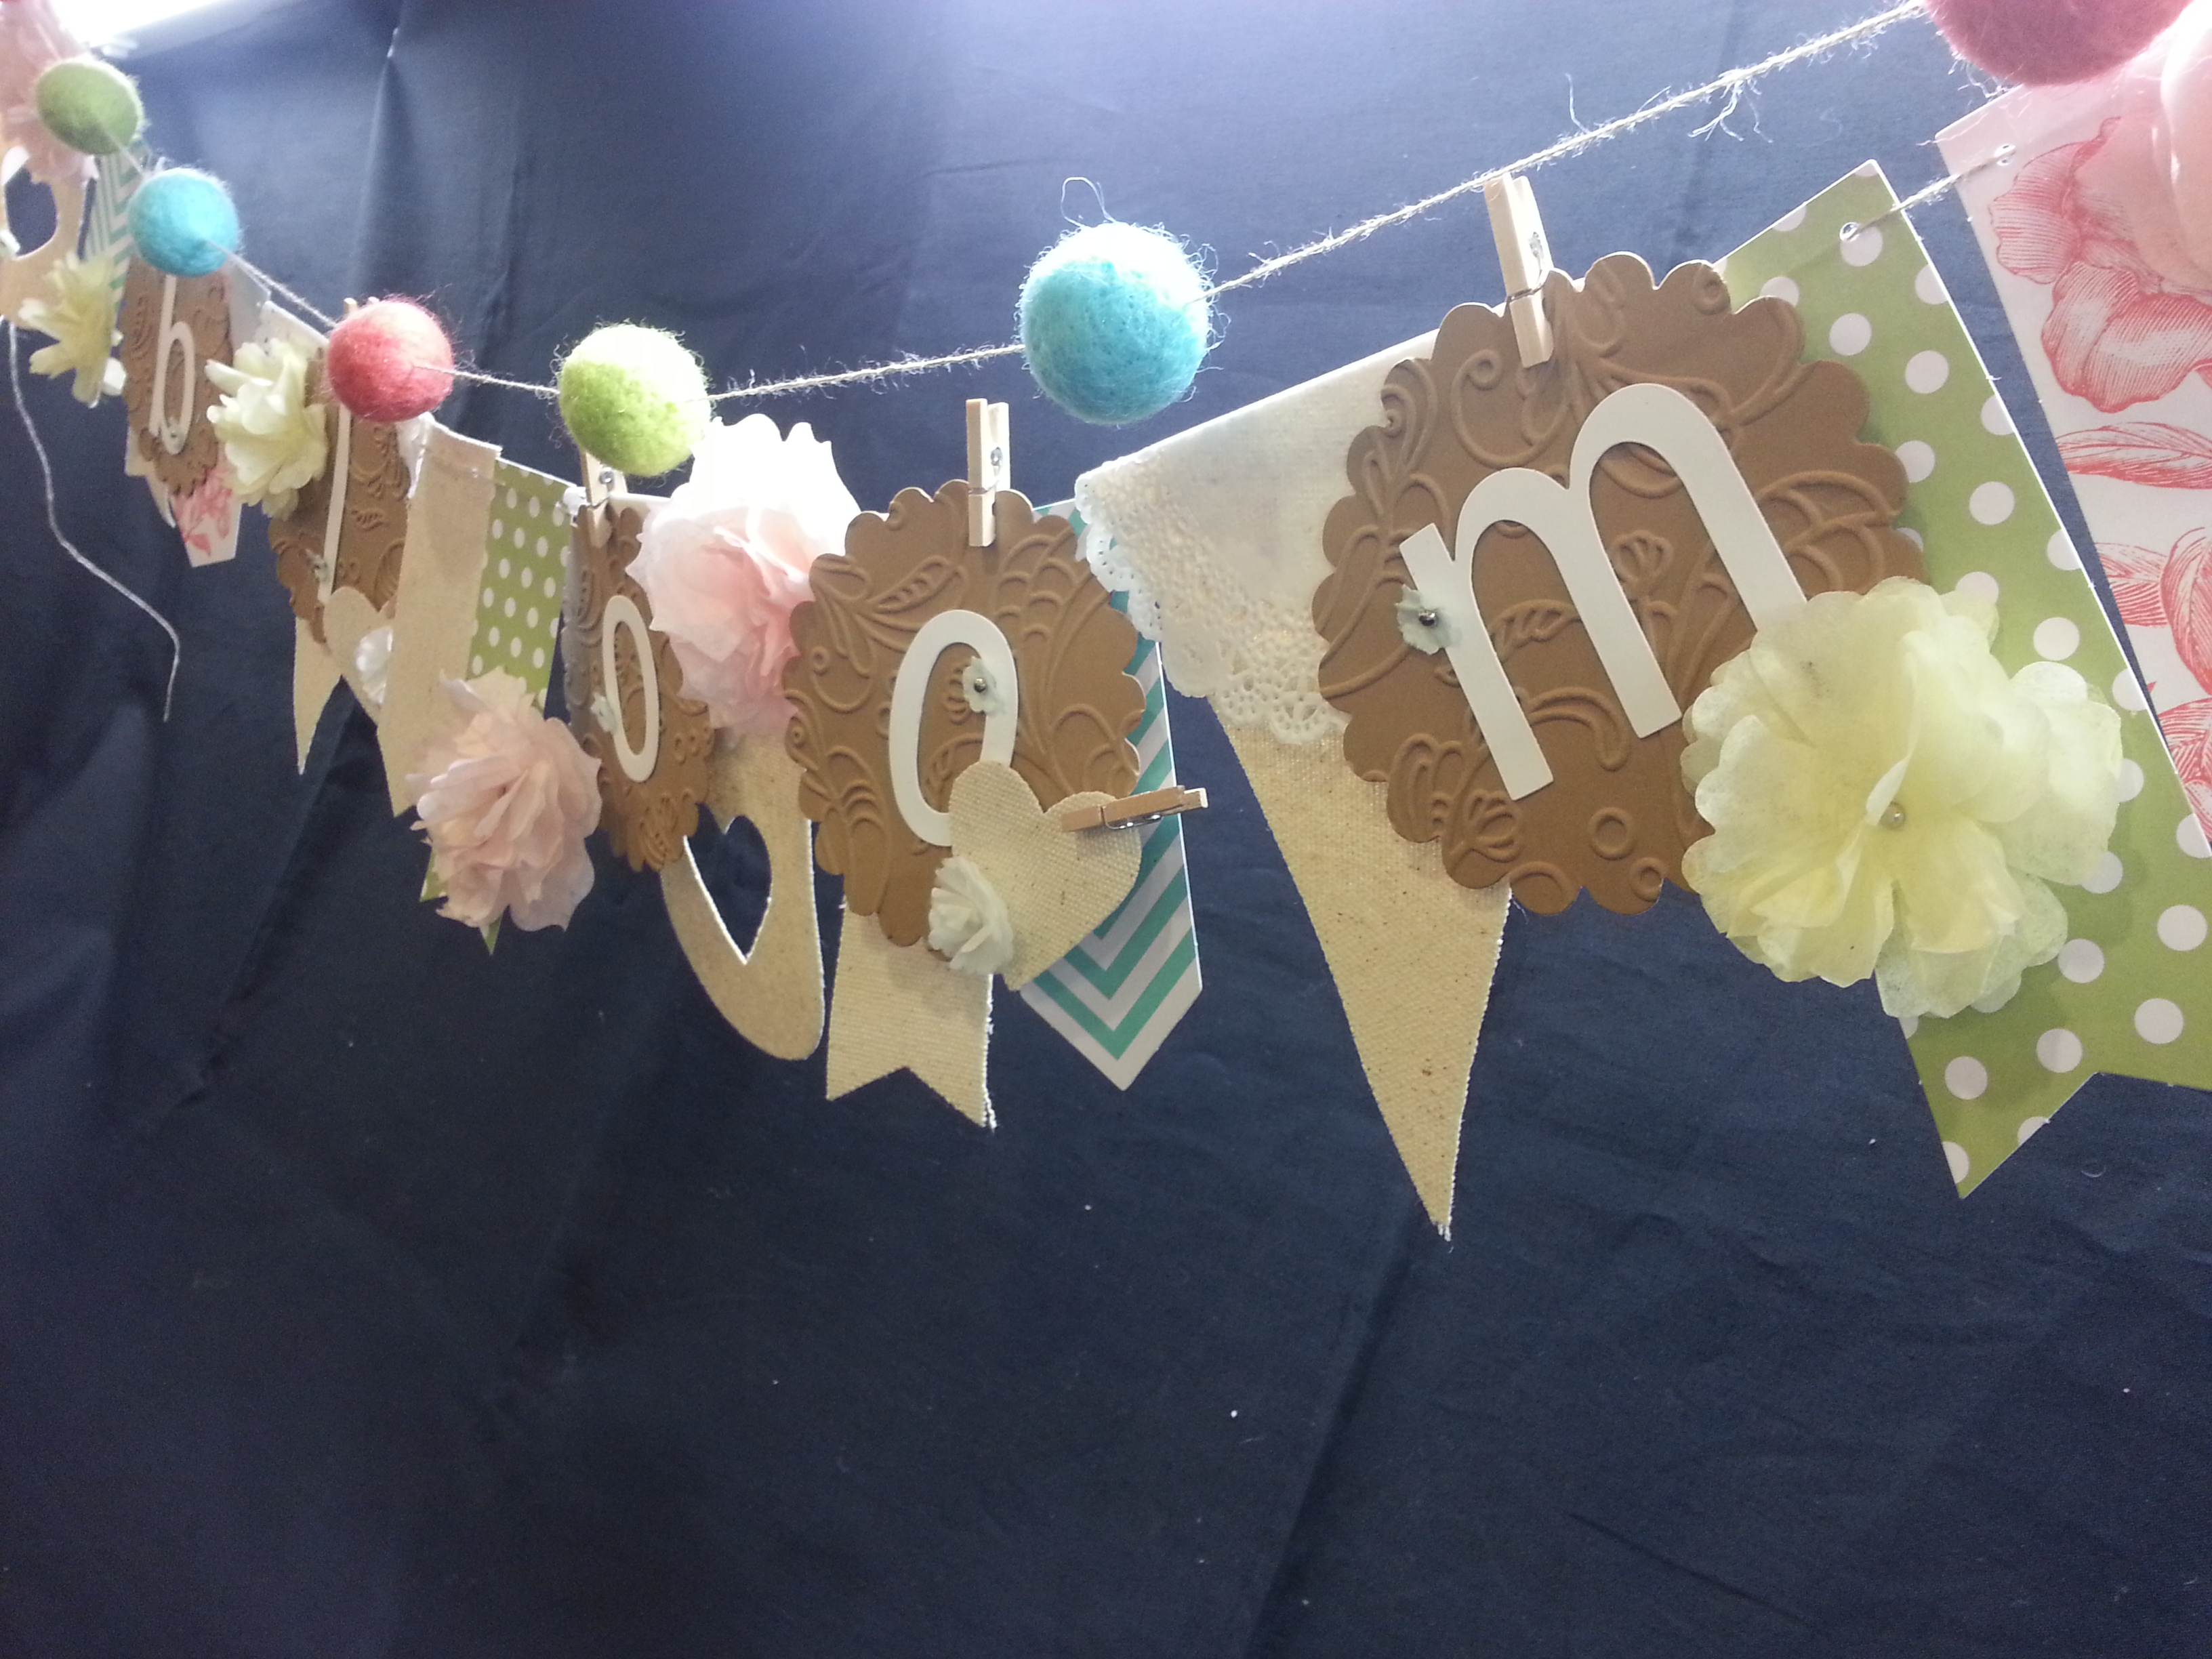
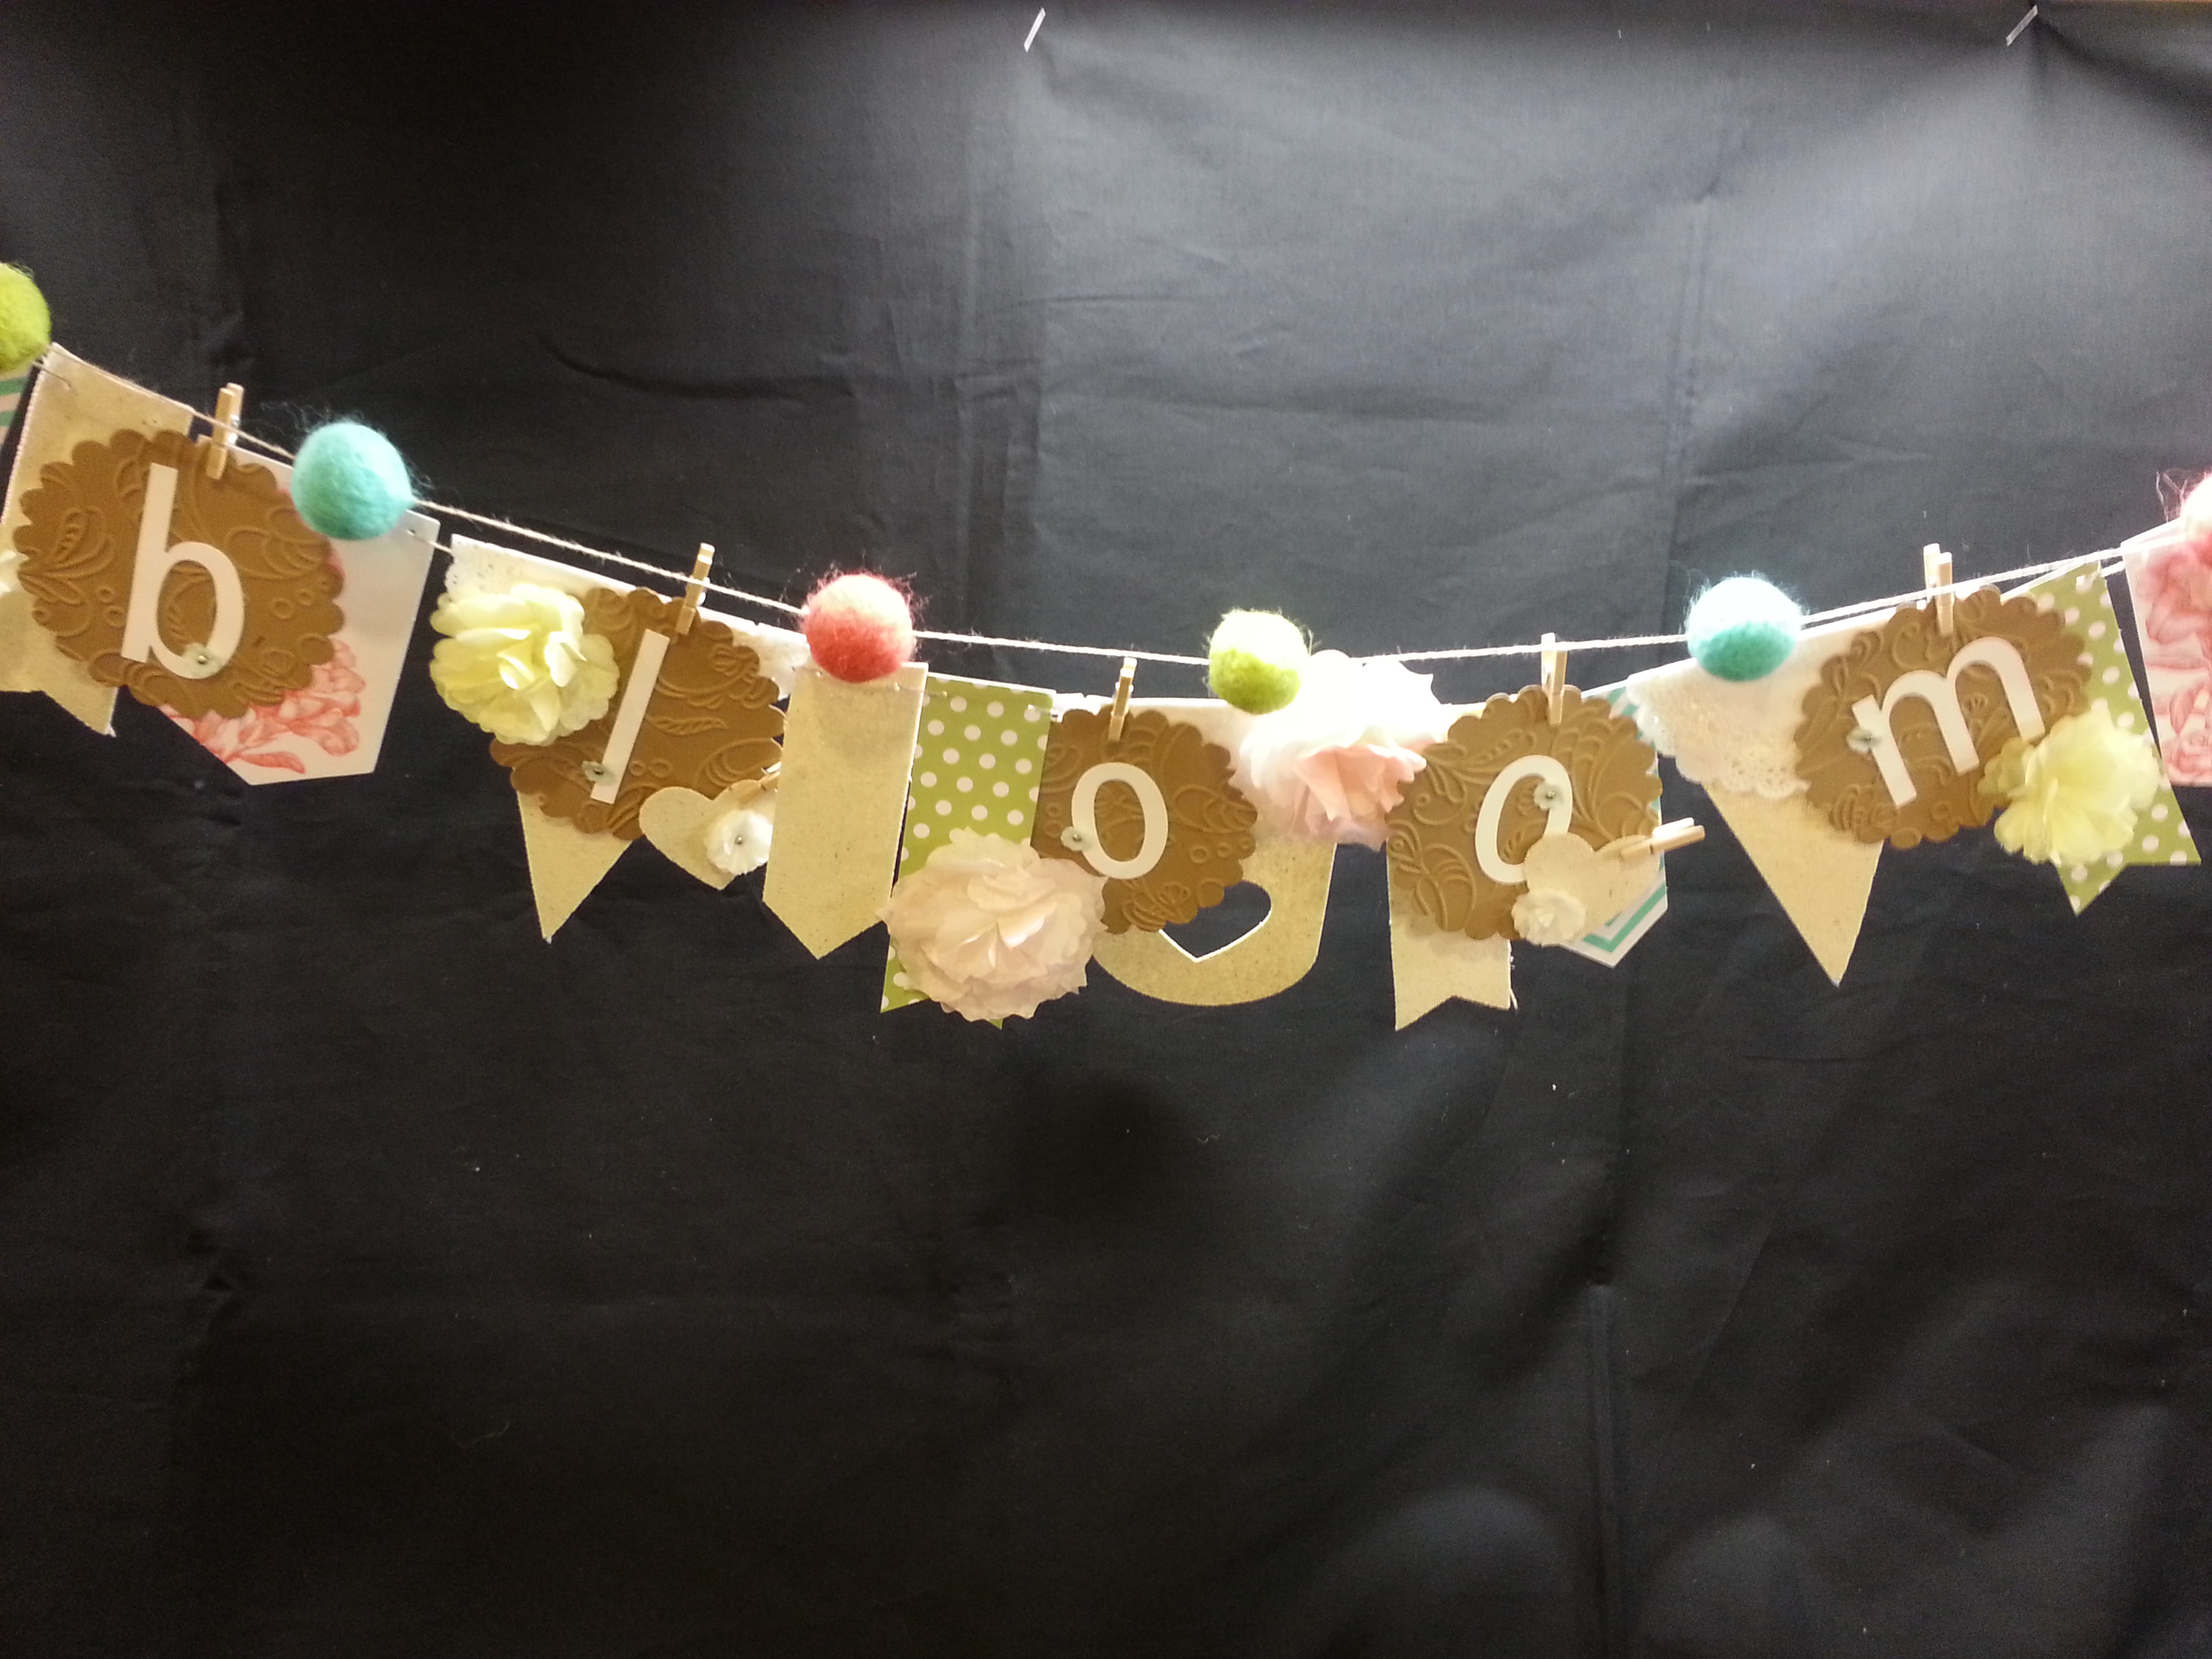
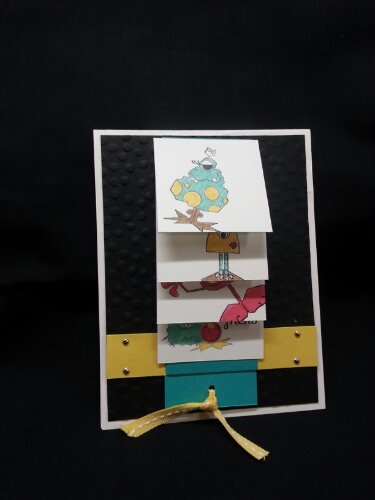
Anyway, I hope you enjoyed this banners and pennant tour (albeit, not much of a banner or pennant here…. but home decor none the less.)

You are off to see what The Maui Stamper, Anne Matasci made.  Click the icon below:blog-tour-pinworthy-next

Tamra Davis    http://www.theCardLadies.com/loving-the-stampin-up-banners/
Connie Diebler http://www.conniestamps.com/2014/02/february-pinworthy-blog-tour.html


Anne Matasci http://wp.me/pCcBw-1xl
Audra Monk http://thecraftyyogi.blogspot.com/2014/02/garland-banners-and-decorations.html
Maria Pane
Andi Potler  http://www.absolutekreations.com/2014/02/13/remarkable-pinworthy-blog-tour-banners-garlands-pennants-galore


Hello February

Standard

Happy February!!  (can you believe it is already FEBRUARY???…  2014 is already 1/12 over…omg.)

Anyway, if you’ve been following along, you know that a couple of the Maui Stampers and I are doing a little mini-blog-hop that features our little yearly calendars.  It’s fun, cause you can see each of our take on each month!!

Well, here’s mine.  It uses the Monster Maniacs stamp set.  And, I love it…  They are so goofy.  They are perfect for Valentines. And just plain cute.

image


And, here is a closer look….

image


Well, hope you have a lovely February!!  We will be back in March with the latest in the calendar series!!

Check out the other Maui Stampers’ Calendars!!

Anne Matasci:  mauistamper.wordpress.com

Cheryl Hamilton:  createwithcheryl.me

A Valentine Treat

Standard


Hello!!  I have a quick little treat bag to share with you today.  I must say, this latest catalog and subsequent releases from SU have really incorporated packaging and gifting into their line-up.  And I LOVE IT.  And, you will too.

These are the Sweetheart Treat Bags (#134610). These treat bags come 12 in a set…Bags, large striped tag, and twine.  AND… the best part is… IT’S ONLY 4.95!!  For 12!!

image


I added the two little banners from the Banner Blast stamp set (it’s an SAB set, and won’t be available until tomorrow) and punched them out with the coordinating punch (again, SAB item and not available till tomorrow–with qualifying purchase.)

image


Here it is with some of silver tissue that I folded and used the ‘grass scissors’ from the Spring Occasions catalog to cut the little fringe on the top…

image


And, of course, what is a Valentine’s treat bag without a TREAT??

These bags are only available until MIDNIGHT MOUNTAIN TIME today.  This means order by 8:00 tonight Hawaii Time to be safe…  You can order through my online store if you so desire.  And, they also have cute kiddie valentines and other valentine cards if you need something quick and easy…

It’s not too early to start on Valentines… It’s only a couple weeks away…


Best of SAB

Standard

Hello!!  And welcome to the FINAL installment of the Best Of Tour!!  I think they saved the best for last.  BEST OF SALE-A-Bration!!  Sale-A-Bration is my favorite time of the SU year cause there is lots of FREE stuff floating around.  And who doesn’t love FREE??

Here are a couple of cards created with said free items and the Best of SAB set…

image

This first card uses the little flower in the Best of Set.  And what I like about this is that an actual SAB set has a larger version of this same flower.  Imagine the possibilities.  And, here, I used the SAB DSP and some of the gorgeous Crisp Canteloup twine that comes with one of the SAB kits.  Super simple and easy, this card is perfect to put a smile on someone’s face.  And, since there are no words, it can be used for any occasion!!

This next card was my first attempt at the file folder card.  So, I could try to explain how to make them, but if you google it, you will see easy peasy videos to make it happen…  And, it is SO easy.  But, you need the awesome envelope punch board.  WAY easy…

image

And, there is more of the super awesome DSP.  I just love this year’s offering.  And, the scallop punch on the card had the words ‘for you’ on it, and after I inked it up, I wiped those words off.  I used a stamp from Fabulous Phrases for the ‘HI’, and the ‘wish big’ from  “A Dozen Thoughts” set (a set I LOVE, btw).

And this is the inside….

image

Another view:

wpid-20140107_205314.jpg

And, oh, this is the same as the first card…but instead of making the background Sahara Sand, I used Basic Black.  I needed to make some for a swap and didn’t have enough Sahara Sand.  Which do you like better??

image

So, you are off to see what Deb Lehigh has for you!!  Hope you enjoy the tour!!

blogtour-25years-next (1)

Remarkably Pin-able Valentines!!

Image

Hello!!

Welcome to the first installment of the Remarkably Pin-able Blog Tour!!  The Stamp-of-the-Month Blog tour has morphed into this one.  And, I think you will enjoy it.  It has a bit of a different focus.  Instead of focusing on ONE stamp set, it will be thematic.  So, I think it will expand the creativity! I am excited.

This month, we are focusing on Valentines, love, or anything related to that avenue… (just in time, I might add…)

So, I have for you a Monster Maniac Valentines!  I love these cute, little monsters!!

wpid-20140107_205030.jpgThis month, I chose to make a waterfall card.  I’ve not done one of these in a LONG time, and my club members were asking to make one.  So, I thought this would be a good opportunity.  I have a quick little photo-tutorial to show you how to do it.

First, you need a strip of paper that is 1.75 by 9.75 inches (I started out at 10 inches but then took it apart and cut it down)  Score it at 2 1/4; 3; 3 3/4; 4 1/2.  For this strip, I’m suing Bermuda Bay.

wpid-20140106_213754.jpg

Then, add adhesive in the scored sections.  I tried to take a picture… hopefully you can see the adhesive…

wpid-20140106_215654.jpg

Next, you need 4 pieces of card stock that are 2×2.  I chose to use Whisper White so that I could stamp and color my little monsters.  Go ahead and stamp whatever you like with the understanding they will be displayed in order.  So you may want to know that you want seen first, second, third, etc…

wpid-20140106_215450.jpg

Then, you attach these little squares to your long strip that you just cut and scored.  Decide which square will be on bottom.  you will need to put adhesive on the back of this one (keep to the center of the back of the 2×2 square) to glue onto the (Bermuda Bay) strip.  This goes on the ‘shortest’ end of the strip.

wpid-20140106_215733.jpg

Then, you will ad the next cards on top… lining them each up with the score marks you made.  Remember, you’ve already added adhesive to the strip so that now you are just placing the cards on.  The bottom half of each card will be ‘unattached’.  This is important.

Next, you will glue the back of the ‘bottom’ of the Bermuda Bay strip (the same one in the photo above.) to a horizontal piece of paper… I am using Daffodil Delight and chose to make my paper 3/4″ x 4″.  This is what will anchor the waterfall card.

wpid-20140106_220034.jpg

Here are a couple of pictures from the side so that maybe you can see the layers.  It seems odd that we aren’t using adhesive here.  But, we cannot if we want the card to move.  I attach the Daffodil strip with brads.

wpid-20140106_220122.jpg

wpid-20140106_220126.jpg

My black backing is 4×5.25″ and I am going to attach it to a white cardstock base.  You can’t really tell in the pictures, but I embossed it with the new Sale-A-Bration embossing folder!! (SNEAK PEEK…)  Attach the entire apparatus (the Daffodil c.s. and the Bermuda Bay c.s.) to the black with brads on the ends of the Daffodil c.s.

wpid-20140106_220610.jpg

Oh, the Bermuda Bay c.s. folds at the top and comes behind itself and sticks out below the daffodil.  It needs to be a little longer so you can attach a ‘pull’ (I used ribbon I tied in a punched out hole).  I also stamped “Happy Valentine’s Day” on this.  You can’t see it in the picture, but it is a ‘hidden message’ that is revealed when you pull the strings.

wpid-20140107_205030.jpgThen, I just glued the black c.s. onto the white card base.  Easy Peasy.  Here is a picture of where I have partially pulled the string to reveal the waterfall.

wpid-20140107_205043.jpg

And, because of all the cutting and scoring we did, the cards ‘flip’ through themselves–revealing all the precious monsters just WAITING to wish you a Happy Valentines…

I even made a little video, but apparently I don’t pay for the version of word-press that allows for videos.  Who knew…

I hope you enjoyed your little Monster Valentine!!  Now you are off to Anne Matasci!

Click on the button below to go to Anne’s site, or use the list provided at the end of the post.

blog-tour-pinworthy-next

Below is a list of all the participants and the links to their direct post.

Nancy Amato:  http://stampinallnight.blogspot.com/2014/01/remarkable-stampers-pinworthy-blog-tour.html

Missy Bolinger
Tamra Davis
Connie Diebler http://www.conniestamps.com/2014/01/whatsnottolove.html 
Sherrie Eddleblute:   http://sweetestdesigns.blogspot.com/2014/01/lovey-dovey.html

Crystal Kondo:  http://wp.me/p2l6Qe-fb  (YOU ARE HERE)

Anne Matasci:  http://wp.me/pCcBw-1tG
Audra Monk:  http://thecraftyyogi.blogspot.com/2014/01/remarkables-lovey-dovey-blog-tour.html
Maria Pane
Andi Potler:   http://www.absolutekreations.com/2014/01/09/remarkable-pinworthy-blog-tour-lovey-dovey/
Michele Reynolds:  http://inspirationink.typepad.com/inspiration-ink/2014/01/lovey-dovey-pinworthy-blog-tour.html

Pam Staples

Jeannette Swain: http://www.StampsNWhatnot.com/my_weblog/2014/01/crazy-mixed-up-love.html

Janet Wakeland:  http://wp.me/pHIQD-5Y7